Finished main spar riveting

Not much to report today. I recruited Josie to come out and help me rivet the ribs that I couldn’t do on my own. It was a bit odd at first (I may have some mild control-freak tendencies), but pretty soon we got into a good rhythm and before long everything was knocked out.

The dogs came out to hang with us as well; I figured it wouldn’t take much riveting to change their minds, but I was only half right. After about the second rivet, Mae retreated back into the kitchen, but Dood (yes, that’s his name) just kept lying on the floor without an apparent care in the world. So we decided to have mercy on his ears and put the Mutt Muffs we got for Mae on him.

IMG 9056

I had originally planned to finish out the night by at least starting to squeeze the rear spar rivets, but after clecoing the spar in place, I discovered that I can’t squeeze them with the setup I have now. I have a long flush set for the squeezer that would allow me to get around the spar channel, but it’s too long to get it on the squeezer with the other set. I could shoot these as well, but access would be tougher than the main spar, and it’s a lot easier to get consistent results squeezing. So I’m going to order a longer on yoke this week and hold off on the rear spar rivets.

I figure tomorrow I’ll put the left wing on the stand and start match-drilling and generally prepping the right wing ribs. I might even be able to get all the way through cleaning and priming them tomorrow if I can actually get my butt in the garage early in the day. I need to get on building the other wing stand too…

Posted in Wings | Hours Logged: 2

Riveted three nutplates

Yes, that’s really all I did today. My work ethic hasn’t been so great, and a lot of the problem is me being a little insomniac. I stay up too late, then I’m tired the next day, I try to resist the afternoon nap urge, but inevitably I give in, and then at bedtime I’m not sleepy, and the cycle continues. We did get up at a decent hour today so we could take the dogs to the Houston Arboretum for a little walk through the woods. We wanted to go early in the morning before it got too hot, but seeing how this is Houston, it was still pretty hot for a 3/4 mile walk even at 10 AM. When we got home I was tired and sweaty, and then I realized that I needed to run to the grocery store. Long story short, I got that done along with some food prep and finally got out in the garage around 2.

Instead of jumping into riveting ribs today, I took a detour from the instructions. I’ve been reading over Jamie Painter’s build log from time to time, trying to get insight into upcoming tasks, and I ran across something useful while reading about building the tanks. It seems there are three nut plates on the inboard end of the spar, part of the tank attach system. This area of the spar is also where the wing walk will be; that is, the reinforced part of the wing that passengers will be stepping on. As such, the ribs are spaced much closer together. That means that if I wait until later to do these nutplates, I’ll have to work in a fairly confined space.

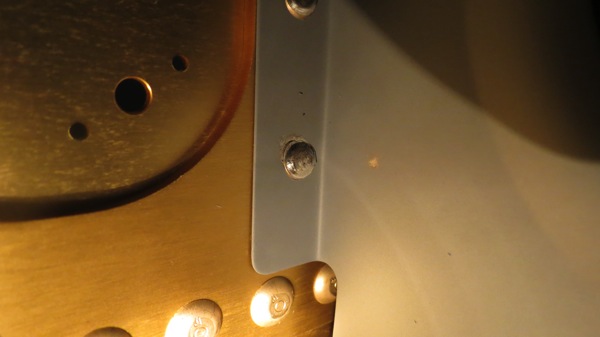
Here’s where the nutplates will live; each of those sets of one large and two small holes is a nutplate location.

IMG 9045

There seems to be no reason why I can’t go ahead and install these nutplates now, while I can get the ribs out of the way and have good access back there. So I did it.

Actually, even with the ribs out of the way, it’s an interesting spot. The spar reinforcement plate doesn’t leave a lot of room to get a bucking bar in there. Squeezing is out of the question; the nutplates are too far away from an edge and the spar flange and forward reinforcement bars are too wide too. I ended up using my tungsten bucking bar here. Most everything went well, but on one rivet I let the bucking bar slip off, and the shop head ended up with a nice little step on it.

I considered leaving it in at first. Generally, a shop head like this is unacceptable, but for a nut plate, the rivet isn’t really taking any load; all it has to do is keep the nut plate from spinning. Once the bolt is installed, that will be the main load path. Still, I was bothered by the bad rivet, so I decided to drill it out. I got the head off OK, but realized I needed a second set of hands to back the nutplate while I punched out the rivet, lest I ruin the nutplate and then have to drill out the other rivet as well. And here Josie had just run out for a few errands. So I went back inside to take a break…which of course turned into the nap I’d sworn I wouldn’t take today.

Finally, I got back out later and had Josie help me punch out the rivet. It turned out it was a useless wait anyway; the nutplate was still bent and I still had to drill out the other rivet and replace it. Then it was back inside to call and talk to my parents before it got too late over in the Eastern time zone.

This is the nutplate I replaced. I still put an ugly shop head on the lower left rivet, smeared it a bit, but drilling it out will probably cause more damage than good, and as I mentioned before, it’s not as critical here to have perfect rivets. You can also get a better idea of how the spar reinforcement (the outer raised area) gets in the way.

IMG 9047

And things are just as fun on the forward side. Notice the spar reinforcement bar below these rivets, covered in blue tape to prevent marring. I could barely get the rivet gun with the flush set into the outermost rivets.

IMG 9048

While I’m still annoyed by these short weekend work days, it’s still better than not working at all, I suppose…

Posted in Wings | Hours Logged: 1.5

Started riveting left wing skeleton

I started out my day by heading up to Weiser Air Park for the monthly lunch the local RV builders do. I hadn’t been to one in a few months due to other commitments, so it was nice to go hang out, talk about building, and most importantly drool other everyone else’s airplanes. One the guys who flew in today was in this sweet-looking RV-8. My practical side is a little unsure about painting an airplane in anything vaguely low-visibility, but I have to admit that this is a cool paint job.

After watching everyone depart – a process that culminated with a low high-speed pass from an RV-10 driver – I headed home, feeling motivated to get to work. That got a little sidetracked when I decided to lie down for a few minutes, whereupon staying up late Friday night caught up with me.

Finally, rejuvenated, I went out to the garage. Mindful of how long it’d been since I shot rivets, I did some practice runs with a few scrap pieces before going to work on the spar itself. I was still kind of nervous for the first few rivets, but before long I was getting into a good groove. And that, of course, is when things got interesting. I was on the inboard end of the wing, where the spar reinforcement bars make the top and bottom rivets slightly more difficult to see the shop head side. I had shot four of the five rivets on this rib just fine, and the last one was the topmost. I inserted the rivet, got the gun and bucking bar in place, squeezed the trigger for a bit, then bent down to check my progress.

I was shocked to see a tiny shop head. Wait, did I not get the rivet in all the way? I checked the other side – nope, the manufactured head is flush against the rib flange. What happened?

IMG 9042

I was confused by this for longer than I’d like to admit, until the obvious occurred to me – somehow a shorter rivet must have gotten mixed in with the ones I was using. If I’d been in any other hole, I would have seen this before shooting, but it just so happened to be the hole where my vision was obstructed.

Well, time to get drilling. This turned out to be a pain; I got the manufactured head popped off pretty easily, and started trying to punch the rest of the rivet out, but that thing was in the hole quite securely. My level of violence wight he hammer continued to rise before I realized that this was exactly the mindset that caused things to get damaged. It was getting on towards dinner time anyway, so I left things alone, fired up the grill, and cooked off some brats. We ended up watching a movie with dinner, after which I went out and, with my mind calmed down some, got the rivet punched out (though not after drilling all the way through it and using pliers to help encourage it). The hole seemed good but maybe slightly oversized; not enough to need to drill out to the next larger size, but enough that I was worried about the shop head clinching (this tends to happen when there’s extra play in the hole).

Fortunately, there’s a well-known solution to this. I’d never tried it, but you can take a rivet squeezer and give the rivet a tiny bit of squeeze, just enough to swell the shaft and snug things up. It worked like a charm; I shot the rivet and then called it a night.

Tomorrow will be more fun. All the ribs I did today had their flanges facing left, which made it easy for me to shoot and buck. Some of the ribs, though, face the other direction. The only way I’d be able to shoot and buck those would be to switch hands and shoot left-handed. I’m not too confident with that ability, so I’ll probably get Josie tome come out and help.

Posted in Wings | Hours Logged: 3

Clecoed left wing skeleton

Not much to see here. I got a somewhat earlier start today because I worked from home for the second half of the day. It sure helps to not have to sit in evening traffic to get home…

Anyway, straightforward stuff today. I started out by finding the outboard-most rib and bolting on the piece of angle that’s used to attach the skeleton to the stands, then I clecoed that rib in place before setting the spar onto the stand. From there, it was a fun game of putting each rib where it went. I guess my binary system worked OK, because I got everything right the first time, without any oddness. Then I took the whole assembly back off the stands and laid it on the workbench to cleco the rear spar on. This seemed preferable to sitting on the floor and trying to line things up and cleco at the same time.

Hey, that looks like part of an airplane:

IMG 9037

From there, I grabbed a couple of wing skins and did another one of those “because I can” assemblies:

IMG 9040

Then it was time for dinner and we decided to watch a movie afterwards. Maybe tomorrow I can bang some rivets? I’m a little skittish; it’s been over a year since I shot rivets with the gun, and that’s going to be a necessity here. Even better, I’ll almost surely have to use the offset set to get in some of these places. I guess I should probably get some practice in before I go to town on the wings…

Posted in Wings | Hours Logged: 1

Wing stand fine tuning again

Not much free time this evening. I overslept this morning, which meant I got to work late, which meant I worked late to make up, and then there was a fair amount of stuff to do around the house. I finally got that stuff done just after 10 and figured maybe I’d try and cleco together the left wing skeleton. But first I needed to clean off a workbench. And then I realized that I should really do the jack pad fix on the completed stand before I went and put a wing skeleton on it.

So I did that; two pieces of 2×6 added on, a new MDF platform screwed down, and then I relocated one of the adjustable “feet” (aka carriage bolts in tee nuts) to the new platform support so I could still adjust it. At that point I decided it was too hot in the garage, even with the door open and the fan going, so I stopped there. In this Texas heat, it seems like I really just have to get the air conditioner running way in advance.

So maybe tomorrow I’ll get that skeleton clecoed together. It’ll probably be good for the primer to have another day to cure anyway…

Posted in Wings, Workspace | Hours Logged: .5

Primed left wing main ribs

Lesson of the day: it takes a lot longer to do, well, everything with the wings. There are more of everything and each piece is bigger…

First, I’ll rewind a bit. Saturday wasn’t entirely unproductive, but mostly so. We had some errands to run in the morning, and when we got home I felt bad enough that I went and laid in bed for several hours. My back has been bothering me off and on for a week or so, and it got pretty bad yesterday (this has been a sporadic occurrence ever since I messed it up slinging boxes for UPS when I was 18).

By the time I felt ok to get up and walk around some more, it had gotten late, which did have the positive effect of the temperature dropping. I decided that my goal for the night would be to cut the new pieces of wood I needed to extend the jack platforms on the wing stands. I had enough 2×6 left over that I ended up cutting four sections, which I’ll sandwich together and attach to the long support to give me an extra 3” of jack pad length. I also cut some of my leftover 3/4” MDF scraps into the new platforms. I did not, however, actually assemble anything.

Today’s goal was to get the wing ribs primed. I slept in again and got to work just before noon. The first order of business was to make a hole deburring pass on each rib. This included the holes I’d match-drilled to the spars previously, as well as the tooling holes in the rib face. I’d left those alone previously because I thought I’d be running conduit through them. Once that was done, I scraped the part ID sticker off each rib, then took them outside for a good cleaning. This was where I got to really enjoy the Texas heat for the first time. It probably took over an hour to scrub down all the ribs.

Prior to the cleaning, I’d set up a piece of rope across the backyard to hang the ribs from. I then found it necessary to anchor the bottoms of the ribs as well so they wouldn’t swing in the wind too much. Some small-gauge wire I had lying around worked well for this. Here are all the ribs hung up and ready to be sprayed:

IMG 9032

Next I got a less in the scaling up that happens when moving to the wings from the empennage. I had two full cans of NAPA 7220 on hand, which I figured would be enough. WRONG. There were still some bare spots when I emptied the second can. Fortunately I still had some SEM leftover, so I used that to finish the job. Both primers are gray, but the SEM is slightly lighter, so my ribs have a sort of amusing mottled look to them.

Here are the finished ribs:

IMG 9035

Tomorrow I’ll probably go ahead and fix the jack pad on the assembled wing stand, cleco the left skeleton together, and hang it on the stands for the time being. I probably won’t be able to get to riveting tomorrow. I had originally planned to assemble the other wing stand first, but now I’m thinking I’ll wait until I need it. That means I need to clean up a bunch of stuff I left lying around in anticipation of assembling that thing…so much stuff that I don’t even have workbench space available, which I’ll need to rivet the skeleton.

Hopefully I’ll feel OK after work tomorrow…

Posted in Wings | Hours Logged: 6.5

Wing stand fine-tuning

Not really a productive evening. I had every intention – I even turned on the garage A/C as soon as I got home from work. After dinner, we took the dogs for a walk, and then I decided to lie down for a bit before heading out to the garage.

Suddenly, it was 9:00. I guess I was more tired than I thought.

Anyway, I decided that given my concern that the jack pad might need to be extended, it would make sense to do a test fit of the stand I’d built. This way I could see how thing lined up, and make adjustments from the start for the second stand. I figured I’d go ahead and drill the outboard rib for the holes that attach it to the stand, cleco the rib to the spar, and set everything in place. Then I could cleco another rib in place and see how it lined up with the screw jack.

The was the result:

IMG 9031

As you can see, the jack seems to be lined up OK with the center of the rib’s trailing edge, but it is right up against the edge of the pad. I don’t really like it sitting right on the edge like that, so what I’ll do is cut another 2×6 piece and attach it parallel to the long planks. Then I can cut a slightly larger MDF piece and I’ll end up with another inch and a half of room on the jack pad.

That means I have some more wood cutting to do. The garage is too cluttered at the moment to do the cutting in there, which is fine by me anyway – I’d rather generate a bunch of sawdust in the driveway if possible. That means further construction is hereby put off until tomorrow.

On an unrelated note, I spent some time last night working up a Photoshop document that I intend to use to start doing some panel planning. It’s really ridiculously early to be doing any serious planning, but seeing a mockup is kind of motivating and just plain (plane?) fun. Here’s what I have so far; it’s pretty rudimentary. Most notably, I think stacking two 7” Skyview displays like I have here would require some modification of the panel. Hmmm…

Sparse panel

Posted in Wings, Workspace | Hours Logged: .5

Wing stands, part the second

Well, I assembled one of the wing stand base thingies this evening. It all went together as expected, though it’s worth noting that these things are pretty basic. Just two long 2x6s, connected at the ends with shorter 2×6 sections that provide lateral stability. The end sections are topped with small squares of 3/4” MDF (leftover from the workbench build), which serve the dual purpose of gusseting the corners of the structure and providing a platform for the uprights to sit on. There are also two small cross-braces at the midpoint of the long span; these are also topped with MDF. The uprights are attached with 5” lag bolts.

Here’s the finished product:

IMG 9028

The only unexcited result of this involves that little platform in the middle. That serves a specific purpose – once the wing skeleton is placed on the stand, the spars will be supported only at the ends, so the structure will sag in the middle. Thus it’s necessary to add a third adjustable support in the middle to take the sag out. I have a couple of screw jacks that were given to me with the stands, and the platforms were intended to accommodate those. When I sketched this out, it looked like I could just have the platform run the width between the two long pieces, but now that I see it all together, I’m thinking the platform will need to project out further (towards the bottom right in the above photo). If so, it should be a simple modification, and I’ve got plenty of scrap MDF lying around.

Posted in Wings, Workspace | Hours Logged: 1.5

Wing stands, part the first

So I settled on what my evening project would be this week: getting the wing stands ready. It would seem that I’ll have one skeleton riveted within the next ten days or so, and I’m going to need somewhere to hang it. Enter the wing stands.

I’m taking something of an independent approach here. The plans call for a fairly simple stand setup; just buy a couple 4×4 posts, attach them to the floor and ceiling, add crosspieces to hold the spars, and you’re done. But there are a couple problems with this approach for me. First off, running the posts from floor to ceiling would mean making one of the garage doors INOP for the duration of the wing build. Not a huge deal, but annoying. More importantly though, we’re renters, not owners, which makes me hesitant to go making holes in the floor and ceiling for something like this.

But I got a bonus a few months back anyway. Some other builders have made floor-anchored wing stands out of steel channel (I think Rudi Greyling may have been the first person to do this). It just so happened that one of these builders was a guy I knew in Atlanta, and when he finished the wings for his RV-7, he offered to give me the stands. His only request was that I give them to another builder when I finished, which I’ll be happy to do.

But there’s still a problem; the “normal” use of these stands involves setting anchors in the garage floor and bolting them down, which takes us right back to that “renting” thing. So my solution to this problem is to construct a base out of lumber, onto which I’ll mount the stands.

I’ve been sporadically mulling over how to design these things for a few weeks now, but last night I went out and started measuring things, then sat down with a pencil and paper and went to town sketching. About an hour later, I had a solid design and a materials list. Today, after work, I ran out to Home Depot and picked up the necessary lumber and hardware. After dinner, I set about making all my lumber cuts out in the driveway (it’s so much nicer to not blow sawdust all over the garage).

I finished up the cutting around 9:30 or so and decided to call it a night, but not before laying out the parts to one base on the garage floor. One problem immediately presented itself – either the garage floor isn’t level, or the 10’ 2x6s that run the length of this contraption aren’t straight. Probably a little of both. I think I’ll take a page from my workbench builds and use tee nuts and carriage bolts to make adjustable feet for the bases. I guess I’ll be making another hardware store stop tomorrow…

No pictures tonight. There’s not much to see anyway, just stacks of cut wood.

Posted in Wings, Workspace | Hours Logged: 2

Conduit mount drilling done

Well, not so much of a highly productive day today. I gave in to the urge to sleep in and had some other things to do around the house. But I still found time to get all those holes drilled for the conduit mounts.

The first order of business was to create some kind of template so I could locate the mount holes consistently. The main concern I had here was figuring out a way to reliably locate the template relative to the lightening hole. After some thinking, I decided that the hole itself was the best reference. The circumference of the hole has a slight channel pressed into it, presumably for greater rigidity. I decided to make my template a two-part affair; first there would be a piece of 1/4” ply cut to butt up against the edge of the channel, and on top of that would be a piece of 1×4 I had lying around, which would have the actual holes drilled in it.

The first step was to trace the edge of the channel relative to the rib flange. Yes, that’s a piece of a McDonald’s bag. Go ahead, judge me.

IMG 9013

Next I cut the paper in that line and transferred the shape into a piece of ply:

IMG 9015

Then I cut the curve on the ply in the bandsaw, ensured everything lined up, and glued the ply piece onto the piece of 1×4. I didn’t get any pictures of this.

At this point, I had some dead time while I waited for the wood glue to set, so I decided to review all the instructions for the wing kit. I was particularly interested in seeing when the wing skins would get match drilled and the ribs dimpled. With the empennage, everything pretty much went together at once, so by the time I got around to priming a rib, it was already fully match drilled and dimpled. Not so with the wings; the skeleton goes together and then the skins are match drilled with the skeletons hanging in the stands. Ergo I’mm be match drilling and dimpling ribs that are already primed. Not that this is a problem really; I even did some tests with dimpling primed pieces a while back and the rattle can primer held up just fine.

Mostly, though, I just wanted to kind of get the big picture in my mind. It looks like once the skeletons get hung, the skins are match drilled, and then work shifts to the leading edge section and the tanks. I’m sure the tanks will be quite a bit of work. Only after those go on for good is it time to rivet some wing skins. then it’s time for the ailerons and flaps!

Anyway, fast-forward a couple hours (and maybe a nap…), and the template was dry. I used one of the hangers to locate and drill the two holes:

IMG 9022

I ended making a few modifications after this; the 1/4” ply is actually a good bit thicker than the lightening hole channel, and I wanted the top part of the block to fit better. So I shaved off some of the ply in the bandsaw and then went to town with the bench grinder. I struggled a bit trying to figure out a way to hold the template in place while I drilled the holes, and then a solution became obvious: the template sat against the rib flange, which had holes for the wing skin. All I had to do was locate it properly, clamp it in place, and drill 3/32” holes through the flange, and then I could just cleco the template in place for drilling. Very nice.

IMG 9026

After checking everything about 20 times, I finally took a deep breath and made some holes. It worked out quite nicely:

IMG 9024

I think I’ll probably get some washers to put between the pull rivets and the hanger itself, since it’s somewhat soft plastic. Can’t hurt to distribute the clamping force of the rivets a bit.

After this, I repeated this procedure 27 more times. Which was actually four more than I needed; at the inboard end of the wing, there are four ribs spaced closely together to support the wing walk, where people will be stepping as they get in and out of the plane. There’s no need to put a hanger on each one of these, so I was going to skip the two “inner” wing walk ribs, but I kind of got on a roll with the drilling and drilled all of the ribs.

Anyway, that’s it for today. Next steps will be to do a final deburring of the left wing ribs, then prep and prime them. I’m going to wait on the right wing ribs until I have the left ribs primed and at least clecoed back to the skeleton. The reason for this is that while I like my binary marking system, it has no provision for denoting left/right wing ribs. So I figure I’ll just keep the batches separate for now.

Thing is, cleaning and priming all these ribs is going to be an all-weekend project for sure. I’ll probably just wait until next Saturday to do that. This week after work, I can finch the deburring, but that’ll be trivial. Maybe I’ll work ahead a bit and see about building the aileron pushrods or the bellcrank assemblies or something like that. I feel like I’m getting some momentum going here, so I want to keep rolling on something and not get in the habit of not working on things.

Posted in Wings | Hours Logged: 4