Electrical

FlyLEDs wingtip light fitting, pt I

Alright, so once again it’s been a couple weeks. You see, a few weekends ago the clutch in Josie’s car gave up the ghost…so of course I said I’d fix it to save her the $1000 mechanic trip…and of course like any good DIY job it stretched out, and out, and out…but hey, the car finally became drivable again as of yesterday.

All that said, the past few weeks haven’t been totally unproductive. Being down to a one-car household got me looking at alternative commute options, which resulted in me trying out the commuter buses here in Houston and…I actually like it, and I haven’t driven to work in about three weeks now. I mention this because I’ve been spending some of my ride time doing airplane-related research. First it was reading through the manual for the VP-X electronic circuit breaker box, and at the moment I’m about 2/3 of the way through Bob Nuckoll’s AeroElectric Connection book.

In short, while this isn’t time I log as build time, the way I figure it I’m keeping my head in the project even when I’m not doing physical work.

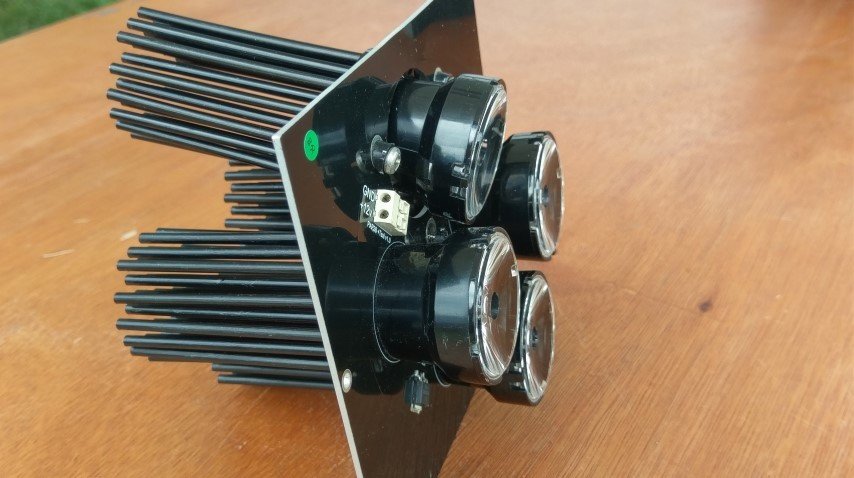
Anyway, also a few weeks ago I ordered a kit from FlyLEDs for my wingtip nav/strobe lights (plus a tail unit). I’d been doing some research on lighting options, discovered these kits, and was extremely impressed with what I saw. It was also nice that this kit was less than half the price of the Whelen LED units I’d previously been intending to use at the wingtips. For a bit more money, I could have had Paul assemble them for me, but what’s the fun in that?

So tonight I drug the wingtips down from storage and set about the first bit of work, which is trimming the boards to fit the light coves. The boards are intentionally oversize so they can be hand-fitted and account for manufacturing variances in the wingtips.

Here’s a look at the bare boards laid in place in the wingtips:

IMG 7131

A close-up shows a little better how the board edges are slightly rough and oversize:

IMG 7132

I started with the inboard, um, boards, laying them in place and tracing the outline of the cove using a sharpie. This gave me the starting trim lime:

IMG 7134

From there, I did the initial rough trim using a sanding drum in the Dremel. Rather than move the Dremel around the boards, I clamped it into the vise, making a sort of poor man’s mini bench grinder. It was much easier to carefully manipulate the board around the sanding drum this way. Once I’d done the rough trim this way, I refined and cleaned up the edge with a sanding block. There followed a bit of trial-and-error, comparing the board to the wingtip cove, until I was satisfied with the fit:

IMG 7136

And yes, I only trimmed that one board tonight. Still got four to go. I suspect the board will still need some final trimming when it comes time to fit the plexi lens around the cove, so for the moment I’m stopping myself from obsessing too much over the fit here. And I figure trimming the three remaining boards ought to go a little faster; it’s always slow the first time you try something new, especially when that something new involves removing material from a semi-expensive component you just bought…

Edit: And now as I take a second look at this…particularly that last photo…I realize that I’ve got the lights backwards. The red lights definitely don’t go on the right wingtip. Looks like what I actually mixed up were the forward- and outboard-facing boards. The good news is that the left and right boards appear to be identical, and while the forward and outboard boards house different components, they have the same lighting complement. So I think I’m probably fine to keep going the way I’m going, and just swap the red/green LEDs to get the sides right, but I guess I’ll drop Paul an email just to be sure.

Edit again: OK, after another look, the only difference between the forward and outboard boards is that one of them houses an additional socket for the electrical connections, so the only functional effect of switching the board locations is that that socket will face aft instead of inboard. Clearly that’s no issue, so I’m not going to bother Paul after all.

Posted in Electrical, Wings | Hours Logged: 1

Wingtip light fitting, pt II

Short night again tonight, but I trimmed the other three boards to fit the light coves. Board #1 from last week was where I was timid and took forever, tonight things went a lot faster. It helped that the forward-facing boards didn’t need nearly as much trimming as the outboard ones. Then, after getting the edges cleaned up and nice and smooth, I gave the boards a good wipedown and stuck them back in the box. Maybe tomorrow night I can get started on some soldering!

A quick look at the trimmed boards:

IMG 7139

Posted in Electrical, Wings | Hours Logged: 1

Building the wingtip light boards, pt I

So, after spending a fair amount of my long weekend alternately catching up on work around the house and being lazy in the air conditioning (since the Houston summer has arrived), today I finally got to work building the FlyLEDs boards. I won’t go into a ton of detail about the procedure; anyone who wants details can simply take a look at the really great documentation that Paul has put together online.

On the advice of said documentation, I bought myself a new fancy soldering iron with an actual temperature control (to take the place of my previous El Cheapo Walmart Special or whatever it was). Took a few minutes to get that put together and up and running, but before long I had myself a little workstation going on the kitchen counter:

IMG 7143

First up were the big white LEDs for the strobes. The docs specifically call out that the LEDs and boards tend to soak up a lot of heat, and…man, I found that to be an understatement. The first joint I soldered turned out nice, and I was quite proud of myself. The second one…I could not for the life of me get it up to temperature. I tried different iron positions, double-checked the soldering iron temperature, over and over again, but i could never get the solder to melt anywhere but in actual contact with the tip of the iron. It’d never actually flow into the joint.

I began to grow suspicious of the iron tip I was using, just a regular old pointed tip. Some reading online seemed to lend credence to this maybe being a problem, so on a whim I switched to the other tip that came with the iron, an angled knife tip. This tip was still smaller than the length of the joint I was soldering, so I reasoned that maybe just getting more contact for heat transfer would help.

Boy, was I right about that. Using the knife tip, the joint would get hot enough to flow solder within 5-10 seconds, no problem. After spending probably 20 minutes trying to solder that one stupid joint with the other tip, I knocked out all 22 remaining joints in probably 15.

The small red/green LEDs for the nav lights were a bit more difficult. One nice thing about the white LEDs was that they were large and easy to maneuver. The nav ones are much, much smaller. And since the terminals are also, by extension, smaller, I had to switch back to the original iron tip. This time I made sure it was fully seated, on the off chance that there was an intermittent connection the first time around or something.

This time I had no problems with the soldering; the red lights were done in no time, and I moved on to the green ones, only to find…I was short two LEDs. Well that’s a little bit annoying. So I decided to take a break there and inventory all the other stuff. Everything (else) for the wing boards was there, that was an easy inventory. The control board is a bit more complicated, but there were no missing parts there either. OK good…I’ll just go ahead and solder all the green lights I have, then shoot Paul an email later to see about getting the missing pieces.

Anyway, here are the left (red) boards with all the LEDs in place:

IMG 7146

After a dinner break, I moved on to the resistors (working only on the red boards to start with). Nothing too fancy here. The main fun was getting the resistors spaced off the board as per the instructions for better heat dissipation. I found that my rivet gauges were a great thickness to act as an assembly spacer here. With the resistors in place, then there were just the connection plugs, and I had myself a pair of assembled boards!

Now for the real fun – testing. Paul’s instructions recommend using a 9V battery for testing; enough to light the LEDs but not at full brightness. That, of course, wasn’t good enough for me, especially since I have a perfectly good 12V power supply. I’ll just be really careful to block my direct view of the lights, no problem. (If you’re expecting a story of regret, you won’t get it. My plan actually worked just fine.)

Board 1 nav lights: OK

Board 1 strobe lights: OK (man those are bright)

Board 2 strobe lights: OK

Board 2 nav lights: nothing (BOOOOOOOO)

Obviously polarity is super important with the LEDs, and the instructions suggest that reversing an LED is a common reason for a failed test. This can’t be visually verified with everything together; while the LEDs have little + and – signs on each terminal, those are now covered with solder. But hey, this is why I have a multimeter. Turn it on, go to diode test mode, test a known good diode…hm, nothing. Nothing in either direction, actually. That’s…odd. I went and dug up the manual for the thing just to make sure I wasn’t making any stupid mistakes…nope, by the book. Wait, there’s another diode in the control board kit; I’ll use that as a test. That one I was able to test no problem…um, OK.

Finally, I figured it out…rereading the multimeter instructions, this thing will only measure up to about a 1.5V forward voltage drop, and these LEDs look to be about 1.6V. What followed this was a lot of head scratching and attempts to figure out other ways to check the diodes. Honestly, I think the orientation problem is a red herring – there are six nav LEDs on two separate circuit branches of three each. A reversed LED would cause the other two on its branch to not function, but not affect the other branch. So I would have had to switch an LED on both branches – still possible, but mush less possible than switching only one, I think. I also noticed when I had 12V connected to the nav circuit that the power resistors were heating up, which implies that the circuit was not open as I’d expect with a reversed LED.

So for the moment I don’t know what to make of this, My current plan is to take the bad board in to work with me tomorrow – hopefully we have a better multimeter there that I can use to positively verify the LED orientation. If that doesn’t pan out, then I guess my email to Paul about the missing LEDs will also be begging for some troubleshooting help…

So that’s it for tonight, a weird-isa combination of victory and defeat. We’ll see what tomorrow brings now, I suppose.

Posted in Electrical, Wings | Hours Logged: 4.5

Building the light boards, pt II

So first off, the good news: The board that didn’t want to work right last night is now fixed. As planned, I took the board to work and tried testing it with the multimeter in the lab, but that didn’t yield any more new information. Slightly defeated, I spent the rest of the day with the thing sitting on my desk, but an eagle-eyed coworker dropped in, asked about the boards, and after looking for a bit pointed out that one of the LEDs looked to be slightly out of place, in such a way as to maybe cause a short circuit. That idea fit with the evidence I’d seen – no lights, resistors getting super hot under power, and I’d already observed oddly low resistance across that particular LED.

So when I got home tonight, I repositioned that LED a bit. Put power to the board and…well, one string of red LEDs lit up, but not the other. Slight progress at least. Some more testing with the multimeter and I identified another LED that seemed to be shorted. It didn’t look like it visually, but I decided to reposition it anyway. And lo and behold, after that they all lit up!

I could go and solder the resistors onto the other wingtip boards, but they won’t be complete until I can get the two missing LEDs from Paul, so I decided to move on to building the controller board. This board has a few bits already soldered – a few surface mount bits better done in a reflow oven – but everything else is left for the builder. Something like 11 resistors, three capacitors, a diode for fun, the IC socket, a DIP switch, and a D connector for hooking everything up down the road. In some ways the soldering here was easier – nothing dramatic was needed to get it done, unlike working with those big strobe LEDs – but all the pins are super close together, so it’s still a bit tense. But after a couple hours I had myself a completed board (sorry, I forgot to take a “before” photo):

IMG 7148

Even better, it actually worked when tested. Test #1 is to just power up the board and observe the little LEDs on it. The red/green ones represent the wingtip strobes and the yellow one the tail strobe. By observing these you’re seeing when the board would be switching on/off the respective lights. This is a good time to tinker with the various settings (flash rate, number of flashes, flash pattern, wigwag pattern). The other fun test is to put the multimeter in continuity mode and probe the power pins for the wingtip strobes. In this way you can hear the multimeter beep in time with the relevant LED flashing on the board. Somewhat underwhelming in a certain sense, but still cool to see/hear it work. It’ll be really fun when I can put all this stuff together into a test rig of some kind (and probably test it out on the ramp at night).

The only problem I have now is that I don’t have any more good inside work to do, and there’s a whole lot of summer left…I do still have the green boards to do, but it’ll likely be a week and a half before I have those missing LEDs in hand…

Posted in Electrical, Wings | Hours Logged: 2.5

Building the light boards, pt III

*crickets*

Once again it’s been a while since I’ve been here, and yeah, it’s been a while since any real work got done on this project. I will defense myself slightly by saying that I have been doing some stuff, just not real luggable work. Josie and I made it to Oshkosh this year, where I did a lot of prodding various vendors and firming up plans for systems. And over the past few months, I’ve been spending some of my morning bus rides reading up on systems stuff (I read Bob Nuckolls’ book cover-to-cover) and beginning to architect my electrical system. On that latter point, I have a sizable spreadsheet going which covers all the components I expect to install, their pinouts, and how everything ties together.

But still…there hasn’t been anything that actually happened out in the shop. Today, though, I finally got to cleaning up some messes I’d left from other projects, and suddenly I got the itch to do something. So I decided it was time to finish up these light boards. Way back when I worked on these last, I found I was short a couple of green LEDs. A quick email to Paul settled that issue, and after the long wait for mail from Australia, I had my two LEDs.

So to get back in the groove of things tonight, first I had to solder those last two LEDs into place. Then I just had to solder the power resistors and connectors to the right-side boards, and things were done. Nothing to it really.

But then I wanted to go a step further and test out the entire setup. I had, in fact, acquired a breadboard a while back for situations like this one. So I set about tying the light boards together (each wingtip has its two boards connected via a ribbon cable) and then hooking everything up to the control board. Then I got the control board tied to the breadboard, where I could attach jumpers to simulate switched inputs on the panel. That let me turn the position, strobe, and wig-wag functions on and off easily. Oh, and I also cut some slots into some scrap wood to actually hold the boards.

The final setup:

20181231 222539

And then, of course, I had to turn off the hangar lights and try everything out. And there had to be video. The challenge was getting useful video – trying to film the lights directly just resulted in the camera being overwhelmed. So I ended up standing behind the boards instead. It’s enough to get the idea across:

https://www.youtube.com/watch?v=-m18RXc2NwA

Anyway, that’s it for now. Next on my list is cleaning up my two workbenches and rebuilding one of them – I decided a bit ago to replace its top with a larger piece, and essentially set it up as a fixed bench (though still technically movable if needed). I even have a strip light I’m going hang above it for task lighting! Maybe I can finally cut down the big piece of MDF I bought months ago this weekend…

Posted in Electrical, Wings | Hours Logged: 1.5

Building landing/taxi light units

Yep, time today for more fun with lights. I really liked the wingtip boards I got from Paul at Flyleds, and when he mentioned offering a combination landing/taxi light unit for RV leading edge cutouts, I was pretty excited. I ordered a pair of Whelen lights, well, several years ago, intending to use them here, but Paul’s stuff looks far superior. I even got to handle an example last summer, since he made it to Oshkosh.

I finally pulled the trigger and ordered the lights a couple weeks ago, and then it was time to wait for the long ship time from Australia. The package came in this past week, and today I set about assembling the kits. Overall, assembly is simpler than the wingtip boards – no soldering to worry about, just essentially installing heatsinks and lenses onto the prefab boards. Here’s everything that comes with the kit for two light units:

IMG 7152

I was actually a bit surprised at the large boards when I first opened the box. I expected four cutouts, one for each light, but upon closer inspection the LEDs were already in place; three fixed to each of the large boards, one to each of the small boards, which will be the aimable taxi light units. And these LEDs are surprisingly tiny when you consider how much light they’ll be putting out:

IMG 7156

Assembly mostly consisted of installing the lenses and heatsinks for each light. Additionally, the small aimable boards needed three nutplates riveted onto each one for eh mounting/aiming screws. This was actually a bit of a challenge, since some of the nutplates are the single-lug type. The rivets on these are really close together, which makes things fun. I’ve only ever riveted these with flush rivets, where at least you can position the squeezer to make some more room – but this kit includes round head rivets, and in that case there’ no choice but to center the rivet in the set. So I actually ended up shooting a bunch of these with the rivet gun.

Then it was on to the lenses. Here, a mounting cup snaps into place on the board, the heatsink is coated with some sort of thermal glue, and screws go through the cup and into the heat sink, securing everything together. Then the lens simply snaps into the cup. The instructions warn that this must be done very carefully; the base of the lens actually fits over the LED, so carelessness here can easily damage the LED. Which is exactly what I did on the second lens I installed – despite being super careful as I pressed it down to lock in place, one side locked and the other didn’t, which took off some of the LED.

It’s not super obvious from this photo, but the small clear plastic (I guess) dome on this LED has been scraped off:

IMG 7158

Interestingly enough, the LED still lit when I put power to it. Maybe it’s salvageable, I’m not sure – I emailed Paul to find out. Hopefully I don’t need to order replacement parts, but we’ll see.

The rest of the lenses went on with no trouble, and then I installed the one aimable board to one of the large boards, and of course there had to be some testing. After basic function testing, and after it got dark, I went outside to do some real-world testing. In the following photos I’m aiming the light at a neighbor’s hangar, a little over 300’ away across the runway. I’m only powering the three landing light units on the large board, not the one taxi light unit on the small aimable board. Both photos were taken with identical camera settings (something like 15s exposure at f4.0).

IMG 7159

IMG 7160

So basically on the plane I’ll have two lights like this, which I think will provide, um, adequate lighting.

The one thing I forgot to do was to take a photo of the finished product, but it looks like this (photo from the Flyleds site).

Next up: some seat ramp riveting. I’ve been reading area in the construction manual. I wonder if I should consider ordering seats sometime soon…once I get the interior stuff done and start really finalizing the panel plans, I expect to spend a fair amount of time sitting in the plane chair-flying the panel. Probably better to just throw some pillows in there for that instead of expensive seats though…

Posted in Electrical, Wings | Hours Logged: 2

Finished the landing/taxi lights

OK yeah, it’s only half an hour, but it’s nonzero, and that counts for something.

Way back in January, I built most of these units, but accidentally butchered one of the taxi-light LEDs. It still functioned, but had lost some sort of clear plastic dome over the LED. I emailed Paul to ask about the best way to proceed, and he gave me good news – if it works, it’s fine. He did say that the LED’s phosphor layer should be protected somehow, and suggested a bit of clear silicone sealant, so I started tonight by adding that. Then I reassembled the light unit, tested it to make sure everything was OK (it was) and mounted the taxi light unit to the larger landing light board. So now I have two finished boards to go into the wings whenever that time comes.

I also spent a little time looking through the construction manual and reminding myself where I was. I was a little surprised to see that there are only a couple steps between where I’m at now and the next section, which is fitting the empennage. Ohhhh boy.

That’s actually a little deceiving, though, I have a spot a few pages back where I skipped some steps, for reasons I don’t recall (I highlight manual pages that don’t have all tasks complete). Looks like this was back when I was doing the flap bearing blocks and rear seat floors. I need to go back and find those build log entries and figure out what the deal is there.

Posted in Electrical, Wings | Hours Logged: .5

Forward systems planning

Well, this is sort of a conglomeration of work from the past few days, though until tonight it was mostly short sessions of standing around and sort of squinting. Tonight, though, I made an actual effort to make something of those squint sessions. As I may have mentioned before, I’m currently considering a sort of two-shelf system behind the panel. The upper shelf would only be accessible by removing the center panel section or EFIS screens, but the lower one will house fuse blocks, and so I want these to be relatively easily accessible on the ground. So I intend to make that shelf hinged somehow, to provide that easy access.

Part of the question was how to do the hinging. My original idea was to have the shelf be separated into two sections, each of which would be hinged at its outboard end, and thus sort of swing down from the middle. I think this idea would maximize use of space, but add significant complexity in wiring. Sp instead I’m so far going with a one-piece shelf that hinges from the forward end. The main detraction here is that when lowered, the shelf can interfere with the gear towers. So when I did some measuring and cut out a cardboard mockup tonight, I had to sort of chamfer the corners a bit to provide clearance with the towers.

But with that actual mockup, I could lay out the components and start to really consider their layout. Basically, what I expect to have living here is the main power distribution hardware and the SDS CPI2 electronic ignition CPU. The CPI2 unit is kind of optional; I’m mainly including it here because it does include a couple built-in fuses, though if those ever blow it’d mean some very abnormal fault had happened upstream. I might end up rethinking this location, since as we’ll see, things are kind of snug.

The power distribution hardware consists of three fuse blocks, one for each bus: main, essential, and battery, plus some extra hardware allowing for emergency measures. Since the electronic ignition means I’ll have an electrically-dependent airplane, I’m paying special attention to redundancy here. The setup here is based on Bob Nuckolls’s design, where an essential bus includes two potential feed paths: a normal one from the main bus, and an alternate one from an always-hot battery bus. Making this work requires a relay to switch that alternate path, and a large diode to prevent the alternate path from back feeding the main bus. (the idea is that the essential bug is used when loads need to be seriously conserved) That relay and diode are the other two items depicted in this first sample layout:

The thing with this setup is that the layout and routing of the wires is actually kind of important. This actually drive the arrangement of the fuse blocks; my initial idea was to putt he smaller battery block on the far right, but routing the wires to the essential bus works better if that block is located far right.

Still, I wanted to better visualize the wiring runs, and instead of drawing on the cardboard – not necessarily great for iteration – I decided to transfer this layout to a whiteboard. (and, now that I look at it, I see that I inadvertently switched the locations of the diode and relay) The colors here represent the two power paths and, by extension, different wiring sizes. Red is the main power distribution from the alternators, and will be sized at 6ga to be able to handle the max possible output from an alternator. Blue is much smaller wire, used for supplying the battery bus from the battery itself, as well as supplying the essential bus. Wire size here will likely be 10ga, assuming I can refine my load planning a bit.

Not depicted here are the outputs from each block, which I’d expect to run along the bottom of the shelf before branching off to their various destinations.

Anyway, I’m still not completely happy with this layout; in particular, I feel like things are potentially cramped for the wiring runs at the top & bottom of the shelf. I’d prefer to make the shelf narrower in this dimension too – making it this wide would require hinging it at the baggage bulkhead, a bit more complex than hinging it at the forward brace. But I don’t think I can spare that space and still make this layout work…so I’m wondering if the thing to do is to let the CPI ECU live somewhere else. Then I could rotate the two large fuse blocks and gain some room here. I suppose I should do some similar planning for the upper shelf to determine if that’s feasible.

Lots and lots to think about…

Posted in Avionics, Electrical, Fuselage | Hours Logged: 1.5

Forward systems planning, again

Nothing too crazy tonight, just continuing with last night’s proceedings. I’d intended to start out by making a cardboard cutout for the upper shelf and starting with that. kind of like I did last night, but I decided instead to go straight to whiteboard drawing this time around. It has its detractions – most notably, I can’t use lay stuff down on a flat surface and visualize, I’ve gotta draw – but on the other hand, I didn’t have to start by cutting cardboard, and I could potentially adjust the shelf dimensions depending on what I found by trying to place stuff.

Probably the most notable thing I decided to roll with right off the bat was to try moving the CPI2 ECU from the lower shelf to the upper once. As mentioned last night, I wasn’t a huge fan of how crowded the lower shelf was. This may or may not be a decision that sticks – I’m going to make a VAF post when I’m done writing this to ask some questions about the CPI2 system, specifically opinions on how accessible the ECU should be. One of the nice things about this is that Ross Farnham, the owner of SDS, is very active on the forums and helpful. This is, in fact, one of the things that prompted me to go with the CPI2 ignition.

Anyway, the final thing that became evident tonight was that just the two shelves weren’t going to cut it for all the behind-the-panel stuff. This isn’t a huge deal, as I also have the backside of the baggage bulkhead I can use here, and that’s a pretty common place for -8 builders to put stuff. With this decision made, though, I think I have a pretty solid layout for this area – pending, of course, responses to the CPI2 questions, which might throw all this in disarray. But that’s the way things go.

First up is the revised lower shelf. Here, I just replaced the CPI2 ECU with the voltage regulators for the two alternators. I could probably put these a little closer together and gain some room with the fuse blocks, but that’ll be something to experiment with another time. This is, after all, still in a sort of rough-draft phase:

Next up is the upper shelf layout, which ends up being nice and roomy for everything. This shelf could actually be made wider, but I’ve intentionally drawn it so it’s narrow enough to pass through the space taken up by the main panel – if I ever needed to remove the shelf for maintenance or whatever, I could do it. Here I have the EMS unit on the left, the remote com radio center, and the CPI2 ECU and its backup battery on the right. I’ve also got what should be ample room to accommodate all the connectors here, particularly the large ones on the EMS (including a 37-pin D-sub):

And finally, a really rough look at the stuff on the baggage bulkhead. Here we have the Skyview network hub on the right, with the ARINC-429 interface box beside it. The ARINC-429 box is what will allow the Skyview system to talk to the Garmin GPS-175 certified GPS, and the location here is nice since the back of the GPS-175 tray will be close at hand (basically high and center). On the right side are the two backup batteries for the two Skyview EFIS screens:

I’m pretty sure that covers all the stuff that needs to live back here. I think at this point I probably need to review my electrical schematics and make sure I really have covered everything, and then…well, I guess it’s maybe time to see about fabricating shelves, These will be mostly simpler than the crazy aft shelf, but there will be the additional complication of the hinges for the lower shelf. Also, it’s possible my trashed wing skin may not be workable for these. Hopefully I’m wrong about that, since ordering sheet from Aircraft Spruce will make for some really expensive shipping…

Posted in Avionics, Electrical, Fuselage | Hours Logged: 1

General systems planning

I’m only calling this one shop hour, even though I’ve spent a whole lot longer over the past two days with this stuff. This is just me drawing a (somewhat arbitrary) line between being out in the shop doing stuff vs. sitting inside with a laptop researching until my brain turns to jelly. If I logged all the latter time I’d probably be close to 2000 by now…

Anyway, the shop time mostly revolved around continuing to play around with component locations. I’ve ended up adjusting things a bit more, though I don’t have any photos of tweaked layouts this time around. The first big change was to the lower shelf. Even though moving the CPI2 ECU off of it made it less crowded, I still wasn’t really happy, and I eventually decided to relocate the voltage regulators to the baggage bulkhead, which turns the lower shelf into basically just a fuse block shelf.

The nice thing about this is that I can move the block around a bit and make the layout a lot more logical – which I count as a win, as the essential-bus architecture can be a bit weird at first. The new layout will better visually show what’s going on. Another benefit is that I don’t have to make this shelf as wide as possible any more. Instead, I can make it just as narrow as the upper shelf, and not worry about it interfering with the gear towers, and also bring wire bundles up around the ends instead of having to go through the shelf with a snap bushing.

Now, the downside to this change was that I needed to move the Skyview backup batteries off the baggage bulkhead. Packaging these was proving to be a pain, since they were kind of wide and flat…but then I came up with the idea of stacking them and putting them right beside the CPI2 backup battery. They’d be no taller than that battery, and have half the footprint. I figured I could just cut some aluminum tube spacers to go between the top and bottom batteries, but the thought of finding the necessary hardware (ie some long screws) was interesting.

But then I came up with an even better idea – mounting the two batteries vertically. I can pretty easily fabricate a small vertical “wall” of sorts, and then just have one battery on each side of it, and instead of needing long spacers and longer screws, I can just use short screws and nuts. It doesn’t really save a lot in terms of footprint, but it’ll be a lot more elegant.

It’s actually kind of bothersome to me that I can only work this stuff in hypotheticals, using little cardboard mockups and imagination. I’d really like to have this stuff on hand so I can do some real packaging work! But it shouldn’t be that much longer – at this point I’m planning on making big purchases probably around the end of August. I don’t know what kind of lead time I can expect on avionics orders, but hopefully I’ll have a lot of this stuff on hand by mid-September.

In the meantime, I can be focusing back on airframe stuff…like the wings. This whole systems planning odyssey came from me wanting to get materials to wire up the wings, and not wanting to make a bunch of piecemeal wire orders, and thus feeling like I needed to at least rough out systems stuff so I could get an idea of wire materials needed. I think at this point I’ve kind of surpassed that…but it’s so much fun…

This leads to the major effort of the weekend, which was just doing the grinding required to gin up a bill of materials of sorts. I did some rough measuring in the airframe of expected wiring distance between various locations – avionics shelf to panel, shelf to switch console, console to underseat (where wing wiring terminations will happen), back to the rear shelf and to the tail, etc. This was information I could use to rough out wiring distances between various components.

A lot of the wire runs are pretty simple. Network and serial data wires can all be plain old 22AWG white wire. Power wires are a slightly different matter – here you can picture me spending a few hours refreshing my knowledge on wire sizing, and working out the proper gauges for power supplies. And there’s also multi-conductor shielded wires for certain applications. All of this information then got applied to the distance chart I’d made earlier, and the end result being a big list of wire types/gauges and required lengths.

The end result comes out to a total of a little over 1300 feet of wire, of various sizes, types, and colors. I’ll end up ordering more than that – I figure that on average, adding about a 15-20% buffer is a good idea. I’d definitely rather have too much than too little, especially when it comes to the super-common 22AWG white stuff.

I also spent a bunch of time researching tools, and ended up ordering a few more crimping tools, some tools for inserting/removing pins in D-sub and Molex connectors. Still left to do is to work out a starting order for connectors. The easy part will be D-sub connectors, backshells, and pins – this list is pretty well dictated by my equipment, and not long. The one thing to consider is that I want to have service connections on the upper forward shelf, which will probably be D-sub, and I’ll need to plan those out. I also expect to use some Molex connectors in a few select places as well. I don’t expect to get that list 100% right off the bat, but I at least anticipate using them at the wing tips for connecting the pitot heat/lights/etc. Got to think that one through a bit.

One final end result that I’m strongly considering is to redo my electrical schematics kind of from scratch – an idea I do not take lightly, as I’ve invested a ton of time in them already. But the current ones are divided into various sheets mainly from a functional standpoint – one sheet for power distribution, one for all the simple switched stuff, etc. I think what will serve me better as I move towards building up harnesses will be sheets divided by physical location – so the forward upper shelf can be one (or more) sheets, and can depict the service connectors I want to add. These sheets should be a lot simpler to translate into harnesses, and also more useful for troubleshooting down the road. I probably won’t start this immediately, though, since the layouts will depend on final packaging, which I don’t expect to nail down until I have all the avionics on hand.

Anyway, that’s the weekend in a nutshell. Not a lot to show in terms of hands-on stuff, but I feel like I’ve gotten a lot done, and I’m definitely getting excited about systems stuff, despite the challenged involved.

Posted in Avionics, Electrical | Hours Logged: 1.5