After taking the dogs for a walk in the arboretum this morning, it was out to the garage in the afternoon to do lots more match drilling. I didn’t realize it at the time, but I was suffering from my first building-related repetitive motion injury. I woke up this morning with an odd ache in my right wrist, like I’d slept on it funny or something, but that didn’t seem right. I forgot about it quickly and moved on with my day…until, just before match drilling, I decided to add a couple clecos to help alignment in some spots. As soon as I squeezed the pliers and tried to twist a cleco into a slightly-undersized hole, that ache made perfect sense.
Anyway, I went to town on the bottom skins and got them all match drilled, and then removed the bottom skins and put them back in their storage stand. The top skins stay clecoed on for the duration, but the bottoms come off to allow access inside the wing. This was a straightforward procedure, so I don’t have any photos of it, but I would like to point out an unsung MVP of this whole process:

I got this little rolling work stool from Harbor Freight, and it’s worth its weight in gold for working on the wings. Much better to sit and roll along instead of hunching over or something. I actually have two of these stools…
The next item is the leading edge, so I put the skin in the nice little cradle I have and started clecoing. This is kind of a challenge, as the skin is mostly bent to shape, but not quite, and it ends up taking some force to pull everything in alignment before inserting clecos. Better yet, the leading edge is large enough that you can’t really put a cleco in the front outside and still reach inside to wiggle a rib around. It wasn’t a horribly frustrating endeavor at all, but a bit tedious.
Then I set the whole assembly on the spar and clecoed it in place. I also began to realize that riveting the spar connections for this thing is going to be interesting. I can barely even reach inside the leading edge assembly to touch the rivet holes, and someone is going to have to hold a bucking bar in there. Whee!
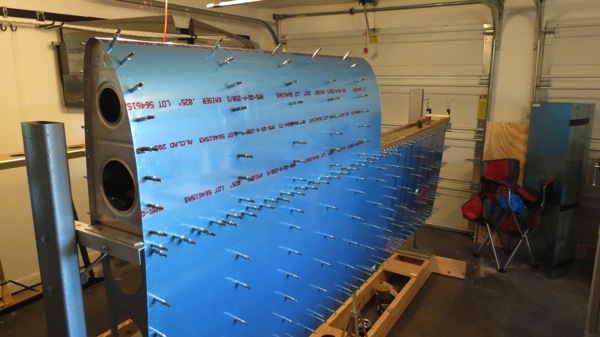
Here’s the wing with the leading edge clecoed in place:

The next thing to do will be to work on the inboard rib for the leading edge. This rib, for whatever reason, isn’t predrilled. There’s also a joint plate that goes between the rib and the skin; the outboard edge of the tank will attach to this plate. The plate has to be fabricated, set in place, and the whole assembly drilled, while maintaining alignment and edge distances. I gather from other build logs that this has been a difficult task for several people. So I’m going to do some reading and research before I jump into this task.
It was about time for me to come in, have dinner, and give my parents a call anyway, so I quit for the evening.