Electrical

Behind-the-panel planning

As mentioned yesterday, with the main panel layout done, today I started thinking (again) about the layout of the stuff behind the panel. Also as mentioned yesterday, I wasn’t quite totally on board with the working layout I had after looking at all the actual components in place. So I started the day off just sort of staring and occasionally moving stuff around. I also got to thinking more about actual wire routing considerations, specifically the way the various D-sub connectors might affect things. To this end, I actually spent some time assembling a bunch of connectors and backshells so I could better visualize things.

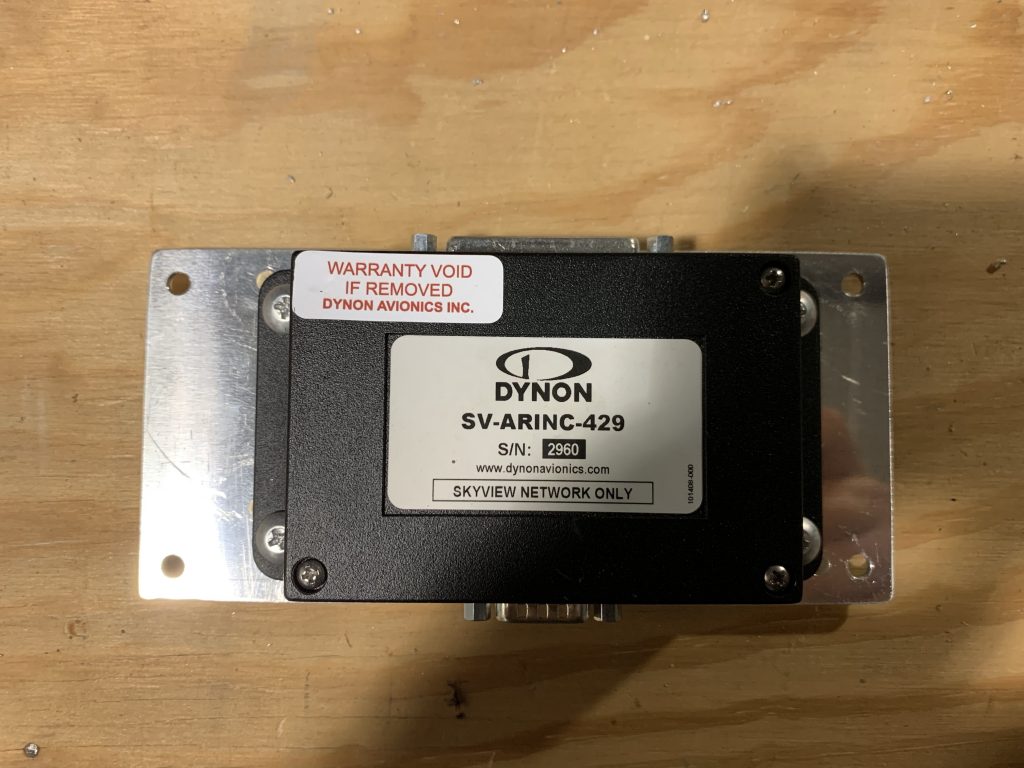
In the end, even after moving stuff around, I was still dissatisfied. Everything seemed more cramped than I wanted it, especially the components on the baggage bulkhead. After lots more staring, I got to thinking about an idea I had a while back and, at the time, rejected – specifically, instead of placing the EMS and ARINC-429 boxes side-by side, figuring out a way to stack them. The thing with both of these boxes is that they have D-sub connectors on two sides, which means they needed decent real estate on either side for those harnesses. If I could stack them, that’d be less dead space I’d have to leave.

Now, there were two reasons I’d rejected this idea previously. First, I was concerned about the extra height of the stacked units – but that was several shelf iterations ago, and now I felt that was less of an issue. Second, I couldn’t visualize any stacking ideas that didn’t seem really unpleasant to deal with – most of them revolved around making a pair of z-profile brackets, and it seemed like a really fiddly thing to deal with behind the panel down the road. But today I had a better idea – thanks to cutting the panel (twice), I’ve got some scrap pieces of thick sheet lying around. Maybe I could fabricate something like the plate Dynon sells for stacking two ADAHRS units.

In the end, I decided to have a go at fabricating a mount, knowing that it might be wasted work if the packaging still didn’t work out. The idea was to cut a plate matching the base of the larger EMS unit, which would be mounted using the same stud mount I plan on the EMS unit, using spacers or standoffs to position ti above the EMS unit. Then I could just install nutplates on the mount plate, and screw the ARINC unit to it. Pretty straightforward work, really.

Cutting the plate was easy, as was getting the mount holes drilled for both the EMS and ARINC units. To help with potential interference with other stuff on the shelf, I positioned the ARINC unit off to one side (which, when mounted, means “higher up”) rather than centering it – this would provide more space near the shelf. Then I got my nutplates fitted and installed, and screwed the ARINC unit to the plate:

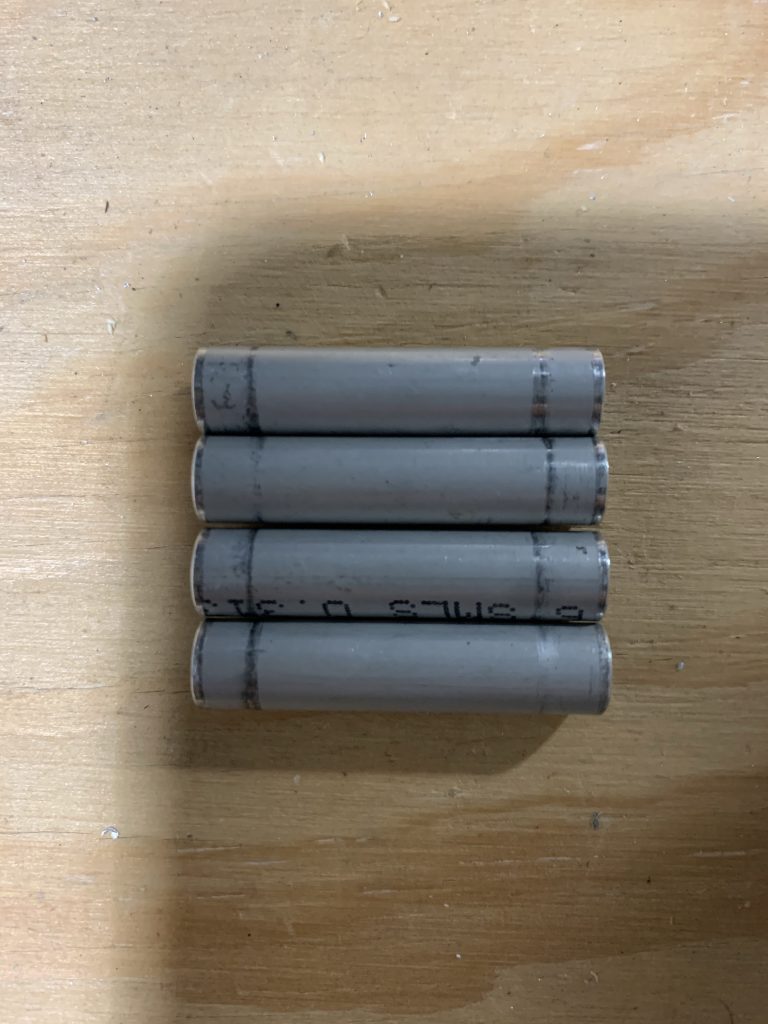
Next up were the standoffs. The mounting holes here are 3/16”, which makes this easy – I’ve got a bunch of aluminum tube that gets used for spacers on AN3 bolts like this all over the place. I even had a convenient donor piece: my first failed attempt at making the aileron trim pushrod. I worked out that the spacers needed to be 1 3/8” long to provide some space between the ARIND mount nutplates and the EMS unit, then did some cutting and finishing. And here we are, four nice little spacers:

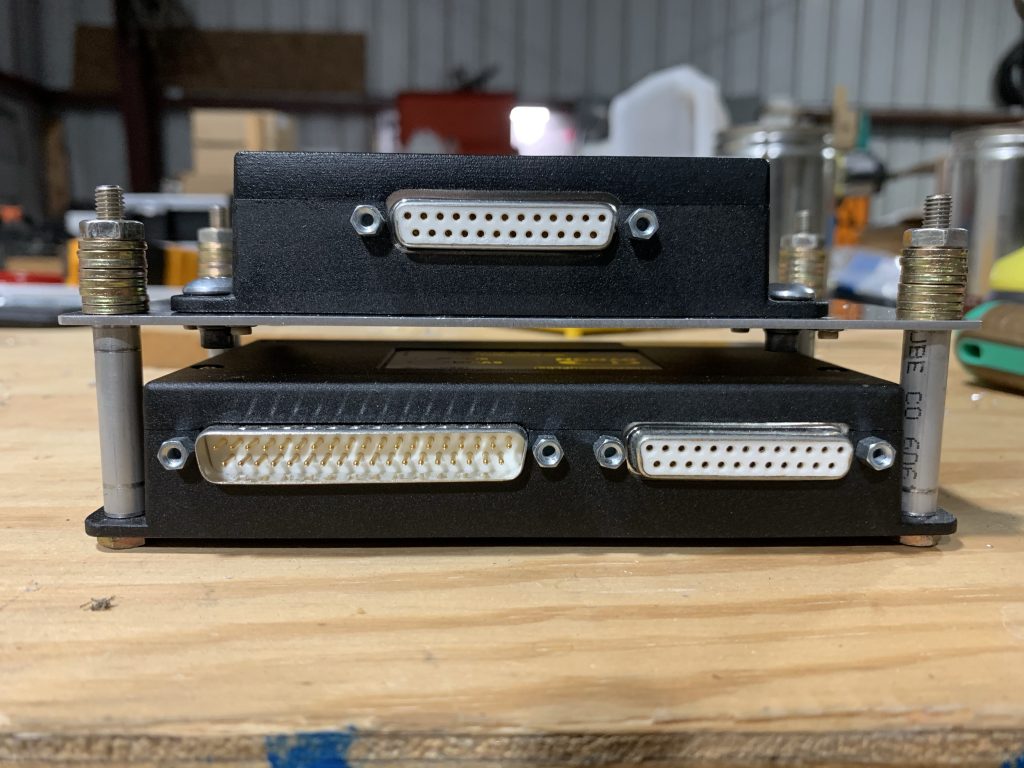
Finally, it was time to put it all together! Only one problem: I didn’t have the right length of machine screws, since when I made my hardware order I wasn’t thinking of this application. But hey, I don’t need the actual hardware, I just need something to hold the assembly together so I can test-fit. I eventually found some AN3 bolts that would do the job, although they were way too long, thus requiring an absurd number of washers. Oh well, it gets the job done:

And so finally, it was time to go back and do the actual test-fitting…and hey, it works! I’d already decided earlier to move the CPI2 ECU over to the far right, mainly to provide better access to the fuses if needed. And that provides good room both fore-aft and up-down for the stacked units. It also lets me shift the voltage regulators back towards the center, which I like a little better…and maybe best of all, I can put the Skyview network hub over far right. That should make for some nice routing, since it’s 1) right beside the EMS and ARINC units, each of which have an SVN connection, and 2) convenient to the right HDX display, which is where I’ll start daisy-chaining the assorted panel units together, and 3) convenient to where the wire bundle going to the aft fuselage will exit the panel, which is good because I’ll have two SVN cables going that way from the hub (one for the roll servo, the other to tie into another network hub at the aft shelf).

I also rotated the CPI2 battery mount so its fuses face inboard as well, again for potential serviceability. The sole wrinkle here is that the Skyview backup batteries end up right between the ECU and battery for the CPI2 – this may make it tough to pull any of those fuses. But if that’s the case, I’ll always be able to remove the Skyview batteries if I need to – it’ll just be two plugs and four screws. Given that I don’t expect to be changing those fuses often, I think that’s acceptable.

This arrangement should also work well for potential servicing. The first step to working back here would be pulling the center panel unit – 12 mount screws to detach it, followed by seven plugs (one plug each for the two HDX displays, the GPS-175, the intercom, the radio head, and the AP panel, plus the SVN connector from the right-hand HDX display). I may consider trying to consolidate this into something like one or two cannon plugs or something, just for simplicity – I think that’ll depend on how all the harnesses end up tying together.

Anyway, back to servicing…with the center panel out, the entire upper shelf will also be removable, with about the same number of connectors: the two Skyview backup batteries, the D-sub and coax connector to the radio box, and the CPI2 connectors. The same thing applies here about maybe adding cannon plugs – that might be worthwhile to make this a little easier. I think the packaging for that might be more challenging, though.

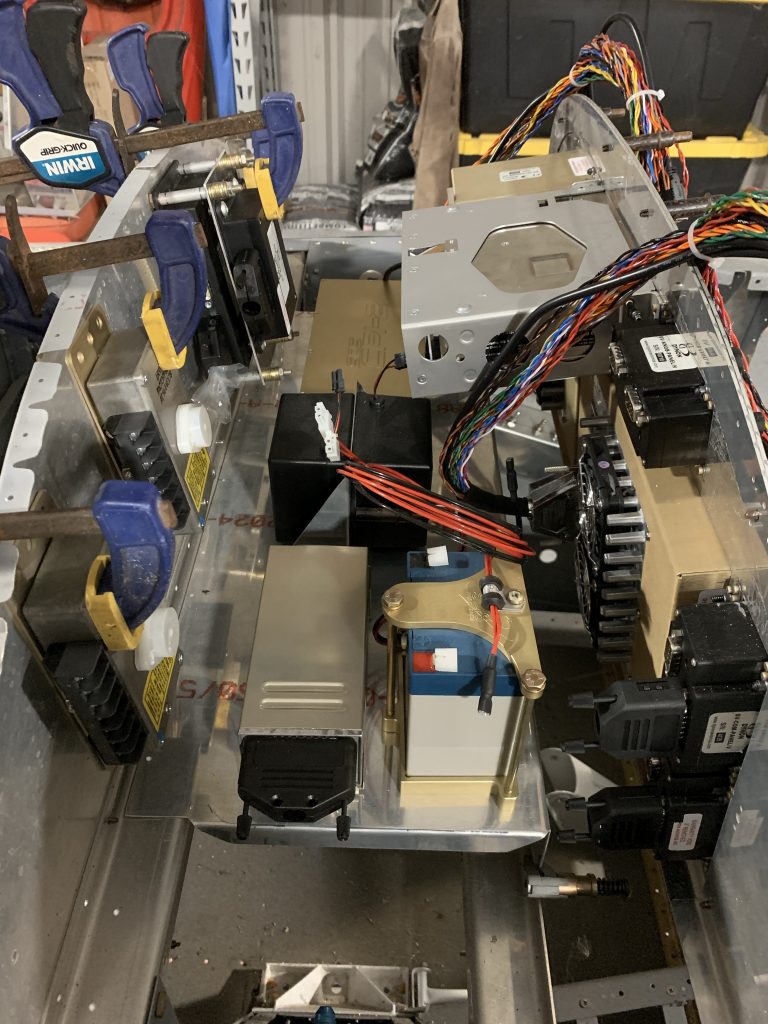
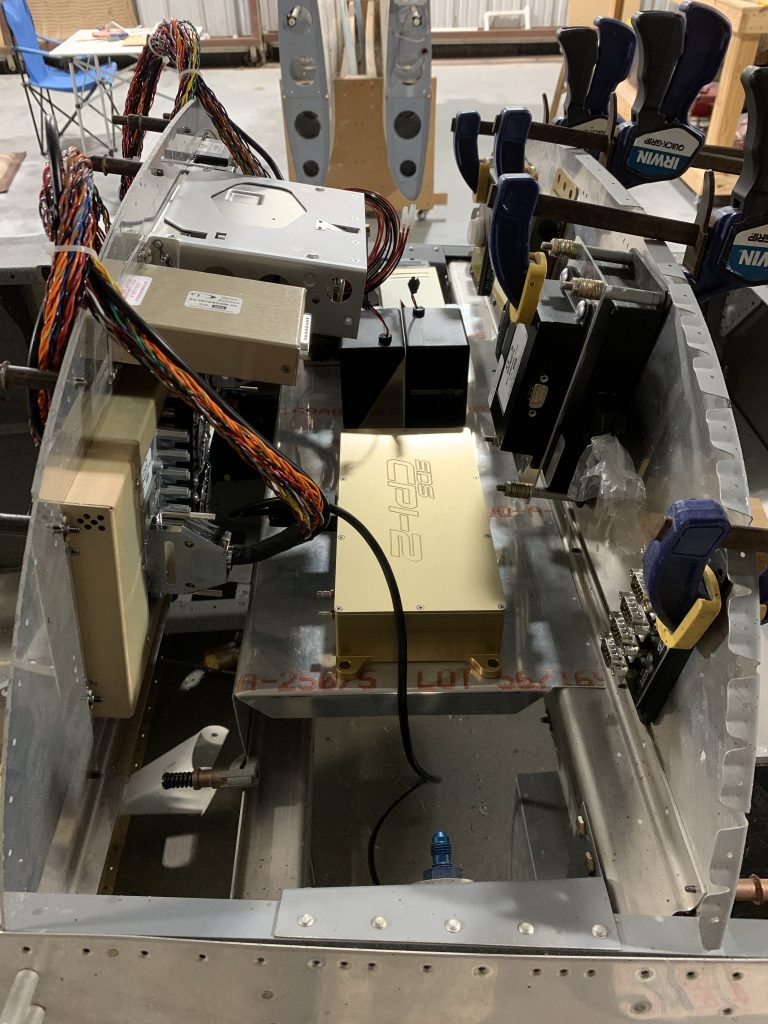
Anyway, let’s get to some photos. First is a look at the area from the left side of the aircraft. On the baggage bulkhead, we have the two regulators closest, followed by the EMS/ARINC stack – with plenty of space for those connectors. On the shelf, we’ve got the radio box, CPI2 battery, Skyview batteries, and finally the CPI2 ECU:

And from the left side…the only thing to note here is the SVN hub, which wasn’t visible from the other side. You can also see a black cable coming from the CPI2 ECU and sort of just going down by the gear tower. This is the cable that will tie into the CPI2 panel controller, which will be on the right wing of the panel.

So there we have it – not a lot of progress in terms of tangible stuff today, but I’m starting to develop a solid mental picture of how everything up here is going to tie together. I really think the next steps here will be to get the panel wings cut and drilled for their components, so I can mock things up a bit more. I’ve also got probably another Spruce order to work up – I need the longer machine screws for the stacked EMS/ARINC mount, plus also maybe some hardware for mounting the CPI2 ECU.

There’s also one more component to add, a pretty late addition – I didn’t even think about having a carbon monoxide detector until this past week. These are pretty ubiquitous in piston aircraft, and most often are just these cheesy little cardboard things taped to the panel. The accuracy of those seems to be questioned, they have to be replaced periodically, it takes up space on the panel, and it relies on me noticing a color change.

This is, of course, all a setup for something better I found – an electronic CO detector, which can mount behind the panel, and is compatible with the Skyview EMS unit. What this means is that 1) I don’t have to take up panel space and 2) instead of having to watch for a color change, I can assign audible alarms via the EMS system – so if there’s ever a CO problem, I’ll get yelled at in the headset the moment it crosses a set threshold. The good news is, the detector unit is really small, just 2” square – easy to fit in back here.

So I think I’ve got the mission(s) for the week: more panel cutting, working up that hardware order, and firming up the harness layout behind the panel. Nice to have a solid path forward.

Posted in Avionics, Electrical, Fuselage | Hours Logged: 3.5

Panel harness layout work

So tonight was about starting to figure out what the harness behind the panel ought to look like. It started with sitting inside and looking over my schematics, with the main goal being to decide whether to not I wanted to add in disconnects for certain modules (like the center panel or the upper shelf). After doing a bit of thinking and tallying up pins that would be needed, I decided that adding those disconnects wasn’t worth the effort. I think the main benefit of doing a single disconnect would be simplifying the service loop needed to allow removing the panel, but at the cost of more planning, more parts to order, and more wire terminations that could be a source of issues down the road.

With that decision made, it was time to start making a go at the layout. I decide to try and do some sort of iterative whiteboard work, sketching out the layout and visualizing the interconnects between devices. The idea is just to layout the paths that wire bundles will have to take, not to detail every single wire. The end result I’m going for is a diagram like the one I drew a while back for the harness to the tail of the aircraft – basically just laying out the wire runs and nodes, which I can then turn into measurements that become the baseline for harness building.

This, in turn, made me rethink some of my wire routing decisions. Initially I’d expect to have significant wire bundles exiting the upper shelf on both the left and right – on the right side would be power/ground connections, plus the beginnings of the run to the aft fuselage, and on the left would be the firewall forward runs, for the engine management system. The main hangup with the latter is that I intend to run the CPI2 FWF harnesses just inside the forward baggage well, to keep the wiring runs manageable. I think it makes more sense to run all the FWF EMS runs through that point, rather than splitting them up. That will leave me with just two firewall penetrations for wiring – the CPI/EMS one we’re talking about here, and one on the far left where the main power feed from the battery will enter.

I think this will be good for packaging behind the panel as well. On the left side I’ll have some SCAT tubing to feed the fresh air vent, which would potentially make routing a decent size wire bundle more interesting. By taking the bulk of the wiring off the left side, this makes things a little simpler. There will still be some wiring over here, but it’ll be limited to a pair of coax runs (for the radio and GPS antennas) and a few wires for fuel pump power and the left tank level sender.

Anyway, the end result of this was some fairly indistinct whiteboard material. Probably this entire diagram will go away and I’ll start over again, because while it decently depicts the interconnects between boxes, I don’t think it’s going to work for depicting the actual harness layout. I expect to end up with sort of two horizontal “trunks” – one that represents connections being router from the far right across assorted boxes, and another that links all the main panel stuff (and this can include the aforementioned service loop).

So at a glance it kind of seems like wasted work, but I think it did wonders for helping me get a better rental image of how things will go together here. I’ve just gotta do a lot more drawing…

Posted in Avionics, Electrical, Fuselage | Hours Logged: 1.5

Panel harness layout, again

It’s kind of challenging sometimes to keep a positive attitude right now. Even though I’m rationally aware that the stuff I’m doing is progress, emotionally it doesn’t seem super productive spending time standing around staring at things, grunting sporadically, and maybe sketching on a whiteboard from time to time. And that’s pretty much how I spent today, just really try to think about how to best route all the wiring runs behind the panel. Along the way, I changed my mind about some stuff…again. Sometimes I’m never quite sure if I’m being indecisive here and going in circles questioning myself, or actually refining things over time. I’m pretty sure it’s the latter, but the human brain sure is a pesky thing sometimes.

Anyway, the one big decision I made was about how to route the wiring runs going forward of the firewall. I’ve always been planning to bring the main power supply cables in through the left side of the aircraft, through a prepunched hole, but then there’s all the sensor connections and so forth. My working plan had been to route this bundle just inside the deep part of the forward baggage compartment – this would keep the wires from being exposed to potential damage in there.

But the more I considered the logistics of this, the less sense it made. Most notably, trying to work out the harness junction over by the right gear tower would be challenging, but also, I’d have to figure out how to get that bundle to turn a really tight corner to head for the firewall, which would mean also getting liberal with adel clamps or something to secure the bundle. The real kicker, though, was this – keeping the wires out of the baggage area to avoid damage seems good, but instead putting it right beside where my feet will go every single time I fly maybe isn’t such an improvement.

Now, there is a stiffener riveted to the side skin about halfway up from the floor, but it doesn’t stick out too far. Still seemed like this was a potential spot to route the bundle, and keep it protected and somewhat out of sight. Question was…how big would this bundle be? Kind of an important consideration. So I gathered up some of the preexisting harness pieces that would make up this bundle – the eight thermocouple wire pairs and the CPI2 bundles for the coil packs and crank trigger sensors. The only thing missing was for the other engine sensors…OK, time to go refer to my schematics. Turns out this is simpler than it seems, and all those sensors only require eight more wires. This was starting to seem manageable.

Finally, I checked the harness pieces I had against a snap bushing, and found one that they went through with plenty of room for a few more wires. Overall it looks like the bundle will be 1/2” to 3/4” in diameter. Very manageable for this spot. Really, the only thing to work out is how to secure the bundle. There are a couple of options here, but so far I’m leaning towards adding another piece of angle to create a protected space for the bundle…or I might just put some of my ample conduit supply here, just not sure the best way to secure it.

That can wait, because even if I don’t know the exact solution I’ll go with, I’m sure it’s a solvable problem, and all this head-scratching was just in service of figuring out where the harness would split back by the gear tower. Between this decision and a few other similar (but less complex) machinations, I finally got to a point where I felt comfortable expanding on my harness diagram, to cover the entire area behind the panel:

This lays out the general architecture back there: the harness will split somewhere near the right side of the upper shelf, with one bundle serving the components on the shelf, baggage bulkhead, and panel wings (the righthand branch), and another serving the removable center panel. That latter will need some kind of allowance for a service loop, so I can pull the center panel out and disconnect everything for, well, service. Of course, even as I write this, I realize that I forgot a few components here, but nothing that majorly changes things.

The one conclusion I’m coming to here is that it’s probably high time I stopped trying to envision the entire harness in my head, and started actually stringing wires and solving problems in the real world. Which means that I absolutely need to get off my butt and finish the fuselage riveting that I’ve been putting off for so long. Once that’s done, what I think I’ll do for the harness is build up the portions between the tail of the aircraft and the top of the right gear tower, and pull that through the fuselage. For the rest, including all the behind-the-panel and firewall-forward portions, I think I’ll be better off building the harnesses in place, rather than trying to carefully measure each one of those branches above and prepare harnesses on a table.

In the meantime, I can still go ahead and get components mounted to the shelves and baggage bulkhead, in addition to doing the cutting on the wings. But I still feel like I’ve got to stop putting off the riveting work. That’s sort of the elephant in the room that’s roadblocking real progress.

Posted in Avionics, Electrical, Fuselage | Hours Logged: 3

Upper shelf buildout

Well, at some point, it comes time to stop looking at devices mocked up on a shelf and actually start making some holes. I decided to make today that day for the upper shelf. This was mostly uneventful, just lining stuff up, drilling mount holes, and getting nutplates laid out. The one dumb mistake I made came while I was doing the mount holes for the Skyview backup battery mount – I’d unwisely left multiple drill bits lying around, and instead of grabbing the #21 for a #8 screw, I used the #12 for a #10 screw…so yeah, that’s now mounted extremely securely with four #10s.

With all the nutplates installed, it was time to add stiffeners. I’d been holding off on these until all the mount stuff was done, since they necessarily had to work around those nutplates. I decided to add two longitudinal stiffeners, roughly evenly spaced, plus another lateral stiffener right beside the CPI2 backup battery (the heaviest thing on this shelf by a good margin).

The stiffeners I made from some .032” sheet I bought a while back, using the cheap Harbor Freight bending brake I also bought a while back. This was a much nicer way to make this bent stuff than the hammer forming I’d been doing before. Then it was just time for more drilling, dimpling, and finally riveting. The finished product can be seen here:

Then I figured I ought to do a test mount of everything, you know, just to make sure it all fit up OK. Seems pretty decent:

Now I’ve just got to get this thing where it can be mounted in the fuselage. Just got to lay out a few more screw holes and get the matching holes and nutplates installed on the forward braces.

Posted in Avionics, Electrical, Fuselage | Hours Logged: 5.5

Upper shelf complete

Well, in terms of structure, this thing is done. Tonight was just attach points laid out and wrapped up.

The shelf attaches to the two forward braces, both of which have a Z-shape profile. At the forward end, the horizontal part of the shelf lays on top of the middle of the brace, while at the aft end, the vertical part of the shelf sits just behind the brace flange. The forward spot was pretty easy; I laid out the holes, drilled them, and installed the nutplates. The attach hardware here will be AN3 bolts; way stronger than needed, but these mount holes will double as attach points for the adel clamps that will hold the wiring harness trunk.

The aft end was a bit more interesting. Since the shelf and the brace mate in a vertical plane, that means there’s no natural support for the weight of the shelf unless the screws or installed. My intent is for this shelf and all it components to be removed as a unit for service, which would probably make this a cumbersome choice. So I decided to add some support tabs on the shelf, to allow it to rest naturally in place even with no screws installed. Some scrap Z-bracket material from the fuel tanks worked great for this; I just made two small angle tabs and attached one at each end:

Then it was just the same routine of laying out the screw holes, drilling, and getting the nutplates installed. Here I’m just using #8 screws, which is probably about all I could manage anyway, as there’s a lot less material on the flange as opposed to the center of the brace.

So here it is, the shelf installed in the fuselage:

And a different angle, showing the forward attach hardware. I added the adel clamps just to give an idea of what the wiring routing would look like:

I’m kind of wondering if I should use screws here instead of the bolts. My thought with the bolts was that using a screwdriver deep behind the panel and up against the baggage bulkhead would be unpleasant. But getting these bolts started through the adel clamps isn’t exactly fun either. For now I guess I’ll stick with this, and see how much I hate my life when the time comes to install this shelf for real…

Posted in Avionics, Electrical, Fuselage | Hours Logged: 2.5

Baggage bulkhead component mounts

Well I sort of took a lazy approach to today, but did still get out and get some stuff done. With the upper shelf done, that left me with two things to attack: either the baggage bulkhead or the fuse shelf. I ended up going with the former, mainly because it was a lot more straightforward.

I already had all the component locations here laid out and marked a while back, so there wasn’t a lot of decision-making involved. Really the only thing missing here is the CO detector, which should be here this coming week. That’ll only need a couple screws, so no worries there.

I also decided to take a different approach to mounting these components. Instead of going with the nutplates like I did for the upper shelf, here I went with a sort of home-brew stud mount approach. My motivation here was twofold: first, to avoid having a lot of nutplates and screws sticking into the forward baggage compartment, and second, to hopefully make working with these components easier in the future, since I could slide them into their stud mounts and add nuts.

The idea here is to just drill the mount holes, and install screws from the compartment side, with thin jam nuts and star washers to lock everything together. Then the component just slides over the ends of the screws and nuts hold them in place. The end results leaves the baggage compartment side looking nice and clean:

Everything worked out pretty well, but I did have to make one change: I was only able to get 2” long machine screws for the EMS/ARINC stack mount, and those weren’t quite long enough to accommodate things as they were. But I had some margin between the two components, so I just shortened my four spacers a bit to tighten everything up, and now things site nicely:

I guess now I’ve got to figure out what to do with the fuse shelf. I ran into an issue with my mount hardware previously – the long #10 screws I got for the fuse blocks have heads too large to fit into the recesses in the blocks. So with my last hardware order, I added some smaller-head screws…except when they came in, I discovered I’d inadvertently ordered #10-24 coarse thread screws, instead of the -32 I needed. So…can’t use those with the nutplates I have.

I’ve kind of thought about doing my stud mount thing here as well, since anything sticking off the bottom of the fuse shelf will be where my knees go. I’m not quite sure how big of a deal this is, so before I decide to go fancy here, I think I’m going to put the fuselage back on the sawhorse so I can climb inside an evaluate how close my knees might get to the shelf. If it’s not super close then I’ll probably just keep it simple and go with nutplates.

Posted in Avionics, Electrical, Fuselage | Hours Logged: 2

Fuse shelf planning and such

Alright, time to figure out some stuff with this fuse shelf. Shouldn’t be that hard, right? After all, I’ve already spent untold hours scratching my head and conceptualizing the layout and all sorts of stuff. Surely all I have left to do is finalize it all…surely…

First up was answering the question of whether using screws from above to nutplates was an OK choice. I mentioned last time I was wondering if this might be problematic with my knees being in the same area. So I brought over the low sawhorse, dropped the fuselage off the rotisseries setup, and temporarily installed the seat floor and front seat. Sitting inside, it was quickly evident that I had nothing to worry about with the nutplates. Even if I stretch my legs out as far as they can go, where my feet touch the firewall, my knees were just barely even with the back end of the shelf, and way below it. If I pull my feet back so my knees stick up further, my knees are completely behind the aft cabin brace, and thus totally clear of the shelf. I don’t think it’s physically possible for my knees to touch the bottom of this shelf.

OK, good deal. Next up was the question of attach screws for the fuse blocks. The original screws I bought for this have heads that don’t fit into the recesses in the blocks. The screws I bought to remedy this have the wrong thread. I could go searching for the perfect screw for this job…or I could just modify the ones I have. As you might guess, I went with the latter; the screw heads were only about 0.03” too large, so it was pretty easy to just grind them down a bit so they fit in the recess.

Alright, just solving problems left and right, time to nail down the component positions and get some holes drilled! Well…not exactly. It’s incredibly hard to visualize the routing of all the wire bundles here, and I felt like I really needed to work that out before committing to anything. At one point I decided to get some Romex I had lying around, pull the individual conductors, and use that for trialing the runs. But that didn’t seem to help that much, and in fact just made me more unsure about the whole setup. The problem was always the same no matter what I tried: there was a lot of stuff going a lot of directions and not a lot of space to make it all work.

This led to me doing a few research sessions, and after lots of poking around and thinking I decided to do some rearchitecting. Basically, the decision was to relocate some components off this shelf – specifically, the battery bus fuse block and the endurance bus alt feed relay are going to move forward of the firewall. This is actually good from a safety standpoint, since it means there won’t be an always-hot wire entering the cockpit, which would have been the case with the battery bus inside. That wire would, of course, have been fused, but it does still pose the possibility of a spark in the cockpit in case of an accident.

Anyway, removing those components vastly simplifies the fuse shelf. Instead of two power feeds that have to go several directions and join at the e-bus, now there are just two fuse blocks, two power feeds, (one for each block), and the e-bus diode tying the two together. This allows for super simple routing, and also leaves lots of room for the other bundles to be routed cleanly.

I did still go with my Romex routing idea, just to better visually represent things:

Here we can see the main bus block on the left, the e-bus block on the right, and the diode tying them together. Entering at top left are the two power feeds; these will be a fat 6-ga wire for the main bus, and a smaller 10-ga wire for the alternate fed to the e-bus. Individual circuits from the two blocks will route around the perimeter, along the lower (ie aft) side, and back up on the right before exiting at upper right.

One seemingly odd thing here is that the components aren’t centered on the shelf. This is actually intentional, and is done to support the need for the shelf to pivot. The wire bundles entering/exiting the shelf will be close to the pivot point, but they’ll still need to twist a bit to allow for movement; with that in mind, I need to make sure I provide a long enough “unsecured” run on each to allow for the twist. This is why, at both corners, there’s a plain plastic loop at the edge, and an adel clamp further inboard. Both bundles will also have an adel clamp just outboard, mounted to the baggage bulkhead, so each bundle will be snugly clamped in two spots about 4” apart, with just the loose loop in the middle to keep the bundle clear of the shelf edge.

So that’s pretty much the final layout; by the time I got to this point it was a bit late, and I want to sleep on this before I commit to actually making any holes, even though I’m feeling solid about this, far more than I was with previous iterations.


Posted in Electrical, Fuselage | Hours Logged: 3.5

Fuse block mounting

Quick little jaunt in the shop this evening – it cools off pretty quick after dark, and I guess after seven years Houston has fully transformed me into a warm-blooded creature. Anyway, I just finalized the fuse block locations, drilled the mount holes, and got the nutplates installed. Probably could have gotten the e-bus diode done too, but the soup I chucked in the Instant Pot for dinner was done at that point, so I retreated into the heat.

Posted in Electrical, Fuselage | Hours Logged: 1

More fuse shelf stuff

Yep, more work on the fuse shelf. Today I drilled the mount holes and installed the nutplates for the e-bus diode. I considered also going ahead with the holes and nutplates for the assorted adel clamps that will secure the wires here, but I think I want to wait until I have the wire bundles mostly in place before I do that, just to be sure I’m locating everything well. No real reason to commit just now other than the general desire to make holes in things.

Instead I decided to go ahead and make the short jumper wires to connect the diode to the two fuse blocks. Hey look, things are, like, connected!

After that, I set about working on the quarter-turn fasteners used to secure this shelf. As originally installed, these are just a bit too long for the application – they’ll grab the receptacles OK, but I didn’t like how easy they were to disengage – seemed like they might be prone to coming loose with vibration. My original fix for this was to just slip some small o-rings onto the fasteners, and that did indeed snug them up nicely – but the o-rings also got squished out and fell off the fasteners in short order. Obviously not a satisfactory solution.

So when I placed my last order with McMaster, I got some new retaining rings for the fasteners (these are one-time use items, no good way to remove them without ruining them). For spacers, I just used some thin AN4 washers. Actually, I originally tried regular AN4 washers but they were too thick. Fortunately I was smart enough to only do this to one fastener before testing. This still took a few iterations of test-fitting the shelf in the fuselage, though.

Then I decided it was high time to get the fuselage prepped for finishing the bottom skin riveting that’s been put off forever. So I set about removing all the stuff I’ve been working on these past weeks – the upper shelf with its stuff, the panel and supporting structure, and all the baggage bulkheads/floors/panels and attached components. Oh, and the control column came back out too. Don’t want that flopping around when I roll the fuselage upside down again, after all.

Finally, I revisited the aft mount points for my two under-floor conduit runs. Some time ago, I secured these runs using zip-tie mounts attached to the lower skin with 3M VHB tape. Most of these stayed put, but I guess I had a little too much tension on the aft mounts – probably I was trying to stretch the conduit a bit to try to straighten it and make running stuff easier. In any case, both the zip-tie mounts unstuck from the tape squares. So I removed the old tape (which definitely had plenty of adhesion to the aluminum), cleaned the area, and re-stuck two mounts. This time, though, I didn’t immediately secure the conduit to the mounts – I’ll let those set up for a day or two first, and this time I don’t think I’ll try so hard to pull the conduit tight.

And that was a good half-day’s work. I need to go dig out the manual pages for the riveting so I can refamiliarize myself with what needs to be done. I also need to get some dimpling done on the antenna mount locations, where the doublers will attach. That’s going to be a fun job – I think the only real way I can do those is with the little pop-rivet dimple dies, and those aren’t the most fun thing in the world to use. Got to be done, though…

Posted in Electrical, Fuselage | Hours Logged: 3.5

Assorted detail wiring prep stuff

Now that was a good solid day’s work, which is exactly what I wanted. Since I haven’t taken much in the way of vacation time over the past year or so, I’ve got a ton of time saved up, and with no plans to go anywhere any time soon, I decided to just take myself a two-week staycation. My intent is to go bananas on airplane work, and today was the kickoff day.

The general idea is to get going on these wiring harnesses. I’ve got most of the big ideas in place from previous planning, but there were still some details to work out, and that was my focus today. Overall, the day’s work was kind of all over the place, but that’s honestly my comfort zone when it comes to abstract work like this, sort of taking it all in and working on things as they come to me. Anyway, the main stuff remaining to finalize were locations and/or wiring runs to: both seat heaters, both control sticks, charge ports front and rear, rear headset jacks, and the ELT antenna.

The ELT was the first thing I looked at, figuring it’d be fairly straightforward. My plan has been to mount the antenna on the right rear armrest, with the antenna curving around the bulkhead above the seat. Locating this antenna on an RV-8 is a little interesting; there’s not much in the way of exterior skin space that’s usable. On top of the tail would be a traditional location but the sliding canopy means almost all that area has to be clean. The old 121.5MHz antennas would go well underneath the empennage fairing, but the newer 406MHz antennas are too long.

Anyway, remember how I thought that’d be simple? Well, the antenna seems like it needs to be mounted at an angle to make that work, and I never could settle on how I wanted to do that, and eventually I sort of quietly moved on to something else, namely the seat heaters. Figuring out where to route the harnesses seemed like it really required that I have the heaters installed so I could see where the plugs would sit…so I pulled out the seats and heater pads and got to work.

These pads are kind of cool; they’re trimmable (in one dimension, at least) to fit inside the seat cushions. The pads for the setbacks didn’t need any trimming, but the bottom cushions definitely needed some work; I trimmed those both for length, as well as cutting a slot in each to allow the harness crotch strap to pass through. Here’s one of those pads, marked for cutting, but with me taking a photo and trying to put off the point where I started chopping off parts of these non-cheap (but not stupid expensive, though) pads:

Of course, I wanted to test out the pads as well, so for both the front and rear seats, I laid the cushions out on the workbench, attached the pads to the provided wiring harness, hooked them to my power supply, and cranked the heat. Yup, they get nice and warm. Hey look, another photo!

In practice, I’m not going to actually use the harnesses shown above. As provided, the heater system provides a switch with off/low/high positions, and makes use of a bulky relay to do some of the switching. I’m going to be ditching that entire setup and just controlling the heat level using a couple of PWM dimmers. Before I could do that, though, I needed to figure out how the wiring would work, which meant reverse-engineering the heater harnesses. Turns out, at the end of the day, it’s pretty simple: with the switch on low, the two heater pads are connected in series, and with it on high, they’re in parallel. Thus on high they draw about four times the current and get warmer. For my setup, I’ll just be wiring them up in parallel, since I want the highest PWM setting to correspond to maximum heat.

So there…seat cushions with harness pigtails. Next up was a whole lot of installing the seats, moving the pigtails around, scratching my chin, removing a cushion or two, thinking some more, reinstalling, etc. Most of the thinking here revolves not so much around being able to connect stuff, but wanting to keep the harnesses as hidden as possible, while still allowing for serviceability; the seats are going to come out on a semi regular basis, as are some of the covers in the vicinity that are involved. So kind of a lot of thinking forty steps ahead.

That was the main thrust of the day, but just to list some other stuff I was considering:

  • How to handle stick wiring. Will the grip pigtails come out the side of the stick? Where? How will I allow the rear stick to detach?
  • Where do I want the rear headset jacks to go? My initial idea was unworkable. I think I’ll end up putting them on the right armrests, but not 100% sure. I’m going to go looking for ideas tonight.
  • Oh hey, I didn’t even account for wiring the flap motor in my harness diagram. Oh wait, how will my up limit switch work? Do I need/want a different control system?
So while actual work in the shop is done for the night, I’ve got a whole list of research topics, which will probably culminate in some part/component orders. Which sounds like it could be a hangup for wiring progress, but I don’t think it is. All of today’s work was just leading up to pulling ribbon through the fuselage so I can work out all the assorted branch lengths for the harness. With the exception of the charge ports and headset jacks, I’m pretty much at a point to keep going with that.
 
So, let’s see what tomorrow holds…
Posted in Electrical, Fuselage | Hours Logged: 7.5