SB 14-01-31 pt 2

Whew. While I’m making decent progress on getting this SB done, it’s proving to be a real drag, and I can say with conviction that I’ll be happy when it’s done.

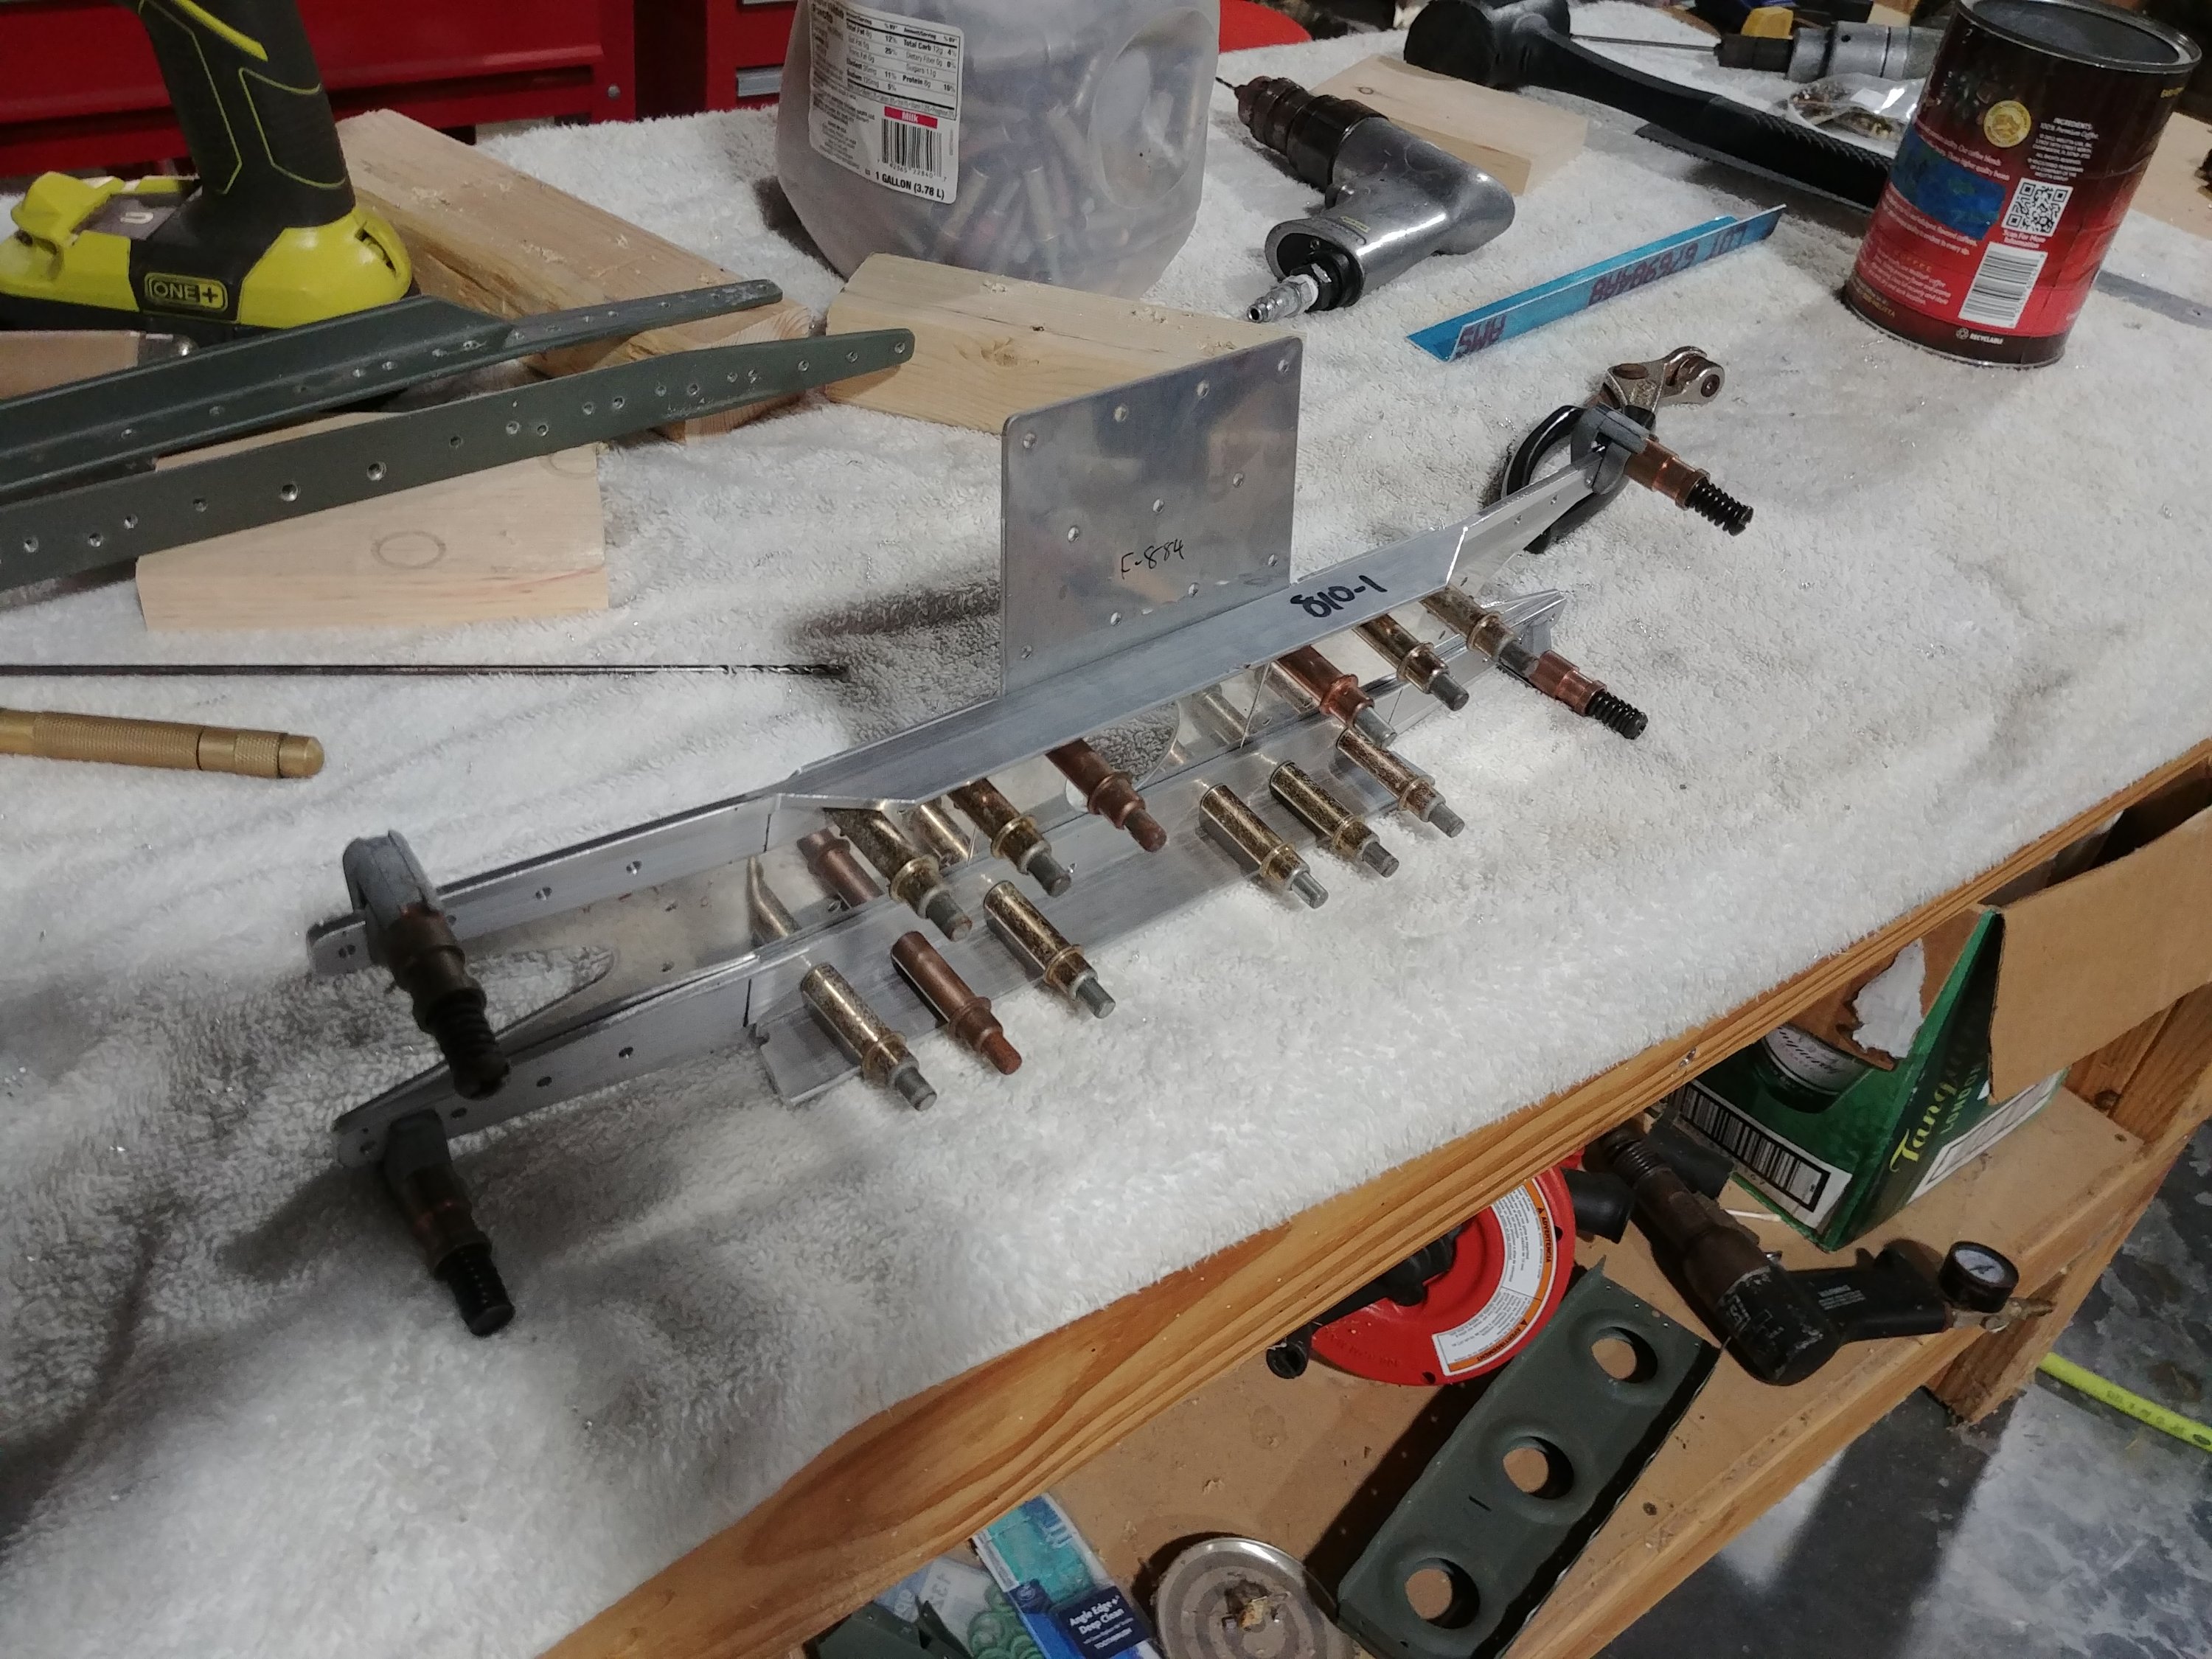
First up today was drilling out the rivets common between the inboard stab ribs and the spars. These took…some time. Universal head rivets are already a little tricker to drill out than flush ones, since it’s harder to keep the bit centered on the round head, but adding in the limited access made these a lot more fun. Long story short, pretty much each rivet presented its own unique challenge. But I did get them done, and without any apparent damage.

Next up were the rivets between the spar webs and the reinforcement angles. For these, I had better access…sort of. It was easy to get to the forward side of the spar, but that side had the shop heads, not the manufactured heads which is where you normally do the drilling out.

In the end, I decided to drill these rivets out from the shop head side. My reasoning here is that that’s the side where the angles are, and if I’m going to damage a part and need to replace it, I want it to be the reinforcement angles – which I’m removing anyway – and not the actual spars – which would be a royal pain to replace.

I’m not sure if that was a good idea or not, but so far, I’ve managed to not do any real damage. I did slightly enlarge one hole, and I put some semi-deep scratches on one of the angles, but those should be easily removable. But boy, did it ever take a long time to get all these out. Drilling the shop head means there’s no real way to be sure the drill is centered not he rivet shank, so some serious care is in order.

So, at the end of the day, I had all the rivets in the center of the spar removed, which is good news:

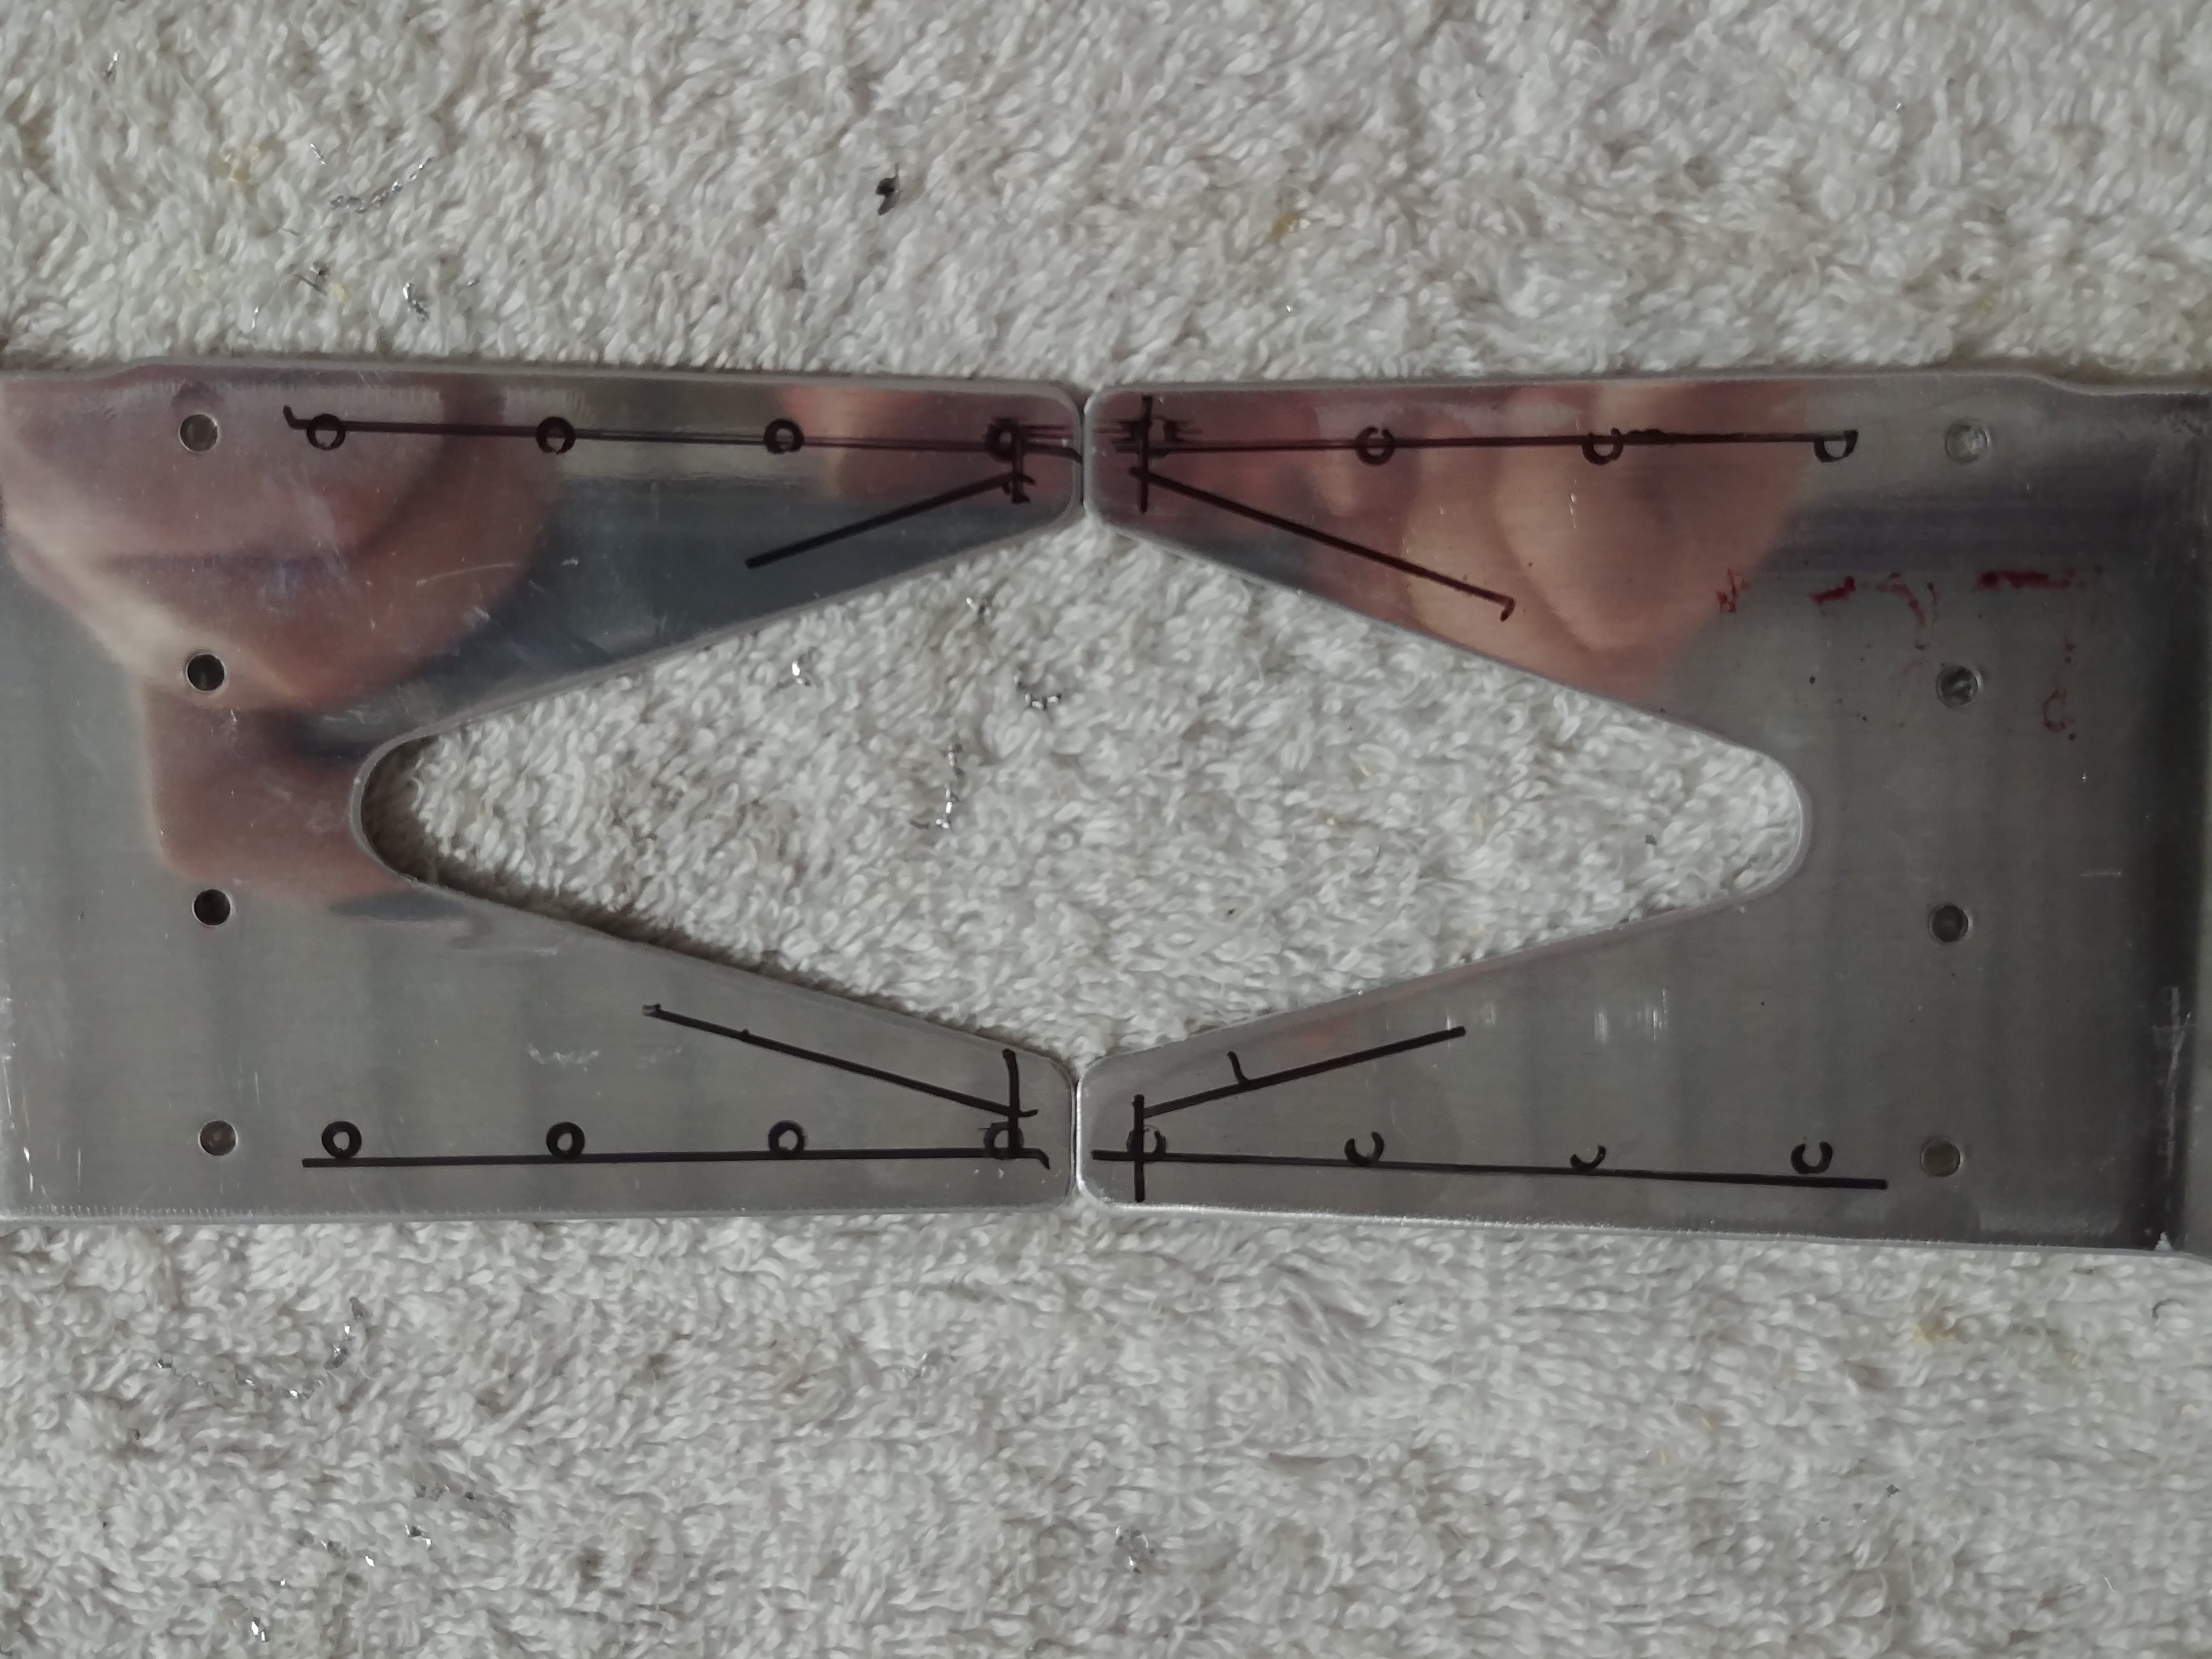
The bad news is that, as much trouble as I had getting these rivets out, they’re still comparatively a cakewalk compared to what’s coming. Now I have the sixteen inboard rivets to deal with, which are inside the stab structure:

I’m really torn about whether to drill these out from the angle side (with the shop heads) or the spar side. Access is far tighter on the angle side, which would kind of multiply the difficulty of drilling out from the shop head side. It’d also make it a lot harder to drive out the rivet shanks after drilling them out. But there’s still that whole point of preferring to damage the angles. I’m seriously considering pausing work on this SB and ordering a rivet removal tool from Cleveland. Using that tool makes it easier to be certain of being centered on the shop head, and also prevents drilling too deep. I’ve looked at this tool in the past, but never felt it was necessary…but adding in the limited access and high stakes here is making me think it might be worth it.

Actually, I might ask around a the neighborhood coffee thing tomorrow morning, maybe someone has one of those already and I can borrow it. I know there are a few people out here with some serious tool collections.

Posted in Empennage | Hours Logged: 3.5

SB 14-01-31 pt 1

Back at it again! Before I got to actual plane work tonight, I had a goodie box from Aircraft Spruce waiting for me at home. There was only one thing (well, four things) in there I really needed – four longer AN3 bolts to properly assemble the throttle. I also bought a bunch of AN3 nylock nuts and washers, just cause it seemed my supply was a little lower than it ought to be. I’ve been trying to keep separate the nuts I use for temporary assemblies, and only use new ones for final assembly, but I think I’ve been going through more than I need to. Technically nylock nuts shouldn’t really be reused at all, since the nylon locking stuff degrades after a while. And lest anyone think this isn’t serious business – the deadly crash at the Reno Air Races a few years back was traced to a nut that had been reused too many times and lost its ability to stay tight.

Anyway, I’ll put that soapbox away…the last thing in the box was the expensive item I added so I could get free shipping. It’s my heated AoA pitot tube from Dynon, and hoo boy is it shiny and fun to look at:

Not going to need that any time soon really, so it’s now sitting on a shelf. Before getting going on the real work for the night, I took those bolts and reassembled the throttle quadrant to its now-painted mount, then added the cover plate just to see what it looked like. I think this turned out pretty well:

I even laid it in the fuselage to see what it would look like in place. Seems decent to me:

That went on a shelf too – I decided not to actually install it in the fuselage, as specified in the manual. I figure I might as well leave it out until I really need it there.

And then it was on to the real work of the night, getting going on the h-stab service bulletin work. At a high level, the work involves removing the inboard ribs, partially disassembling the forward spar, doing the work to add the reinforcements, and then putting everything back together. Tonight I just worked on drilling out all the rivets between the skin and those four ribs.

There’s been no shortage of rivets I’ve drilled out over the course of this project, but they were always in small numbers, just a few at a time. Here, I was removing them en masse, which opened the door to getting careless. Drilling out rivets is precise work, and it’s a lot harder to keep the precision up when you’re doing it 40 or so times. Nevertheless, I got all the rivets out, and there’s only one hole where I think I may have enlarged it slightly.

The ribs are still in place for now – I also have to drill out the rivets attaching them to the spars. That part is going to be tougher; I won’t have great access to the manufactured heads, so I’ll probably have to use an angle drill for them. And there will still be even harder ones once I get to removing the reinforcement angles from the spar – those project into the stab a bit. That’ll be where I’ll have to be really careful not to damage anything.

But anyway, that was all I got done tonight. Hopefully I can get all this SB work knocked out this weekend, and move on to mounting this thing to the fuselage…

Posted in Empennage | Hours Logged: 1.5

SB 14-01-31 prep

OK, again not a lot got done tonight. What was supposed to be a quick adjustment to the riding mower ended in a stripped bolt and general annoyance, but even though I wanted to go inside and mope, I decided to still do something on the plane. (also, this would not be the end of frustration tonight…more on that later)

While I didn’t log anything as useful work last night, I did spend some time tidying up a workbench, dismounting the vise, and moving away the tool cabinets I usually have beside it – this was all in preparation for bringing the horizontal stab down off the wall. The time to fit it to the fuselage is upon me, but before I do that, there’s a service bulletin to be dealt with. This involves adding some reinforcement to the forward spar of the stab, where cracking has been observed in some aircraft. It’s not required that the repair be done unless cracks are observed, but it seems prudent to me to do it now as preventative maintenance.

Anyway, last night wrapped with me bringing the stab down to the bench, ready for work to start. Tonight I began by removing the elevators – which I’d just been storing installed on the stab. First, I removed the AN4 bolt through the center bearing. This bolt runs through that bearing and each elevate control horn. It’s important to be careful removing this bolt; in the space between each control horn and the center bearing is a handmade spacer, sized carefully to exactly fill the gap and prevent binding of the surfaces. So I carefully removed the bolt, placed the spacers back on it in the correct portion and orientation, and made sure to mark which side of the airplane the bolt head should go to.

Next up are the two outboard pivot bolts for each elevator. Nothing too horrible here, though access to these things is a bit obnoxious. But I got all four off, removed the elevators, and set them aside. OK, now to just put these four AN3 pivot bolt/nut/washer combos with that AN4 assembly I removed earlier…hmmm…uhh, where did that go?

And this is the other frustration of the night. I looked for that stupid bolt/but/washer/spacer assemblly for half an hour, to no avail. I don’t even understand how I could have possibly lost it. At no point between the time I marked it and the time I finished removing the elevators was I outside of about a ten-for circle. There just aren’t that many places I could have physically put it.

But…I never found it. Even after going inside, sitting for a bit, and then going back with a hopefully-clearer mind.

So I guess either it’ll magically turn up, or I’ll get to repeat the exercise of fabricating those spacers. Probably have to order another AN4 bolt, pretty sure it was a unique length that I only had one of. Which is also annoying since I just placed an order with Spruce for some assorted stuff.

Oh well. I guess tomorrow I’ll see if I can get going on actual SB work.

Posted in Empennage | Hours Logged: .5

More painting

Well, this wasn’t the productive day I’d hoped for after all. Not sure if I did too much yesterday or not (in fairness, I was going strong from about 7 AM to 10 PM), but today I was just super tired and ended up sleeping a lot. I did still prime all the throttle quadrant parts, and shoot flat black paint on the stuff that would be visible.

That’s really it, though. No workbench cleaning off, no getting the horizontal stab down. Oh well, tomorrow’s a new day…

Posted in Fuselage | Hours Logged: 1

Interior painting, plans stand thingy

So I’m only logging this as an hour and a half on the build, but there’s a fair bit more time covered here, over the course of the last thee days.

Most of this was addressing what’s been sort of a chronic problem for most of the build – what to do with plans pages I need to refer to while working. I’ve done various things with the sheets, most recently just laying them out on a workbench. This works, but it means one of my workbenches (half of my “inventory”) is kind of unusable. And I’m about to need my standalone workbench clear, because it’s about time to pull the horizontal stab off the wall and get working on the service bulletin fix.

In the miss of all this, I was watching a youtube video where Steve Thorne (FlightChops) was getting started on his RV-14 build. Somewhere along the way they were using this sort of large podium-type thing, and I thought it looked like a useful thing. I’d thought about getting a drafting table for the plans but those are expeeeensive. This, however, seemed to cover the general idea.

Basically, it’s a ~waist-height table, with a bit of a slope to it. I decided to make mine with a sort of cabinet on top, where the table top hinges up. This way, I could store all the plans sheets inside, and be able to easily pull out the one I need at any time. I also decided to build a high frame on the back, and attach a pair of dry-erase boards that’ve been sitting around the hangar. I’ve been wanting to get those hung somewhere so I can start tracking punch-list-type items and so forth, but I never was sure where to hang them.

So the result is that I have this sort of “admin station” or something like that. Framed out with 2x4s, set on locking casters, and with a plywood cabinet built on top. It’s not going to win any furniture-building beauty contests, but it’s functional.

About the only thing I still want to figure out is some way to clip the plans sheet on the top down…I don’t want it blowing in the wind, after all. Normally I put random heavy objects down when I set these on the workbench, but that doesn’t really work here thanks to the slop. I probably could have made that a bit more gentle.

Anyway, here’s this contraption after I finished it up this morning (note ancient-history markings no one white board…hope those aren’t too much trouble to clean off):


Interspersed with that work this morning, I got the seat floors and baggage pan painted up. Lots of waiting involved here, so it works well as a sort-of concurrent thing. Gotta clean and scuff the things, then let them dry thoroughly…shoot primer, let it dry for an hour or so…then add the stone-texture paint, which also takes an eternity to become dry enough to touch. But hey, painted stuff!

Tomorrow I want to finish getting that workbench cleaned off – there’s still some random stuff sitting on it, but more important, it has my vise mounted, and that’s not going to work. I’ve considered mounting the vise to a small piece of 3/4” MDF, which I can clamp to the workbench when I need it. But I kinda suspect that the vise might not hold as well as I’d like if I do that. So maybe I’ll just consider this a temporary removal, we’ll see.

Also, I still need to talk Josie into helping me finish riveting the forward bottom skins…

Edit: Oh…I almost forgot. While I was picking up the lumber at Home Depot, I also picked up a few different black spray paints to try out (flat/satin/semi-gloss). While I was doing painting stuff today, I cut there little test squares and shot each one with a different black. Tomorrow I’ll compare them to the anodized throttle quadrant and decide which one matches the best. So far, semi-gloss unsurprisingly looks way too shiny, so I figure it’ll be either flat or satin, Given a choice, I’d rather go with the flat if it works, since I’ll likely end up painting the instrument panel with the same paint. Don’t want any more reflection there than I have to have.

Posted in Fuselage, Workspace | Hours Logged: 1.5

Seat floors done (structurally, at least)

No photos tonight, it was just sort of menial work. I riveted the rear seatback hinge half in place, in assembly with the appropriate stiffener. Then there were four nutplates on each seat floor that needed to be riveted – which required final-drilling, deburring, and countersinking. There were also eight nutplates that needed to be riveted to the forward baggage floor before I could call this section of the manual done. I did notice that apparently I never did any edge finishing on that baggage floor, but I ran out of time to do that tonight.

The only thing left to do on these pieces now is to prime and paint them. Looks like this weekend might be a paint weekend at this rate; I also have the throttle quadrant and right console that are ready for painting, which takes me back to the topic of picking a black paint I want to use for those pieces.

Beyond that, we still need to go back and finish the riveting on the forward bottom skins – I took some time tonight to review the manual and make sure I had an understanding of the things I’d skipped over previously.

Once that’s done…it’s on to the horizontal stab. This thing is about to start looking a whole lot more like an airplane…

Posted in Fuselage | Hours Logged: 1.5

Riveted seat floor stiffeners

Not much to report tonight. I gave the seat floors a good cleaning and back riveted all but one of the stiffeners in place. The one I left iff gets riveted in assembly with the rear setback hinge – that’ll be on the docket for the next work session.

An interesting tidbit here: the instructions specifically say not to back rivet six of the stiffeners here, which are at the forward part of the two floors. I could not for the life of me figure out why I was supposed to delay those, so I asked around on VAF after the last session. The consensus seems to be that it’s to make it easier to install the floors, which does make sense – it takes some maneuvering and bending to work them around the bulkheads and such. But it really seems like a pain to rivet these after the floors are in place.

One person reported that he riveted his ahead of time and was able to get them in. His reasoning was that if he ever has to pull the floors, he’ll have to get them out with the stiffeners in place, might as well figure it out now. I’m thinking more in terms of being able to get these pieces primed and painted before installation – I’m trying to avoid, as much as possible, doing any painting in place inside the cabin.

So anyway, sometime next year when it comes time to install these for good, we’ll see if I end up regretting this decision. In the meantime, here’s a photo of a floor with some stiffeners:

Posted in Fuselage | Hours Logged: 1

Seat floors ready to be riveted

I did it! Two days in a row of getting up and getting an early start out in the hangar. I started carrying my 6 AM weekday alarm into the weekends about a month ago, but until now I’ve just been turning it off and going back to sleep. I think getting going early in the morning is going to be important to maintaining momentum here.

I did still have a few hours distraction, between going to have coffee with neighbors and doing some other work around the house. It also doesn’t help that once midday rolls around, I can only handle about an hour or so in the hangar before I have to go inside, drink some water, and cool off. But at least I’m doing stuff and putting up with the heat and not just deciding it’s too hot to work.

Anyway, today I launched into prep work on the aft seat floors. There are ten stiffeners in total, and thanks to the taper in the fuselage, they come in five different sizes. I got all those separated and deburred, and clecoed the whole assembly together (both aft seat floors and all the stiffeners. Next was getting the bottom half of the hinge that will serve as the attach point for the base of the rear seat back. This only had a single #40 reference hole in it, so it had to be carefully aligned and drilled, using the prepunched holes in the floor as a guide.

Hey look, a photo of everything clecoed together!

Interestingly, the manual never actually says to final-drill the rivet holes between the floor and the stiffeners, but pretty quickly it jumps to deburring the dimpling them, and obviously final drilling is a prerequisite for that work. Then everything came apart and, yup, time for a bunch of deburring. This included not just the stiffeners’ rivet holes, but also all the #30 holes between the floors and the seat ribs in the fuselage, which were match-drilled a while back. And that meant deburring all those seat rib holes too…that was a bit tedious.

Finally, I broke out the squeezer and C-frame and got all those #40 holes dimpled. Next step: a bunch of back riveting!

This is actually where the manual gets a bit interesting. It says to rivet only some of the stiffeners, not all of them. I’m not really sure why some of them need to be delayed, I want to read ahead and see if I can figure it out. I’d prefer to get everything riveted in place and go ahead and prime and paint the floors, but I want to do that as late in assembly as possible, especially in this case since back riveting would probably mess up the paint and I’d have to touch it up.

At some point I need to go way back in the manual and finish riveting the forward bottom skins. Back when I was doing that, I got as much done as I could by myself, but decided to move on to other things and recruit Josie to help later on. Well, it’s really later on now…I did broach the subject, and she seemed up for it, Maybe we can get it done next weekend, or one night this week. If I recall correctly, it’s not really a ton of rivets, and could probably be done in one solid work session.

All this is just putting me ever closer to the really fun job of hanging the horizontal stab. Except I suppose I should tackle the service bulletin fix first; in case I ruin the thing, I’d rather not go through all the work of fitting it first…

Posted in Fuselage | Hours Logged: 3.5

Some nutplates

Bit more progress today. A lot of the day was taken up with the monthly local RV people lunch, along with some other home-project stuff, but I got up early enough this morning to get some work in, and then got some more in after dark.

But yeah, it was just nutplates. First up were the four nutplates where the aft control mount will attach. These weren’t too hard, just had to set up the nutplates, drill the holes, countersink, and set the rivets.

The other two were more fun. Way back, just ahead of the baggage bulkhead, is where the two bearing blocks that support the ends of the flap weldment sit. One of the two holes for each block is prepunched, and that nutplate was riveted, I think, back before the seat angles were even installed. The second hole was drilled using the block as a guide, and now it was time to install those second nutplates. Access here is a lot more fun, since they sit really close to the fuselage side skins.

It was clear from the beginning that this would require the angle drill attachment. Drilling the holes went well, but then they had to be countersunk. There was no room for the countersink cage here, so I just threaded the countersink cutter into the angle drill extension, and sort of eyeballs the countersinks. And I just had to get a photo of this Rube Goldberg arrangement (side note: there’s a lot of mud dauber debris still down there):

Next up was figuring out how to rivet these. The construction manual suggests squeezing them using a pair of flat vise grip pliers. For one thing, that seems super ghetto to me. For another, I don’t have a pair of those. I elected instead to use blind rivets for these nutplates…way easier.

And then it was 11:00 and time to call it a night. Next up will be getting the stiffeners in place on the seat floors.I guess I should see about priming the cable anchor for the throttle quadrant at some point too…probably easier to do that on the weekend when I have plenty of daylight, vs trying to squeeze it in on a weekday evening.

Posted in Fuselage | Hours Logged: 1.5

Assorted seat floor-related stuff

Back at it again tonight. To start with, I took a look at the construction manual and confirmed I was basically done with the throttle quadrant section. The only remaining steps here are to prime and paint the throttle quadrant and cable anchor, but that wasn’t stuff I could do tonight. I do, however, need to think about what I’m going to do about paint for the quadrant. While I’ve been painting all the assorted interior stuff with the granite texture paint, I know I’m going to want the panel, for example, to be a different color. Probably the glareshield, too. And since the quadrant itself is black anodized aluminum, I kind of feel like the surrounding mount should be black as well. And then I’ll probably make the right-side console black also just for some sort of symmetry.

All that is to say that I’ll probably want to pick up some paint to test with soon. The final step in the quadrant section is to mount it in place in the fuselage, which seems like a point at which it ought to be final painted (though it is removable). Just something else to think about…

Anyway, with that section put to bed, I moved back to where I left off with the seat floors. I don’t even remember any more why I stopped in the middle of those and jumped ahead, I guess I should look back and see if I mentioned it at the time. But anyway, the first order of business was installing nutplates on a couple of floor support angles. This was a bit annoying, since said angles are already permanently mounted to the seat ribs. Ergo, I had to work inside the fuselage, and there wasn’t a ton of space.

The fun part was deciding how to put the nutplates in place to serve as drill guides. Normally I’d put them where they’ll be finally, and hold them in place with a screw, but in this case that would have required drilling the rivet holes with an angle drill. The other option was to screw them in place on the top/accessible side of the angle; that made drilling easy, but I had to use a stubby screwdriver at an awkward angle to hold them in place. But it wasn’t too bad:

With the holes drilled, I just had to countersink for flush rivets and rivet the nutplates in place. Done!

Next on the docket was the aft control mount. This is a beefy chunk of aluminum that, well, serves as a mount point for the control column. First order of business here was demurring the thing. That’s always fun on pieces like this made of super-thick material. The tooling marks on the edges are substantial and take a bit to remove. I ended up using a combination of the vixen file, bench grinder, and Dremel with assorted sanding bits to get this done.

Then it was time to pull the seat floors out of the fuselage, where they’ve been clecoed for…some time. Removing them was pretty easy, but that led to more fun. There were several sizable mud dauber nests hidden under them, so I got to spend some time removing them. By the time that was done, it was 10 PM and it seemed like a good time to quit for the evening.

I’m hoping that, before the weekend’s out, I can get those seat floors completed (I think they just need stiffeners cleaned up and riveted) and then primed and painted. We’ll see how that goes…

Posted in Fuselage | Hours Logged: 1.5