Fuselage

Fitting gear towers to forward floor

First order of business tonight was to finish bolting the weldments to both gear towers. When I did the right tower last night, I actually took the time to torque all the bolts, but tonight I refrained from doing that. I figure that if possible, I’ll remove the bolts before I spray whatever top coat I decide on for the interior. Anyway, with the weldments bolted to the towers, it was time to mate the towers to the forward floor assembly:

IMG 5847

IMG 5848

In the left foreground of the second photo are the two mid-cabin braces. These will be riveted to the back of the gear towers, which means they need to be clecoed in place. Except…oops…apparently I needed to skip a rivet on each of the towers where the braces rivet in assembly:

IMG 5850

No worry though, I’m far beyond the point of stressing over drilling our a couple rivets. Once I got those out and clecoed the braces in place, I figured I was mostly done with this assembly for the night. I still need to go back and rivet the firewall together, so I got all the angles and weldments clecoed back onto that. And then I just kind of went wild clecoing stuff together just to get an idea of what the forward fuselage assembly was going to look like. None of this is really necessary, but it sure is motivating.

Baggage compartment bulkheads, floor, and walls clecoed in place (view from the rear side):

IMG 5851

And from the front (the floor is sagging cause I didn’t cleco the stiffeners on):

IMG 5854

And now with the firewall assembly clecoed on as well:

IMG 5855

IMG 5856

IMG 5857

And that’s all for tonight. Tomorrow I should be able to get the firewall riveted. I actually think this temporary assembly may be beneficial, as it’ll hold the firewall in a nice position for me to shoot rivets. We’ll see if that bright idea actually works later…

Posted in Fuselage | Hours Logged: 2

Firewall riveting

Pretty good night’s work, at least by after-work standards. I managed to get all the rivets in the firewall done. The vast majority of the rivets can be back riveted, though an added complication is that the firewall has a flange facing towards the flush side. So back riveting requires elevating the back rivet plate a bit. I just used some double-sided tape to attach a few scrap wood blocks to one side:

IMG 5865

So then I just shot a bunch of rivets. It took a little longer than other back riveting due to there being several different rivet lengths to deal with. This, in turn, is because of the various material stacks; there’s firewall + angle, then a few spots with those two + a reinforcement piece, and finally the engine mount weldments that combine all three of those and the weldment itself.

Then there were a handful of rivets that couldn’t be back riveted, mainly due to space constraints on the shop head side. Those I just shot normally; not too big of a deal, but it did end up with me doing yet another amusing “no, I don’t need a second pair of hands” setup:

IMG 5860

I marred the primer in a couple spots while riveting, so I shot some touch-up primer afterwards:

IMG 5864

And there it is, a finished firewall:

IMG 5861

Now I can get back to working with the gear towers and the forward floor. And I’ve got a long weekend coming up, so I ought to be able to make some great progress in the next few days.

Posted in Fuselage | Hours Logged: 2.5

Gear box weldment riveting

Another short night. I started out deburring the edges of the mid-cabin braces. Frankly, I think this is a weird time to do this, but I might as well keep working in the order of the instructions, I guess. Apparently the only reason you deburr those braces is so you can cleco them to the gear towers for 30 seconds to identify two rivet holes that you’d better leave open for the time being. After this, the next task was to rivet the outboard weldments to the gear towers. Mostly this is just a whole bunch of rivets, some of which have to be shot with a long set because they’re right up against a flange of the weldment. I got through about half of these, but was kind of getting tired, and when I smeared a rivet pretty badly, it seemed like a sign to quit for the evening:

IMG 5868

Removing that rivet will be fun. Smearing it means I don’t have the little dimple in the center of the factory head to act as a drill guide, which in turn means there’s ample opportunity to foul up the hole here.

Posted in Fuselage | Hours Logged: 1.5

Gear box riveting, center section prep, etc

Started off the day today by making and prepping some paint test patches. Numerous other RV builders have had good luck with, of all things, Rustoleum hammered finish spray paint for an interior finish. So I got a few different color cans and I’m going to shoot some test pieces to see how they look and hold up. After cutting three patches from my scrap leading edge skin, I cleaned/scuffed one side, masked off half of each patch, and shot primer. I’m only priming half of each patch so I can evaluate how the paint does with and without primer. The instructions claim that no primer is needed, but I’m curious to see if adhesion/durability are any different. I also got some matte clear coat that I’m going to try on half of each patch as well.
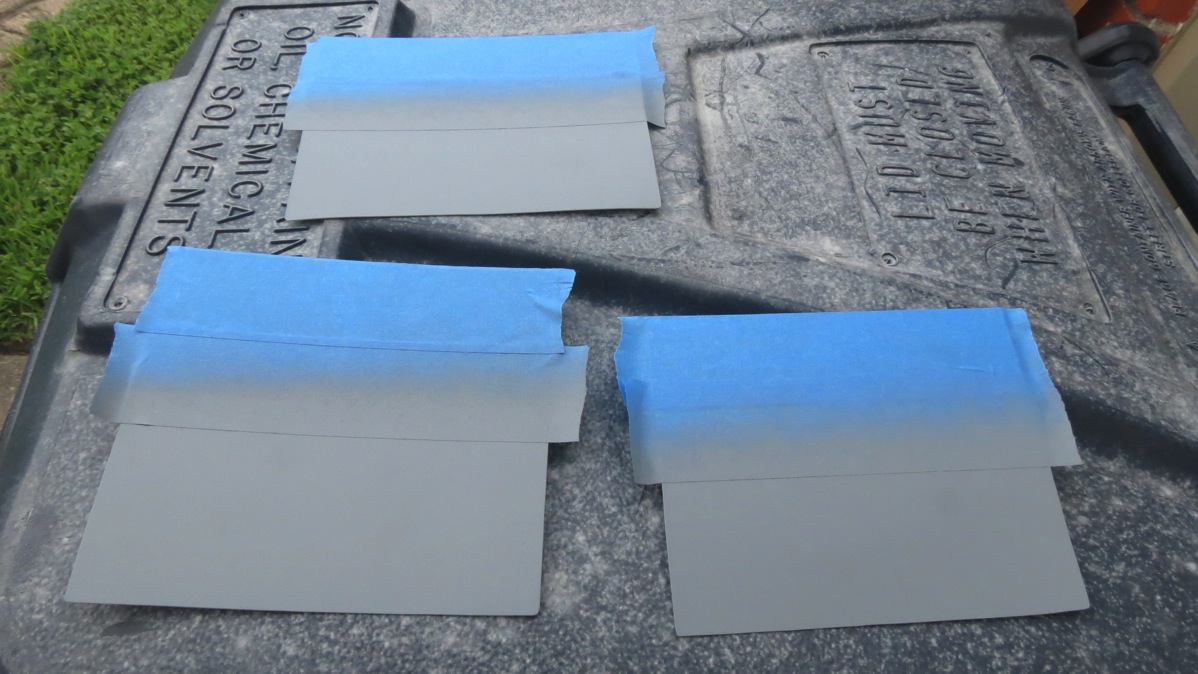
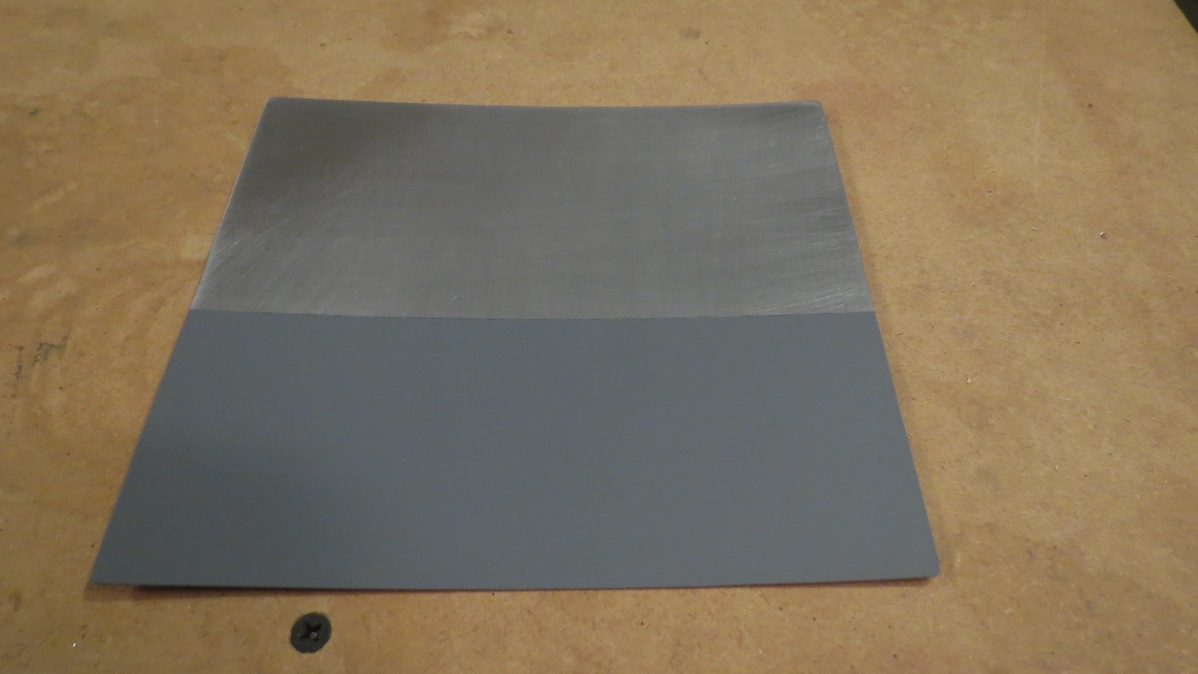
IMG 5871

IMG 5879

Next, I moved on to drilling out the smeared rivet from last night. I was tempted to try and drill it out last night but that seemed like a good way to exacerbate the problem. Despite the smeared head, I got it out with hardly any trouble today, shot a new rivet in its place, and then got back to work. Except that about four more rivets in, I smeared another head badly. I’d been noticing that my short set seemed really prone to this, so I took a closer look and I think I found the problem:
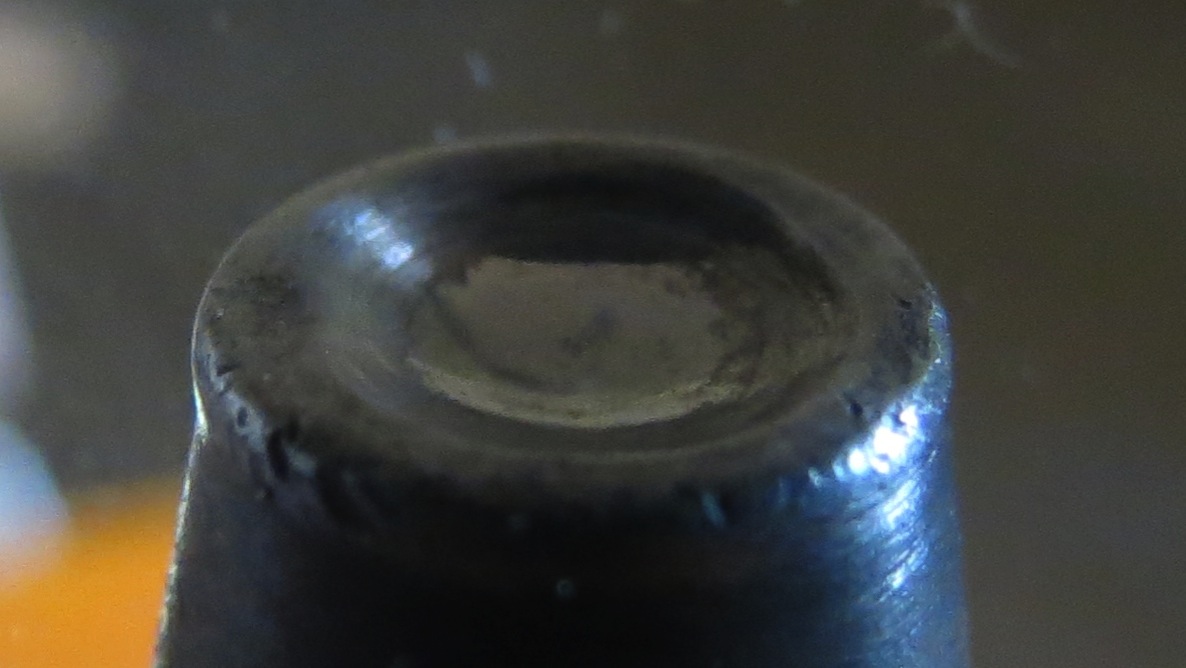
IMG 5872

There’s a little deformed lip in the cup, towards the back of the photo, which I’m sure is what’s making this set tend to drift off of the rivet heads. Time to get a replacement. To make matters worse, I didn’t do such a good job drilling out this bad rivet, and the hole got enlarged. So i drilled it out to the next size up, and I’ll be ordering some -5 rivets from Spruce next week. I should probably have some around for repair jobs like this anyway.

Anyway, I finished riveting the rest of the weldments using my long cupped set. It’s a little more awkward, but plenty workable.
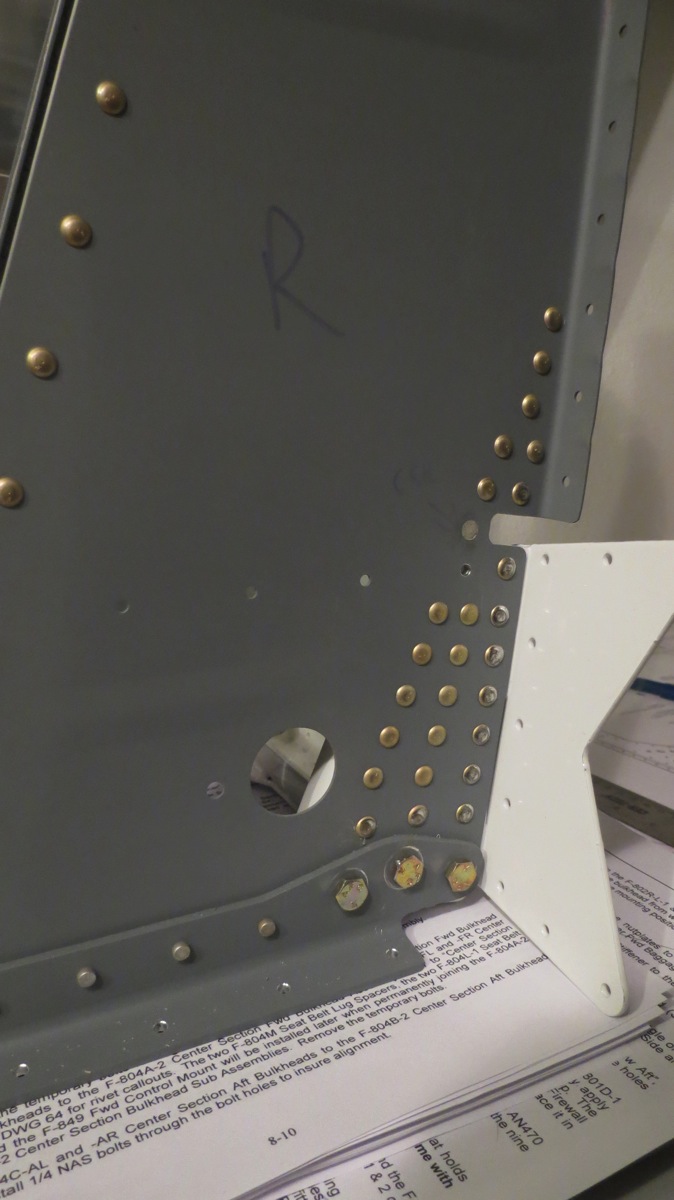
IMG 5880

Next I match drilled the tower bases to the forward floor, then pulled the towers from the floor so I could deburr. This is as far as I can really go until I get those rivets from Spruce next week, so I set the towers aside. I hadn’t yet deburred the edges of the forward floor, so I knocked that out before setting the floor aside too.

So after looking through the directions, the next task is working on the center section. The centerpiece of this assembly is the spar carry-through, which the wings will bolt to. For obvious reasons, this is a critical structure, and it comes mostly preassembled and gold anodized, just like the wing spars. I ran into my first issue once I unpacked the center section parts:
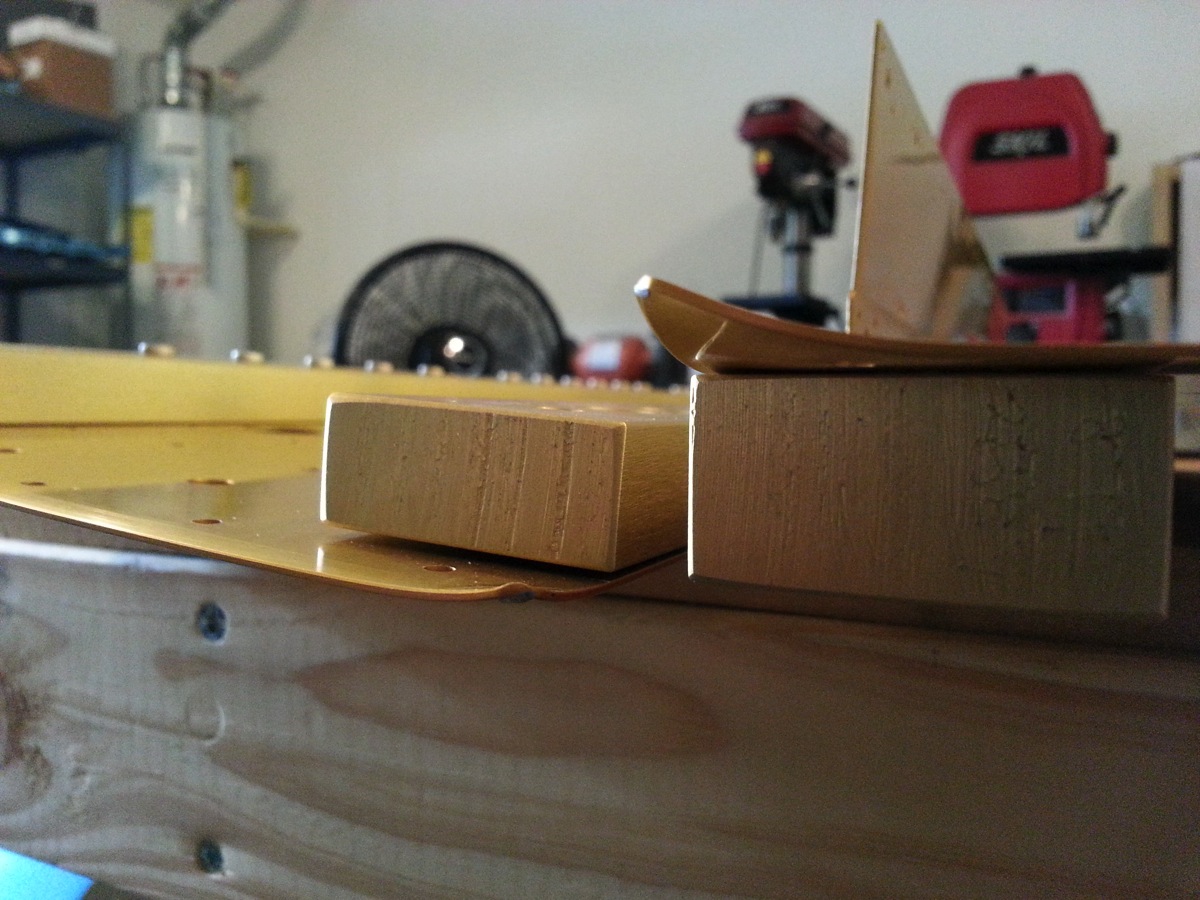
QwBKMB5

Apparently those got bent up a bit in the crate, and it wasn’t obvious while these parts were still wrapped in plastic. The bends are pretty minor, and I don’t think there’s any issue with just bending them back, but seeing as how this is a critical component, I’m going to email Van’s about it just in case. For the time being, I went ahead with work on the center section. The first task is to enlarge a couple holes in the forward and rear bulkheads for the rudder cables to pass through. Interestingly, the hole locations are different depending on whether your building a tailwheel or tricycle plane. I took careful not of the correct holes and circled them with a sharpie for good measure.

Drilling holes this size (5/8”) calls for using the unibit, which I prefer to do in the drill press. This was slightly awkward, given the size of the bulkheads, but I got the holes in the forward bulkhead done with no problems. For the rear bulkhead, though, it was necessary to flip the bulkhead over, putting the side where I’d marked the proper holes on the bottom. And that was my mistake. I’d just finished drilling the first hole in the rear bulkhead when I realized I’d enlarged the hole corresponding to a tricycle plane. The wrong hole. In the spar carry through web.

It would be an extreme understatement to say that I was displeased. In fact, I think that was the first time I’d actually thrown something across the shop. I was pretty sure that I’d just ruined what I’m sure is a very expensive part to replace (subsequent research indicated that a replacement would run $850).

After calming down a bit, I began wondering if it’d be possible to drill the correct hole and add a doubler patch to compensate for the potential structural problems from the misdrilled hole. Looking through the plans, it doesn’t look like there will be anything on the forward side of the web, so it’s at least physically possible to add a patch there. I still have to find out if that’s a viable solution though. I guess my email to Van’s will now include two questions.

I put together a picture to show my proposed solution when I send the email. I really hope that this is an OK fix.
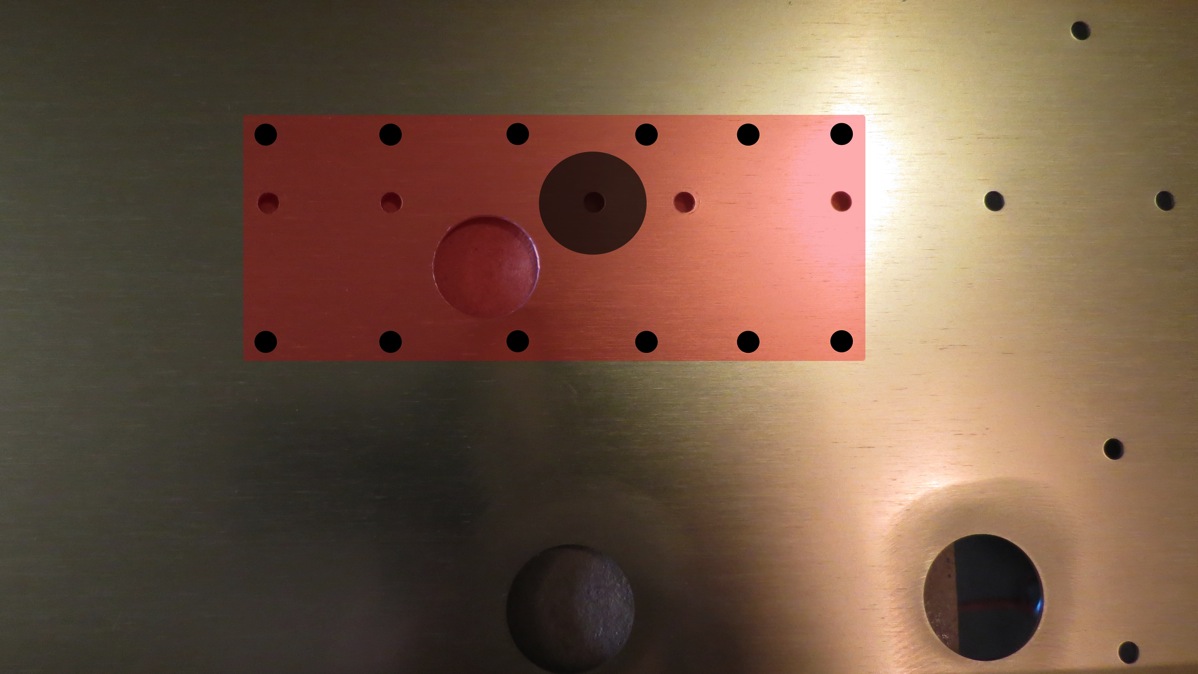
IMG 5875

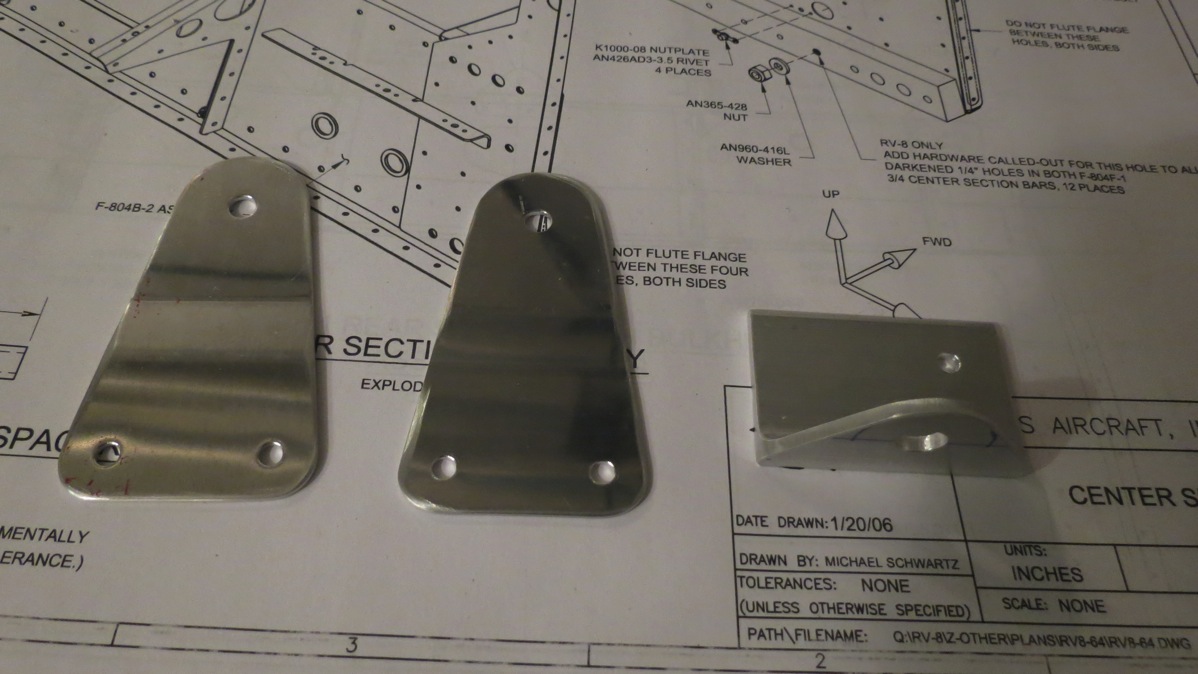
Anyway, I moved on to other center section tasks, after drilling the final rudder cable hole in the rear bulkhead. I got as far as cleaning up the center seat belt attach lugs and fabricating the forward control mount:
IMG 5876

Then I went inside to have dinner and watch a movie. I was supposed to fly tomorrow morning, but it definitely looks like the weather isn’t going to cooperate. At least that gives me more building time, I guess, assuming I can avoid fouling anything else up…

Posted in Fuselage | Hours Logged: 6

A bunch of random stuff

Didn’t get a lot done today for various reasons. First I got woken up by a nasty thunderstorm around 6:30 AM, and about the time I was noticing how windy it was getting, my phone buzzed with a tornado warning…fun times. Then it seemed to clear up enough that it looked like I could go flying after all, so I got ready, headed out, then noticed that there was enough of a low scattered layer to concern me, so I cancelled after all. Then I finally caught up on the sleep I hadn’t gotten the night before…and that’s why I didn’t even get started working until early afternoon. Even then, I had some other stuff to do, so I squeezed in sporadic work throughout the afternoon.

First up, I went back to work on the center section. I clamped in place the forward control mount I made yesterday and drilled the second bolt hole in assembly with the forward center section bulkhead:

IMG 5882

Then I dug out the bulkhead extensions, fluted the flanges, and fitted them to the bulkheads. The forward extensions got match drilled, but the rear extensions won’t be match drilled until later:

IMG 5884

This pretty much got me to a point where I wasn’t sure it was a good idea to keep working on the center section, lest I find out later this week that it’s trashed. So I moved on to the next manual section, the seat rib assembly. For the record, I currently have the gear towers + forward floor assembly stalled, along with the forward baggage compartment (which is waiting on the towers), and now the center section as well. I’ve got partial assemblies all over the place and organization is definitely starting to suffer. I think this week may be short on actual work until I can get stuff in to let me make real progress on the stalled stuff; I’m getting to a point where I think I have too many balls in the air.

Anyway, the seat rib assembly starts with the rear bulkhead. Attached to this bulkhead are two thick bars that will eventually be the attach points for the rear wing spar. First off, a couple of spacers are fabricated from 1/4” solid stock. Next, a pilot hole in the bulkhead is used to drill a #12 bolt hole through the spar attach bars. Care must be taken here to make sure the bolt hole is perfectly perpendicular, so the manual calls for using some 1/4” wood pieces to space out the spar bars and to level the assembly on a drill press. Here are the wooden spacers in between the bars, prior to drilling:

IMG 5887

Next, I dug out all the various seat ribs, and deburred the first four before fluting them a bit to straighten the flanges. At this point, it was getting a little late in the evening, and I was about ready to quit. So instead of continuing with the next steps, involving fabricating some more stuff, I decided to just cleco the seat rib assembly together to get a sense of how it all fit. And things kind of went crazy from there. After putting the seat rib assembly together, I wondered what the forward part of the ribs attached to…and it occurred to me that they attached to the center section bulkheads. So I just had to cleco those in place too. And then I realized that the forward floor would attach to the bottoms of the center section bulkheads, so I clecoed that on too.

And that’s how I ended up with basically the lower fuselage assembly for the entire cabin area sitting on a pair of sawhorses:

IMG 5888

IMG 5892

IMG 5893

It’s unfortunate that I’m hung up on so many things right now, since tomorrow is a holiday. I guess I’ll try and figure out how to keep working on stuff for the seat rib assembly.

Posted in Fuselage | Hours Logged: 3.5

Seat rib prep and drilling

So after disassembling the stuff I stuck together for fun last night, I started moving on along with the seat ribs. First task was to fabricate a couple of angle supports. The instructions say to use .063 3/4”x34” angle to make these. I dug through all my angle stock about three or four times and never could find any of that stuff. Finally, I went inside and consulted VAF. Turns out that I did have some of this angle stock – it’s the stuff I have for the longerons. Van’s recommends using two separate pieces of the 12’ angle for this, cutting one angle bit from each. This makes it less likely that, down the road, I discover that I cut something too sort. Shipping a 12’ piece of angle probably is far from cheap.

Anyway, that made for fun times. Fortunately, my bandsaw lines up well with the door into the house, enabling me to cut these piece that way. I recruited Josie to stand in the kitchen holding one end of each angle while I ran the bandsaw for the cut. The rest was straightforward from there:

IMG 5895

Next, the long support angles, those little angle bits, and the seat belt mount assemblies get clecoed to each inboard seat rib. The second hole is drilled in the bracket made above, and then everything else gets match drilled. There are also nutplate holes on the tops of the angles that get final drilled and countersunk for flush rivets. Here are the seat ribs with the angles and seat belt brackets clecoed in place:

IMG 5897

At this point, the instructions say to go ahead and if the aileron trim brackets if applicable. Since I’m doing electric aileron trim, this is definitely applicable. First I had to figure out where the trim kit was. This took longer than it should have, because I apparently thought it was a good idea to put this kit on a top shelf behind other stuff. After getting the kit out, for some reason I felt compelled to start at the beginning of the instructions instead of just fitting the brackets and calling it a day. And that’s how I spent an hour or so fabricating aluminum tube into the actuating arm of the trim system. This requires notching one end of the tubing to fit over the trim servo arm. The provided piece of tubing is a couple inches long, which was a good thing, because my first attempt at making this notch was ugly and I cut it off and started over. Second attempt turned out much better:

IMG 5901

Then I finally skipped to fitting the brackets. The left rib gets a little platform for the servo to mount on, while the right side just has a little bracket with a guide for the actuating arm. There are already prepunched holes to fit the drill guides for these pieces. But I managed to foul up here too. There’s a drill guide for the platform on the left side, but the right is supposed to be drilled using the actual bracket. Well, I used the drill guide on the right side, drilled everything, and then realized my mistake. And of course the holes don’t line up.

At first, I’d resigned myself to replacing the seat rib, but upon further thought, this bracket is about as far from structural as it can be. So I elected to drill new holes on the forward side of the bracket, reducing the number of rivets on that side from four to three. This was necessary because the holes I’d already drilled were located such that the original bracket holes couldn’t be used. I also decided to fabricate a doubler to place on the inboard side of the rib, to provide some reinforcement to make up for the extra holes in the rib. Probably overkill, but it gives me peace of mind. It took an hour and a half or so to implement this plan, but eventually it was all done, and now I don’t have to order a replacement part.

Outboard side, showing the bracket. On the right side, the abandoned rivet holes can be seen:

IMG 5903

Inboard side, showing the doubler. I made this large enough to incorporate the extra holes to the far right, which would have corresponded to the servo bracket. The doubler also circumvents three of the rivets that go through the bracket (second from right). This is necessary because with the doubler trimmed to fit around the hole in the rib, there would be essentially no edge distance to those rivet holes:

IMG 5905

And that’s all for tonight. I need to write up my email to Van’s support about the center section, and maybe I can get the OK for my fix tomorrow and get back to work on that portion. I probably won’t get the rivets and stuff I need for the gear towers until Thursday or Friday. Here’s hoping the center section fix is approved!

Posted in Fuselage | Hours Logged: 6.5

More seat rib stuff

OK, so not a lot done tonight; mainly I just wanted to get back in the swing of things. Last week was interesting, as we got caught up in the flash flooding…and by “we,” I basically mean “my car.” Took two days to get it towed, and I’m still waiting to find out if it’s going to be a total loss or not. So basically I ended up kind of taking a break from the build.

A lot of tonight was just cleaning up again…once again, my propensity to just leave tools out had created a mess. After that, I did some more prep on the seat rib assembly. I got to the point of clecoing everything together again, which would have been followed by match drilling, but I decided this was a good stopping point with the seat ribs, so I set them aside.

In the week since I’ve worked, I got in my stuff from Spruce, including an assortment of -5 rivets; I needed those to finish up the gear towers. I also got a response from Van’s support, approving my proposed fix for my misdrill in the center section web. So I’m finally equipped to go back, finish stuff up, and get back in order. I was all set to finish riveting the left gear tower, but…there was a hangup. In the process of drilling out the bad rivet that started all this, I made some scratches that needed to be sanded down, which in turn removed primer. Seems I never got around to touching up that area. So to finish up tonight’s work, I did the touch up priming and then just called it. Tomorrow I can get those things riveted…

Posted in Fuselage | Hours Logged: 1

Gear tower riveting and other stuff

Started out tonight by finally finishing up riveting the outboard weldments to the gear tower. I got in my -5 rivets from Spruce last week, which was what I was waiting on for this task. I shot the -5 rivet (surprisingly not tough at all), then shot the remainder of the -4 rivets on the tower. So there’s one odd-sized rivet here, but hey, it’ll be on the front side of the tower, and the only way anyone will ever see it is if they’re lying on the floor with their head by the rudder pedals:

IMG 5920

The next step is to rivet the towers to the forward floor, but here I got in an argument with myself about priming/painting. Part of me had considered painting the towers before riveting them to the floor, but I’m not sure I’ve settled on what paint I want to use yet. I definitely wanted something for the floor inside the gear towers, so I wanted to at least prime that area. I was not, however, prepared to prime the entire floor, if for no other reason than it would end up scratched up by the time I was done anyway. Eventually I settled on the solution of masking the area around the towers and just spot priming the area under the towers:

IMG 5921

I also checked and retorqued all the bolts between the towers and weldments. The outboard weldments got torque seal on the nuts; even if I removed the bolts, the weldments wouldn’t come out anyway. I didn’t torque seal the inboard weldment nuts though; my rough plan is to remove those when it comes time to paint the gear towers, just so I’m better able to scuff and clean the powder coat. Here’s some torque seal…exciting stuff, huh?

IMG 5926

So tomorrow I should be able to rivet the towers to the floor, and then move on with further assembly work.

Posted in Fuselage | Hours Logged: 1.5

Finished gear tower assembly

Yup, finally back to work again. The search for a replacement car continues, mainly because I’m looking for something very specific. I did get in some flight time Saturday morning before going to look at a couple cars, then I just got lazy the rest of the afternoon.

Today I started off by cleaning and prepping the baggage bulkheads; I wanted to get those primed this weekend since the weather was nice. Once that was done, I clecoed the gear towers in place (again) on the forward floor and shot the rivets on the aft attach angles. The forward angles remain unriveted until much later, for reasons that I’m sure will eventually be clear.

Look! Rivets!

IMG 5928

Next I clecoed and match-drilled the two upper braces, the mid-cabin braces, and the throttle quadrant mount bracket. I spent a fair amount of time deciding which of these components I was going to prime. In general, my approach to priming interior parts is restricted to parts that I expect to eventually topcoat. So after poking around a bit, I decided that the upper braces didn’t need primer, but the mid-cabin braces did. So I scrubbed and primed those as well. One benefit of the Houston heat is that primer coats dry in no time…

Meanwhile, after deburring the upper braces, I clecoed those into place and riveted them, then put bolts through the appropriate holes. There are some washers here that have to be radiuses a bit to fit inside the tower, so I did that as well and then primed the washers in accordance with the construction manual. By this time the mid-cabin braces were dry, so I brought those in and riveted/bolted them in place as well.

That completes this particular subassembly; time to set it aside and work on the baggage area again:

IMG 5930

I didn’t get a lot done with the baggage area stuff, just riveted all the nutplates to various components and made sure everything was dimpled. I wanted to go ahead and rivet the stiffeners to the floor, but I was getting pretty hungry for dinner by this point, so I called it a night.

Posted in Fuselage | Hours Logged: 4

Preparing for firewall riveting

Started out tonight by back riveting the stiffeners to the forward baggage floor; simple stuff there. Next I riveted the mounting bracket (don’t ask me hat it mounts, I don’t know) to the lower baggage bulkhead, then both bulkheads were clecoed in place to the forward upper brace, followed by the baggage side. Next, I clecoed the firewall to the forward floor and the baggage side and match drilled the holes between the floor and lower firewall angle.

Access to these holes was tight from above, so I decided to work from below. This seemed like the easiest way to do it, though it looks kind of odd:

IMG 5932

Next the firewall was unclecoed and all the holes deburred. Some of the inner holes – which will be in the cooling ramp area – get flush rivets here, so the lower firewall angle gets machine countersunk and the forward floor holes dimpled.

The next step would be to rivet the firewall to the lower floor, but I need to seal that joint before riveting. I ordered the fire barrier sealant from Spruce a couple days ago and it should be here tomorrow, then I can proceed. I could have switched back to working on the center section, but it seemed easier to not have to rearrange everything…

Posted in Fuselage | Hours Logged: 1