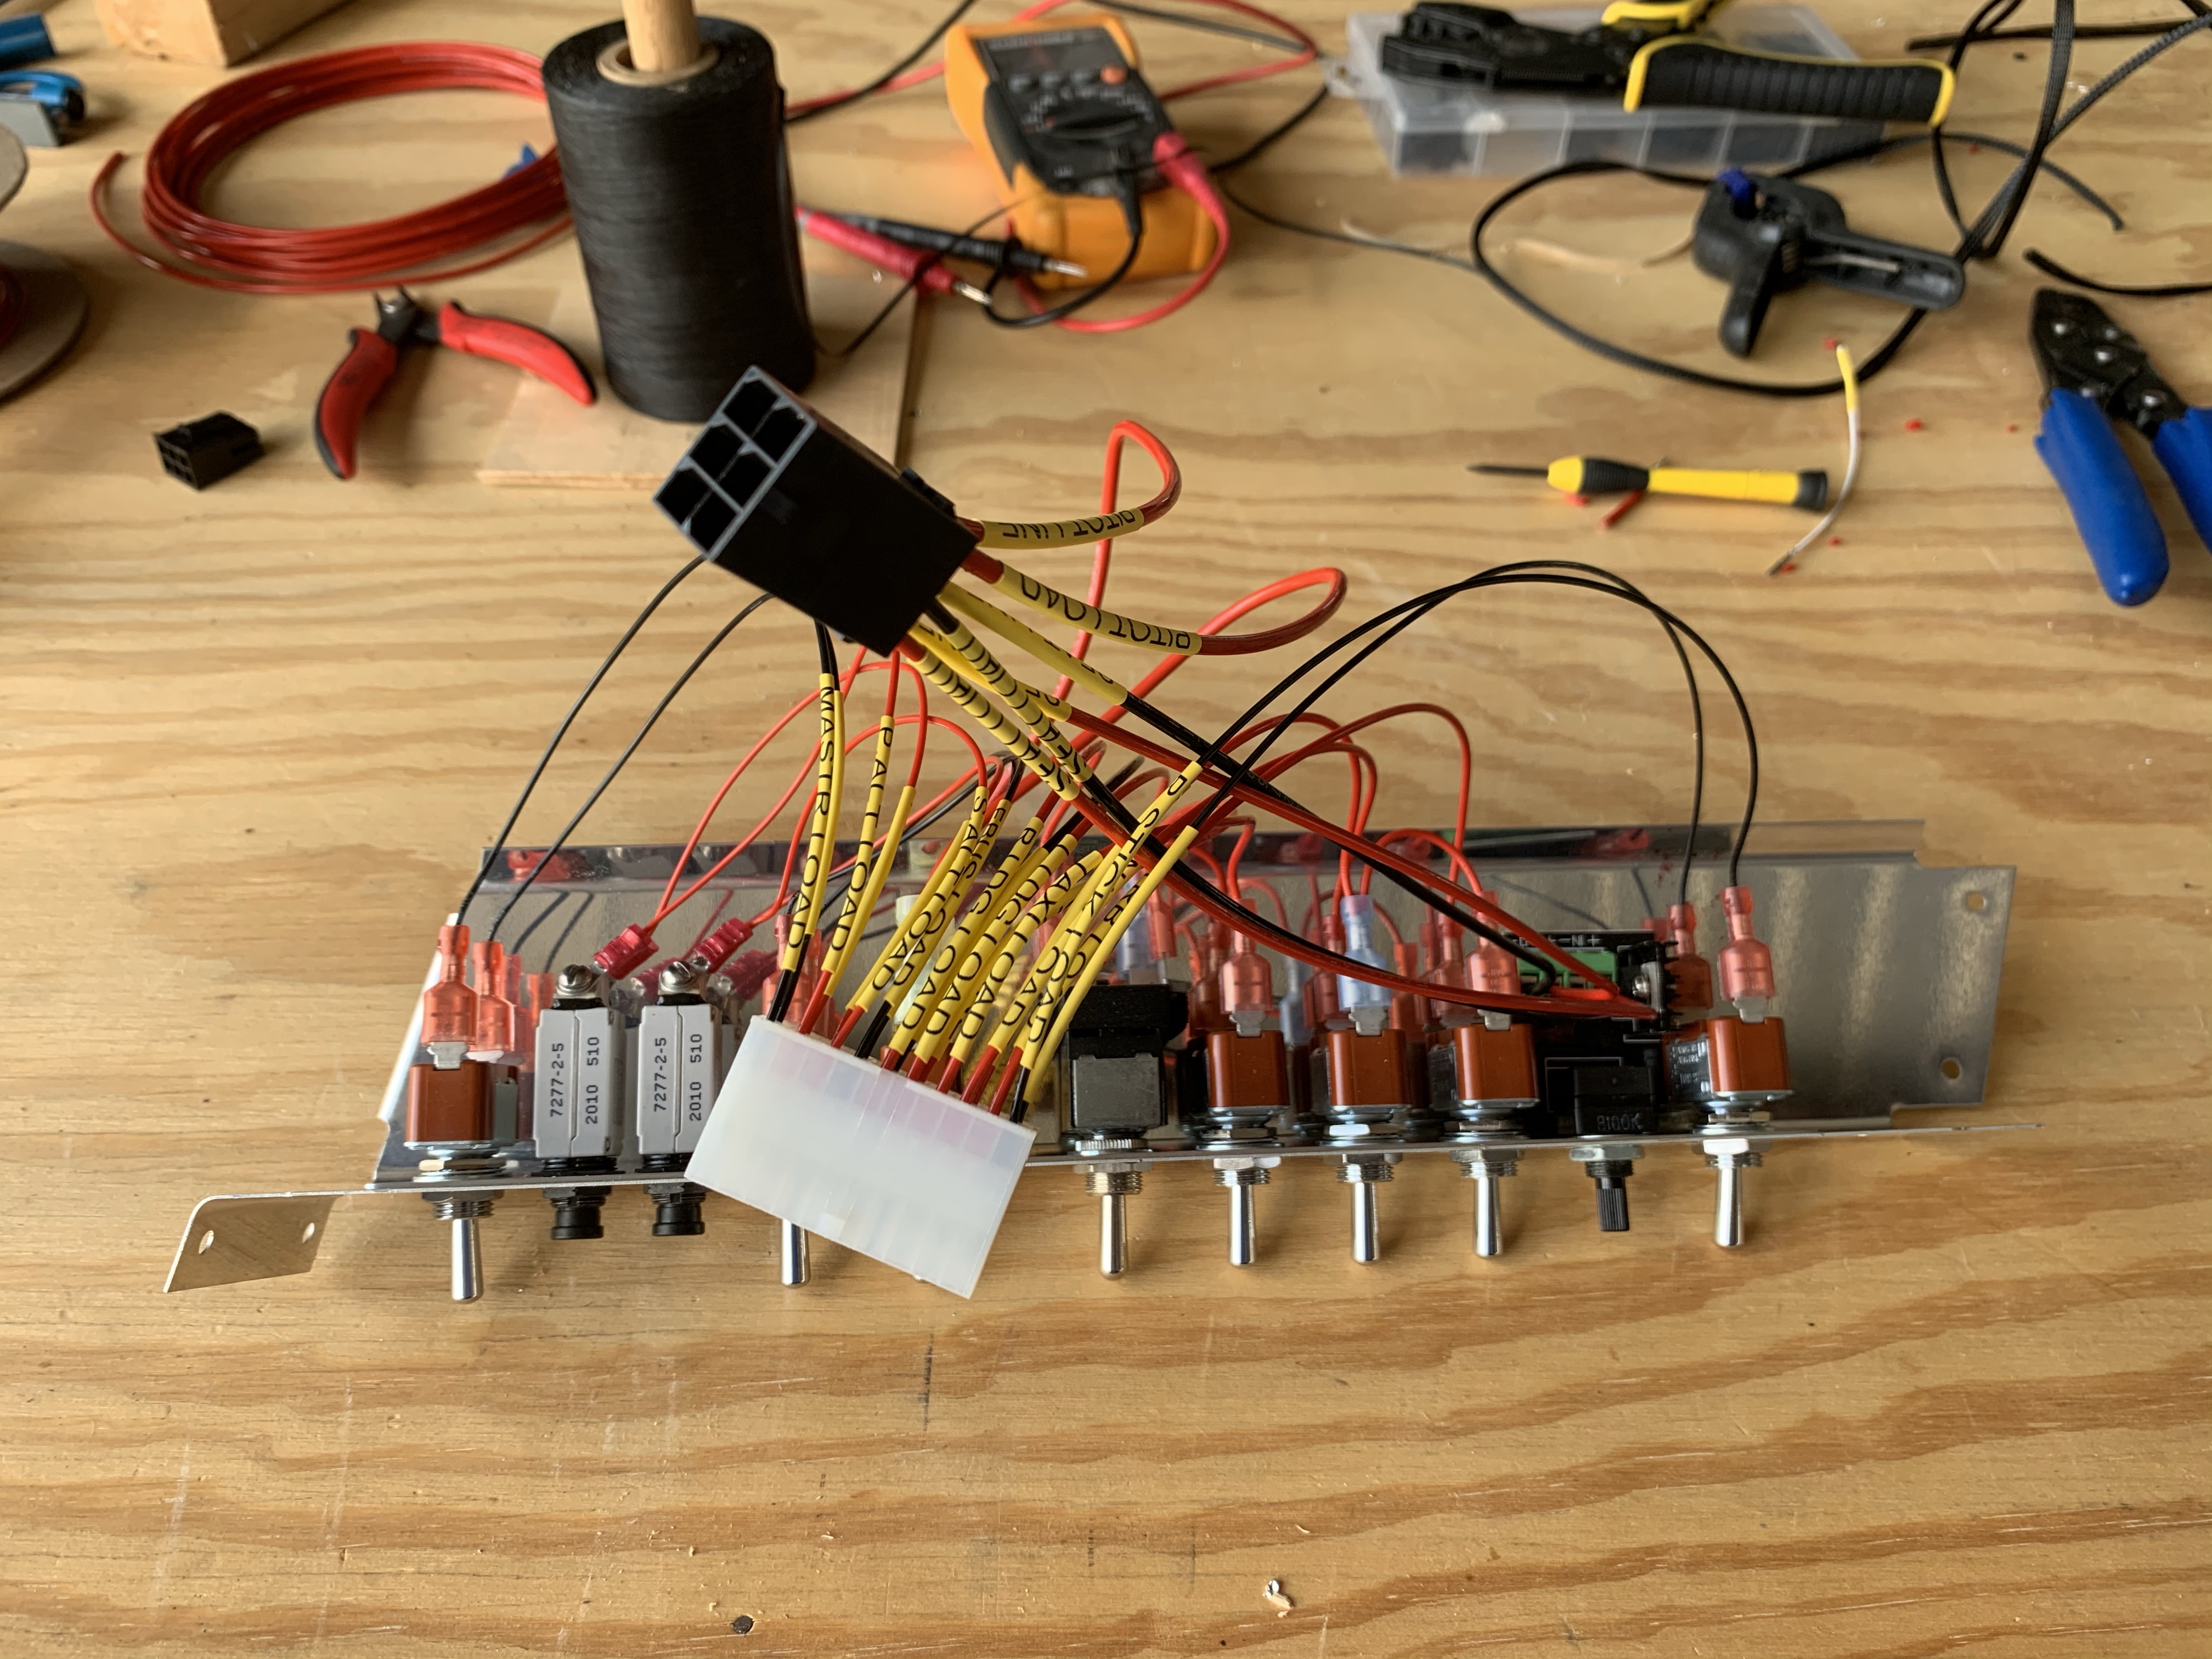
Back at it with the console today. With all the wires pinned, next up was positioning the heat shrink labels and getting them shrunk. That was a bit fun trying to hold the wires where I could heat one at a time without accidentally shrinking one that wasn’t ready. Also, this printable heat shrink stuff is awesome, I’m loving this as a way to label things.
Anyway, with that done, it was time to start inserting the low-current pins into their connector housing. Continuing with a recurring theme, there wasn’t anything especially challenging here, just tedious. With both connectors in place, it’s gradually looking more organized:
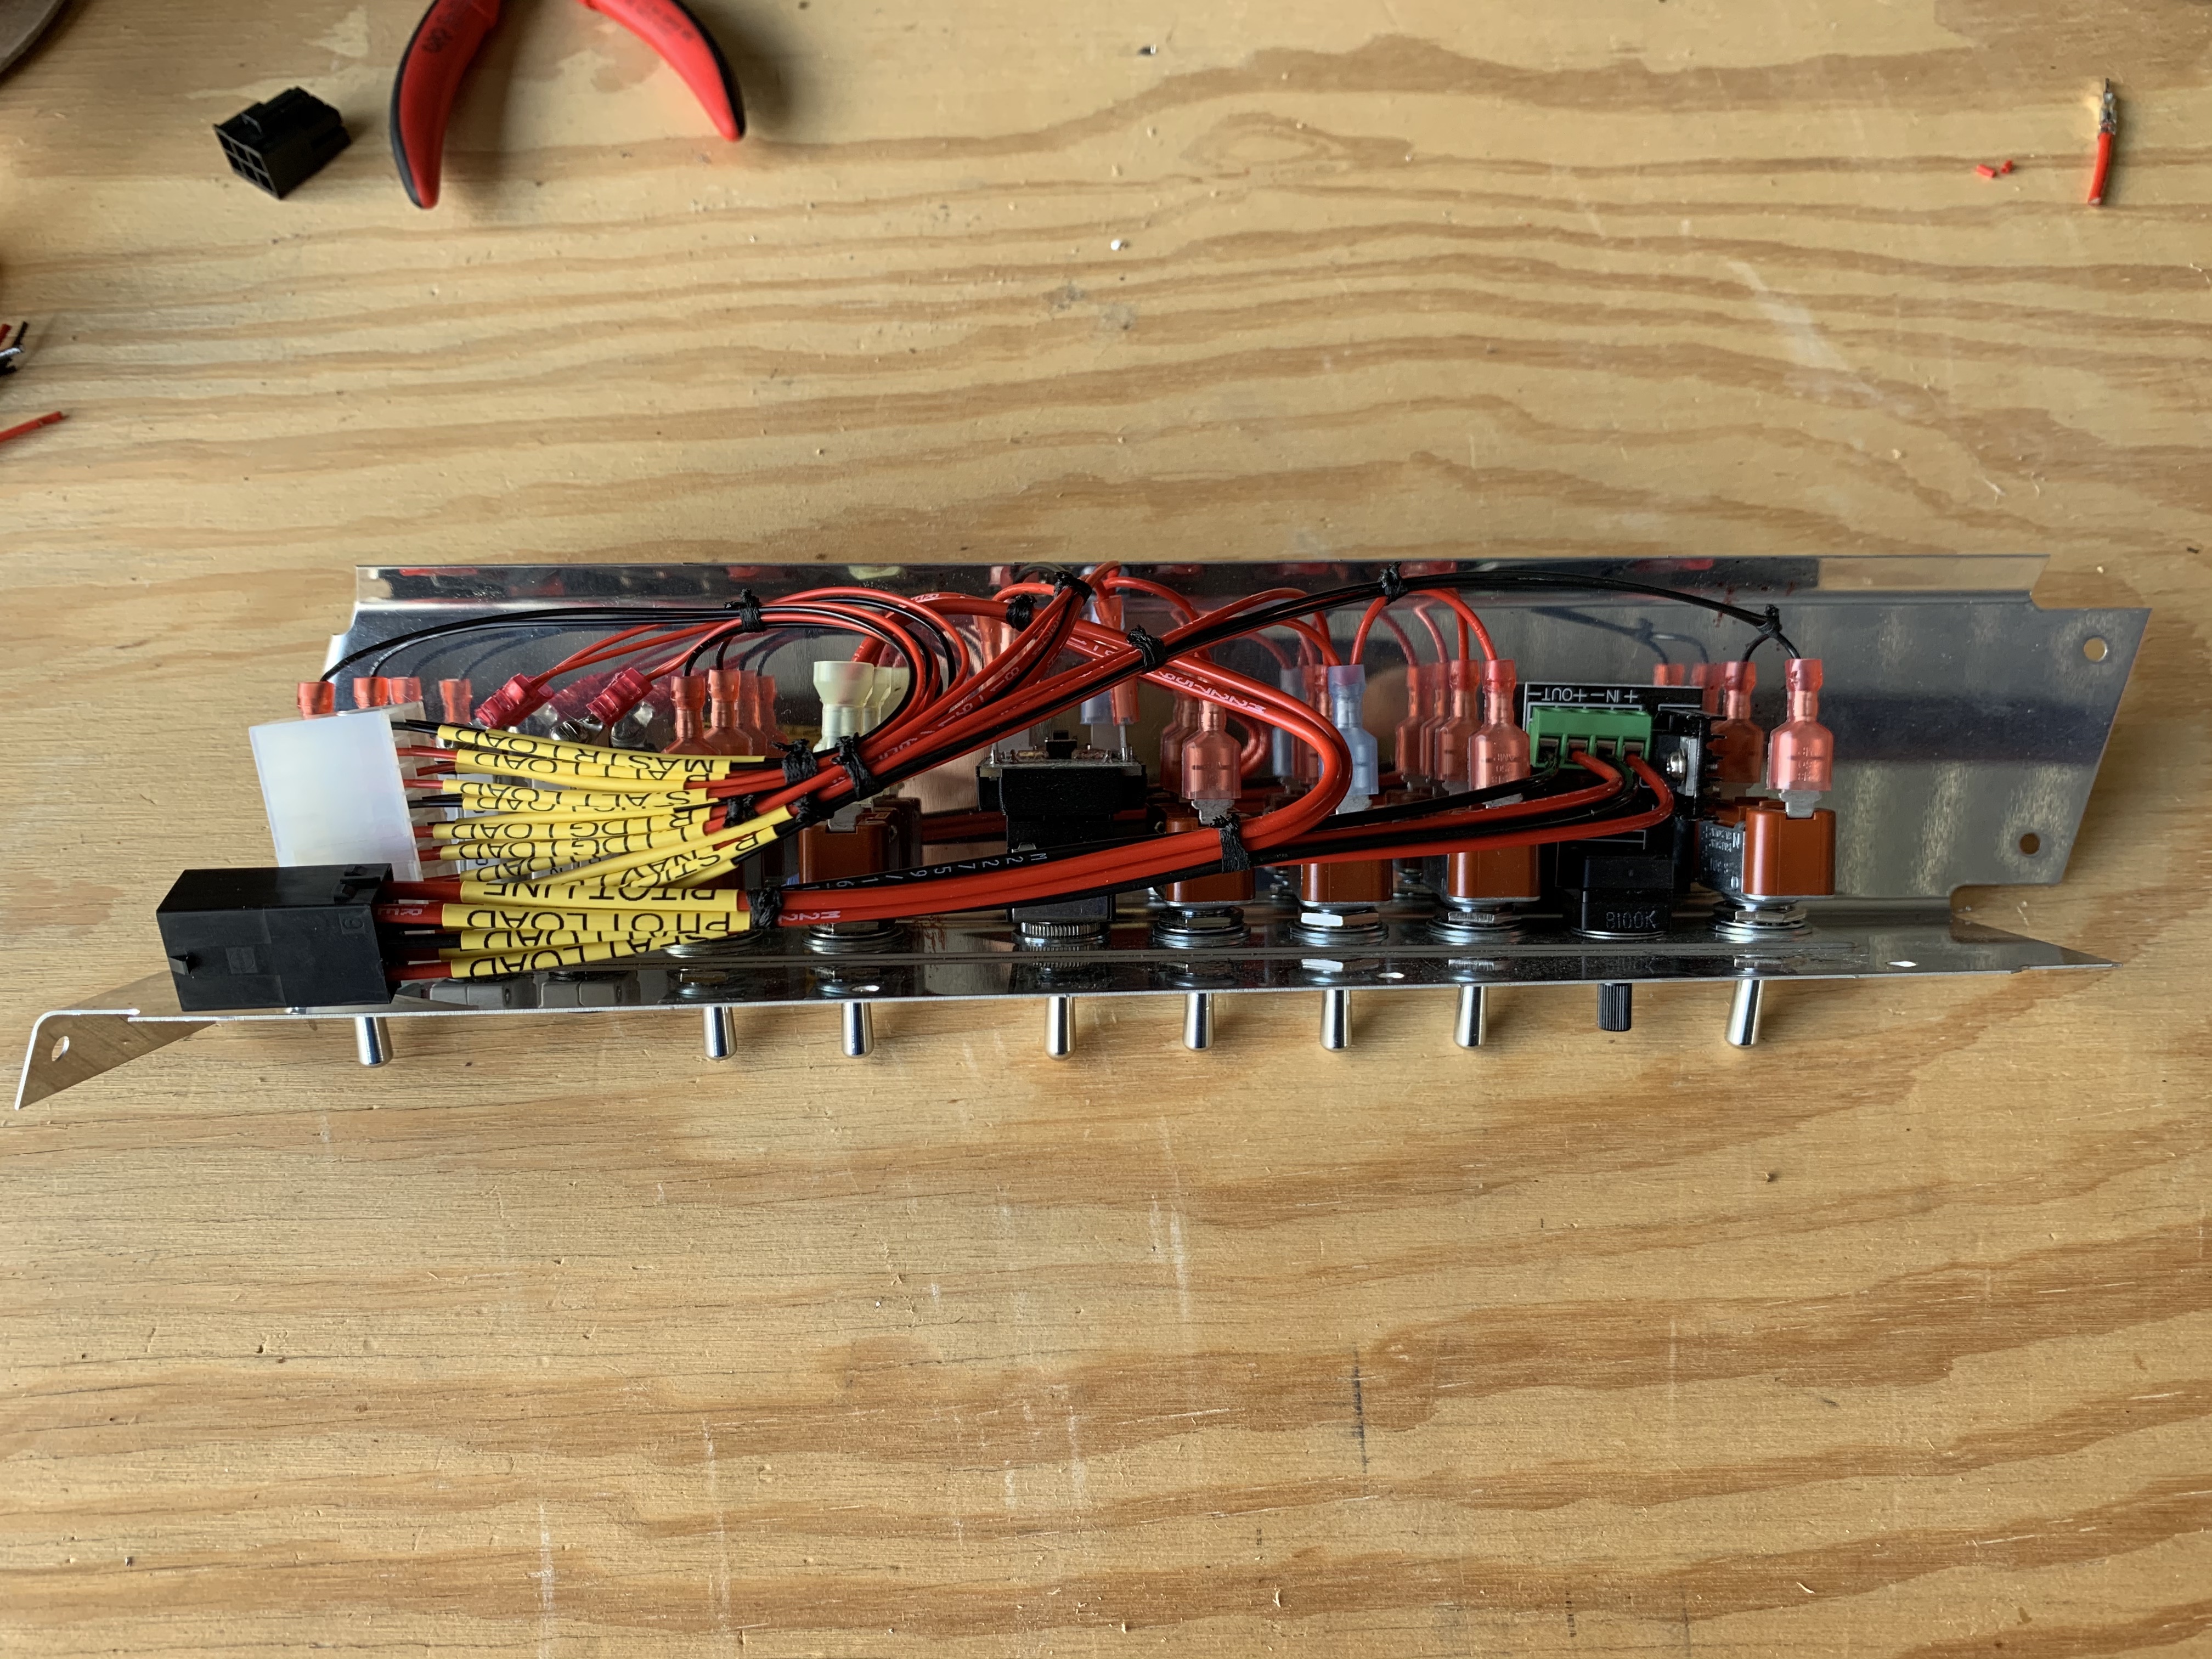
Next up, time to break out the lacing and get everything bundled. Now it unequivocally looks organized and not rat’s-nest-ey at all:
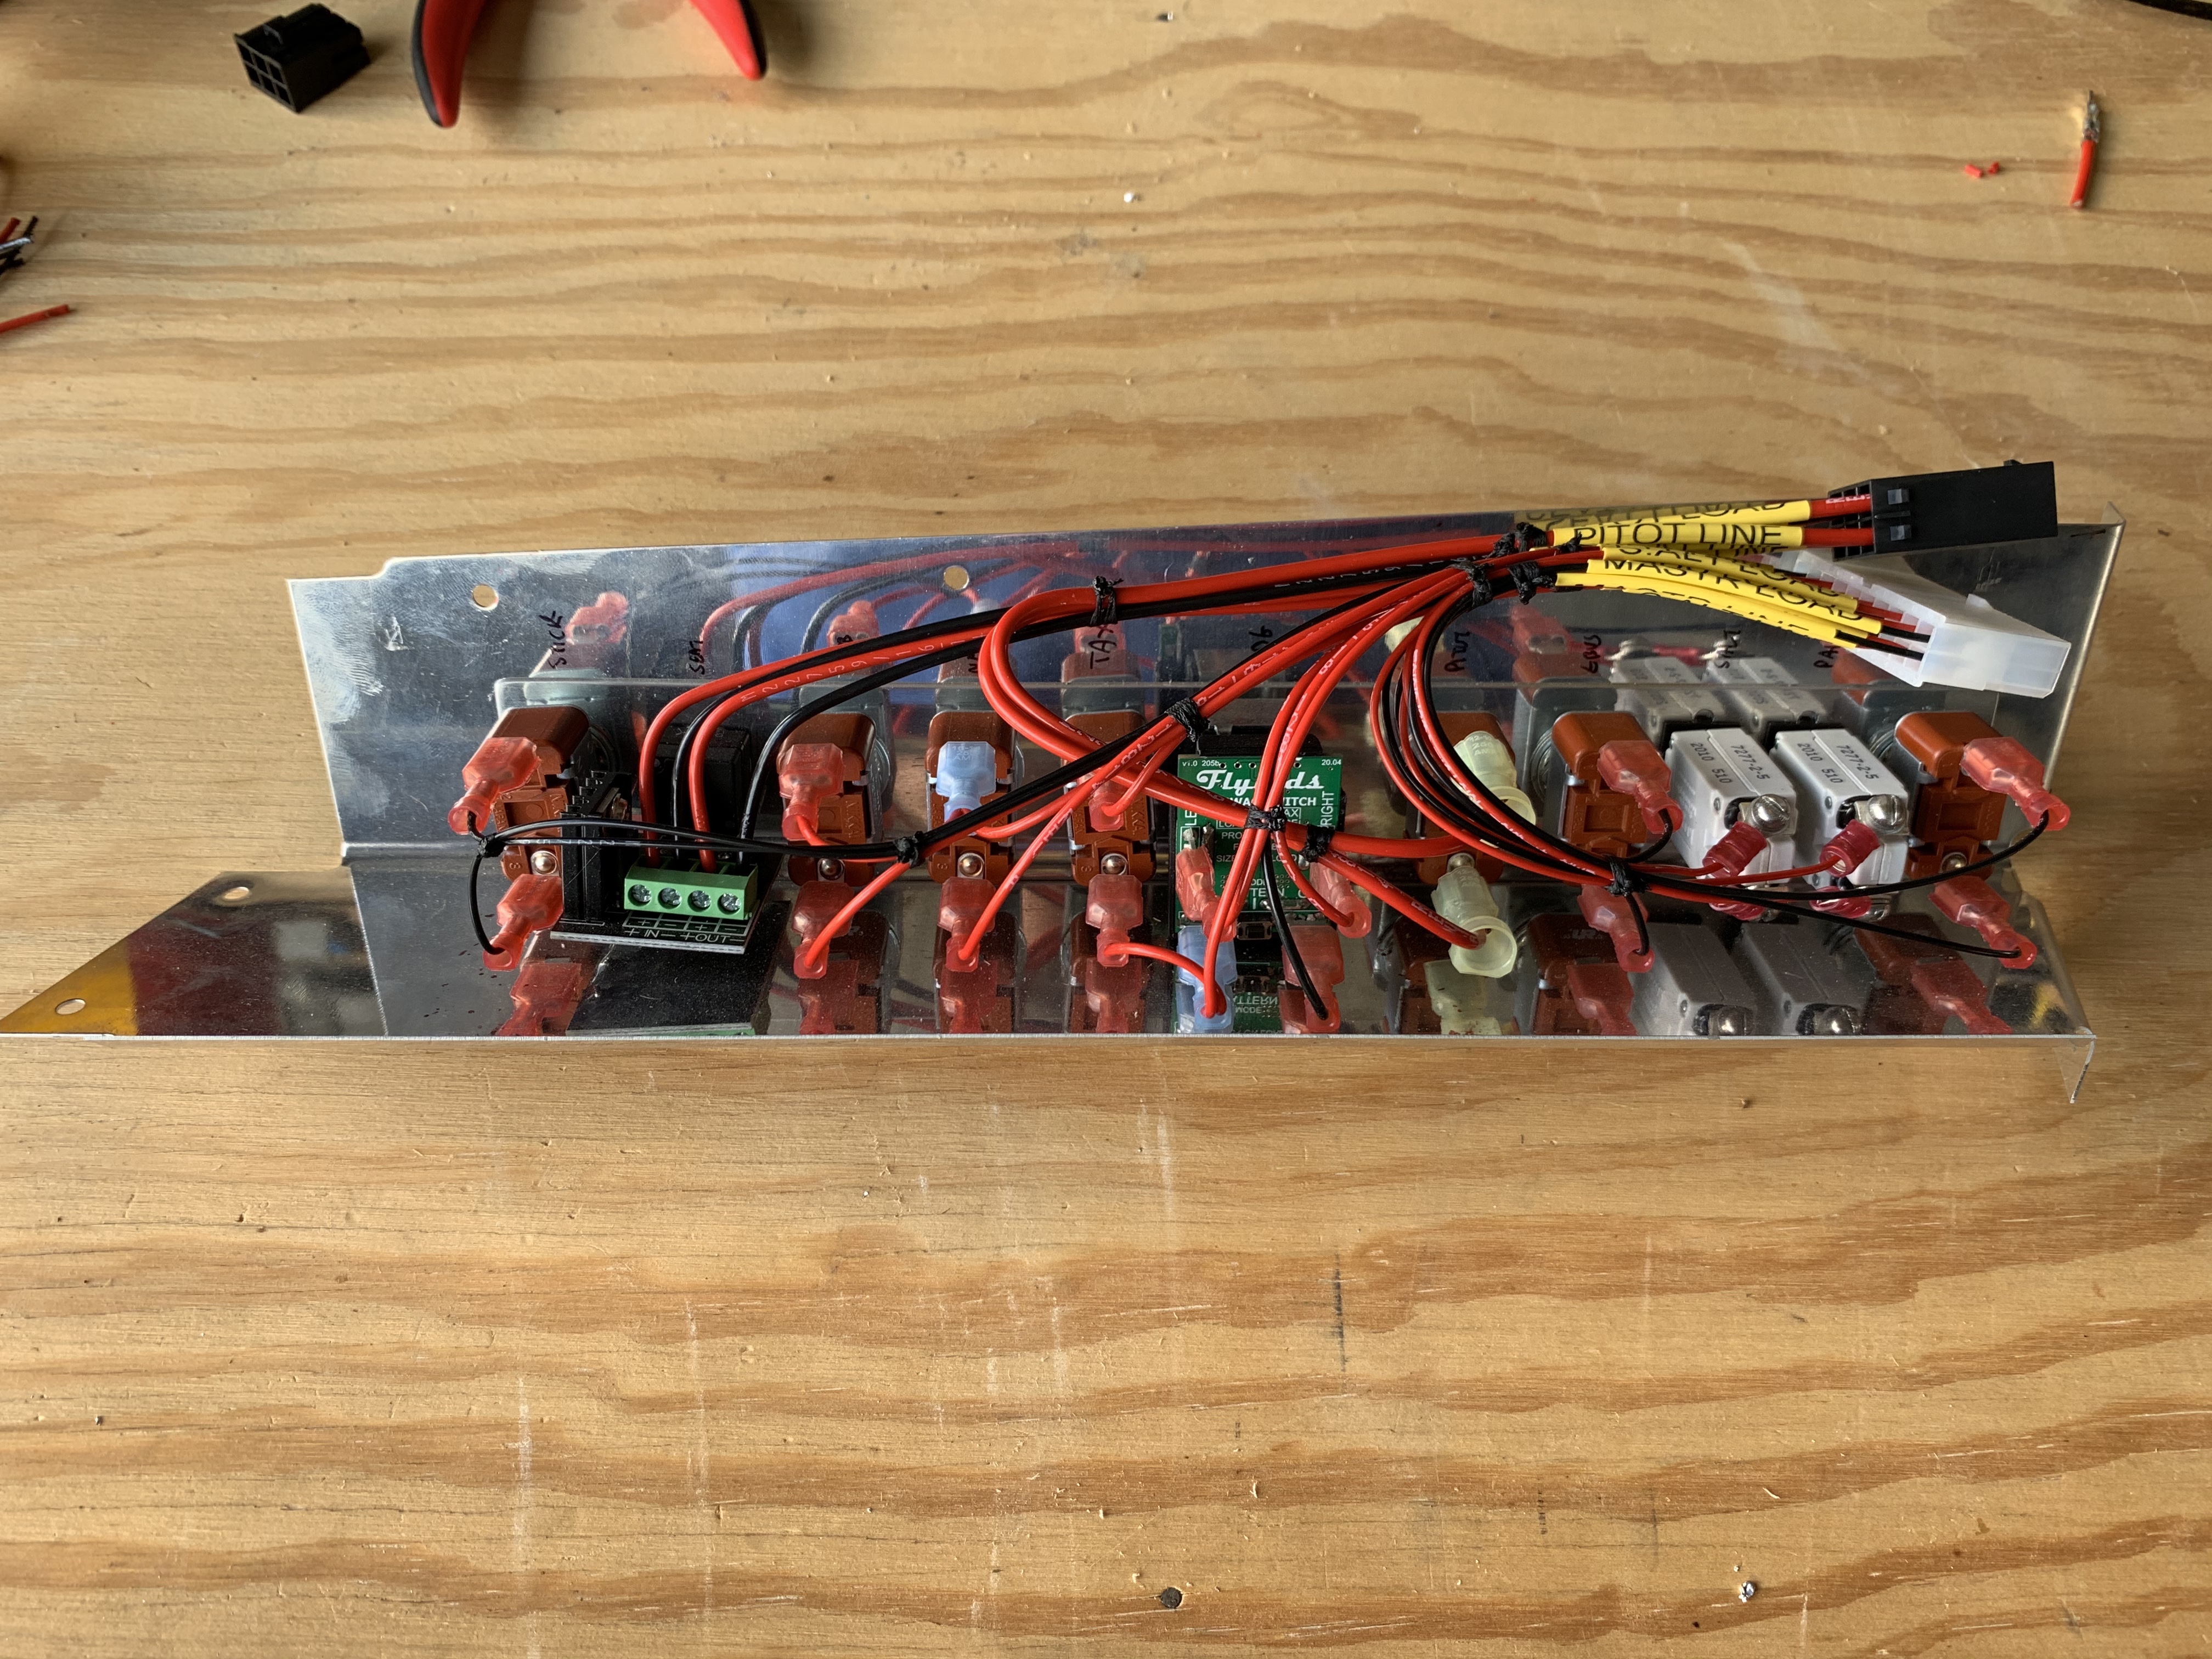
And from the opposite angle (looking from “below” rather than from the side):
Later, when this is ready to be installed for real, I intend to bundle both connector housings together with silicon tape, just for a bit more organization. Right now I’m not doing that for a couple reasons. For one, I want to be able to easily see all my heat shrink labels when it comes time to pin up the mating connectors in the fuselage harness. For another, all these switches will need to come back out of this console at some point, so I can get it painted and labeled.
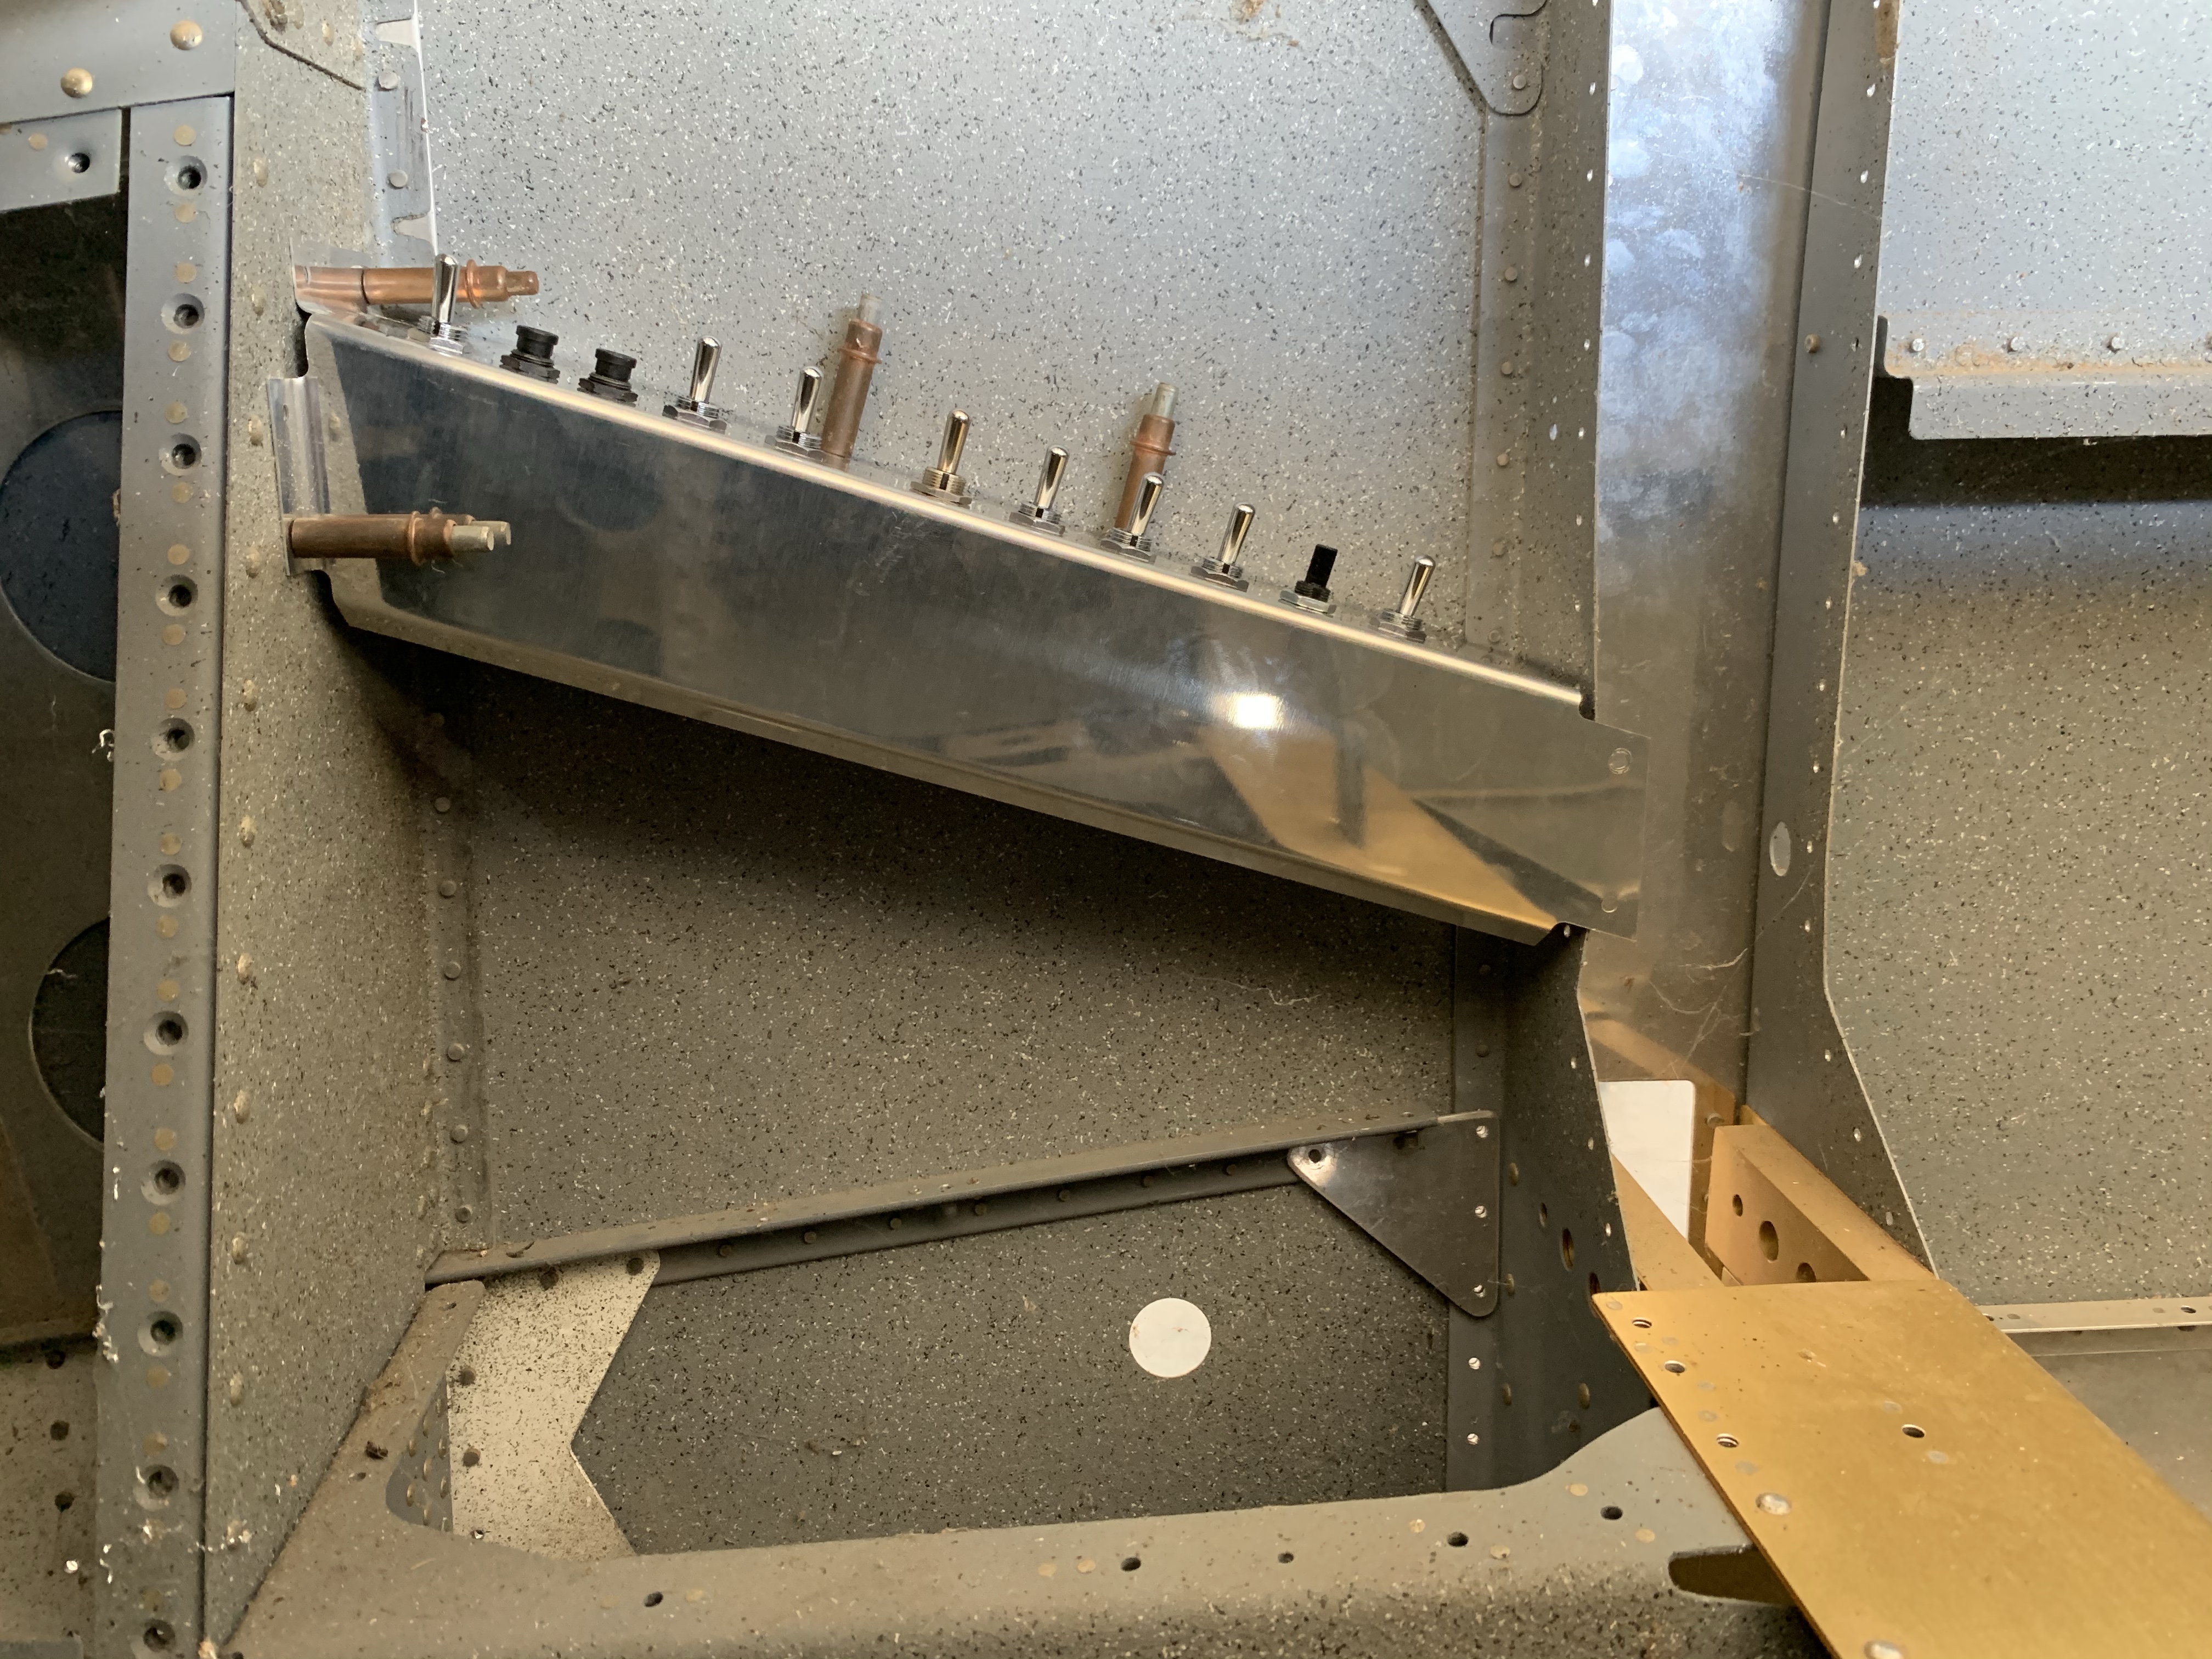
Last step for this bit-o-fun was to cleco the console back in place in the fuselage. All the bundles are tucked up nicely and don’t show at all:
So…what to do next? I’ve been kind of avoiding some of the more prickly fuselage wiring prep work. I still need to do the conduit runs below the seat floor, but before I can do those I need to drill a hole in a bulkhead, but more importantly, work out the positioning of the terminal strips and other stuff just behind the spar carry through. That, in turn, is somewhat affected by exactly where the wing conduits will enter the fuselage. So I decided it was time to bite the bullet and make those holes in the fuselage.
A while back I attempted to make a jig out of scrap wood for this purpose, and after a decent amount of work, I decided I really didn’t feel like it was a great option when compared to just doing some careful measurement. The fun part of figuring out these measurements is deciding on the right reference points to use on the fuselage. What I decided to go with were the center section for fore-aft location, and the lower skin that will mate with the wing ribs for vertical location. To determine these measurements, I used a square to measure the distance from the bottom of the inboard most wing rib to the edge of the conduit, and at the same time, I marked the location on that rib flange where I took the measurement. I then measured from the aft face of the spar along the rib flange to that mark. The outside diameter of the conduit is about 7/8”, so by adding 7/16” to my vertical measurement, I had what I needed to mark the center of the hole on the fuse.
So I started with the left side; measuring back from the center section (where it would mate with that aft face of the spar) along the lower skin, marking the fore-aft point, using my square to extend that line inboard to the side skin, then using the square to draw a vertical line from there and mark it at the appropriate distance. I did a double sanity check on the fore-aft distance, verified that it looked right, and got to drilling – first a #30 pilot hole, then going to town with a big step-drill bit. I went with 1-1/8” holes, mainly because there was a very prominent step on the bit there, but also because there’s no need to make these super precise. I may end up putting large snap bushings or grommets into these anyway.
Then it was time to do the right side. Rather than just reuse my measurements, I did the whole procedure again with the right wing, which entailed temporarily installing the conduit there (it had already been in the left wing) Upon marking the pilot hole location on the right side, I noticed that…this mark seems lower than the other one. Oh boy, time to find out which one is wrong. Sad news: these measurements were right. I made the first hole on the left side too high. Good times. Well, first thing is to go ahead with the right side hole, but be REALLY sure to get it right. Then there was the question of what to do on the right side.
There were two issues to really consider here. The first and most obvious was to consider the consequences of enlarging that hole as needed. Simply going further with the step drill would result in a seriously gaping hole, bad for both not having a super drafty cabin, and also for questions of structure. Besides, by the time I made the hole large enough, the top edge would likely be unacceptably close to the seat angles and rivet line above. No, I needed to essentially mark the correct center and redial the hole entirely. That presented a different problem: I doubted if the step drill would necessarily center itself well if it was overlapping into an existing hole.
So what I decided to do was to add a doubler; this would both help with any potential structural weakening (which I didn’t think was a huge deal, but still better safe than sorry), while at the same time allowing me to basically have virgin sheet stock when drilling the new penetration hole. OK then, time to get to work.
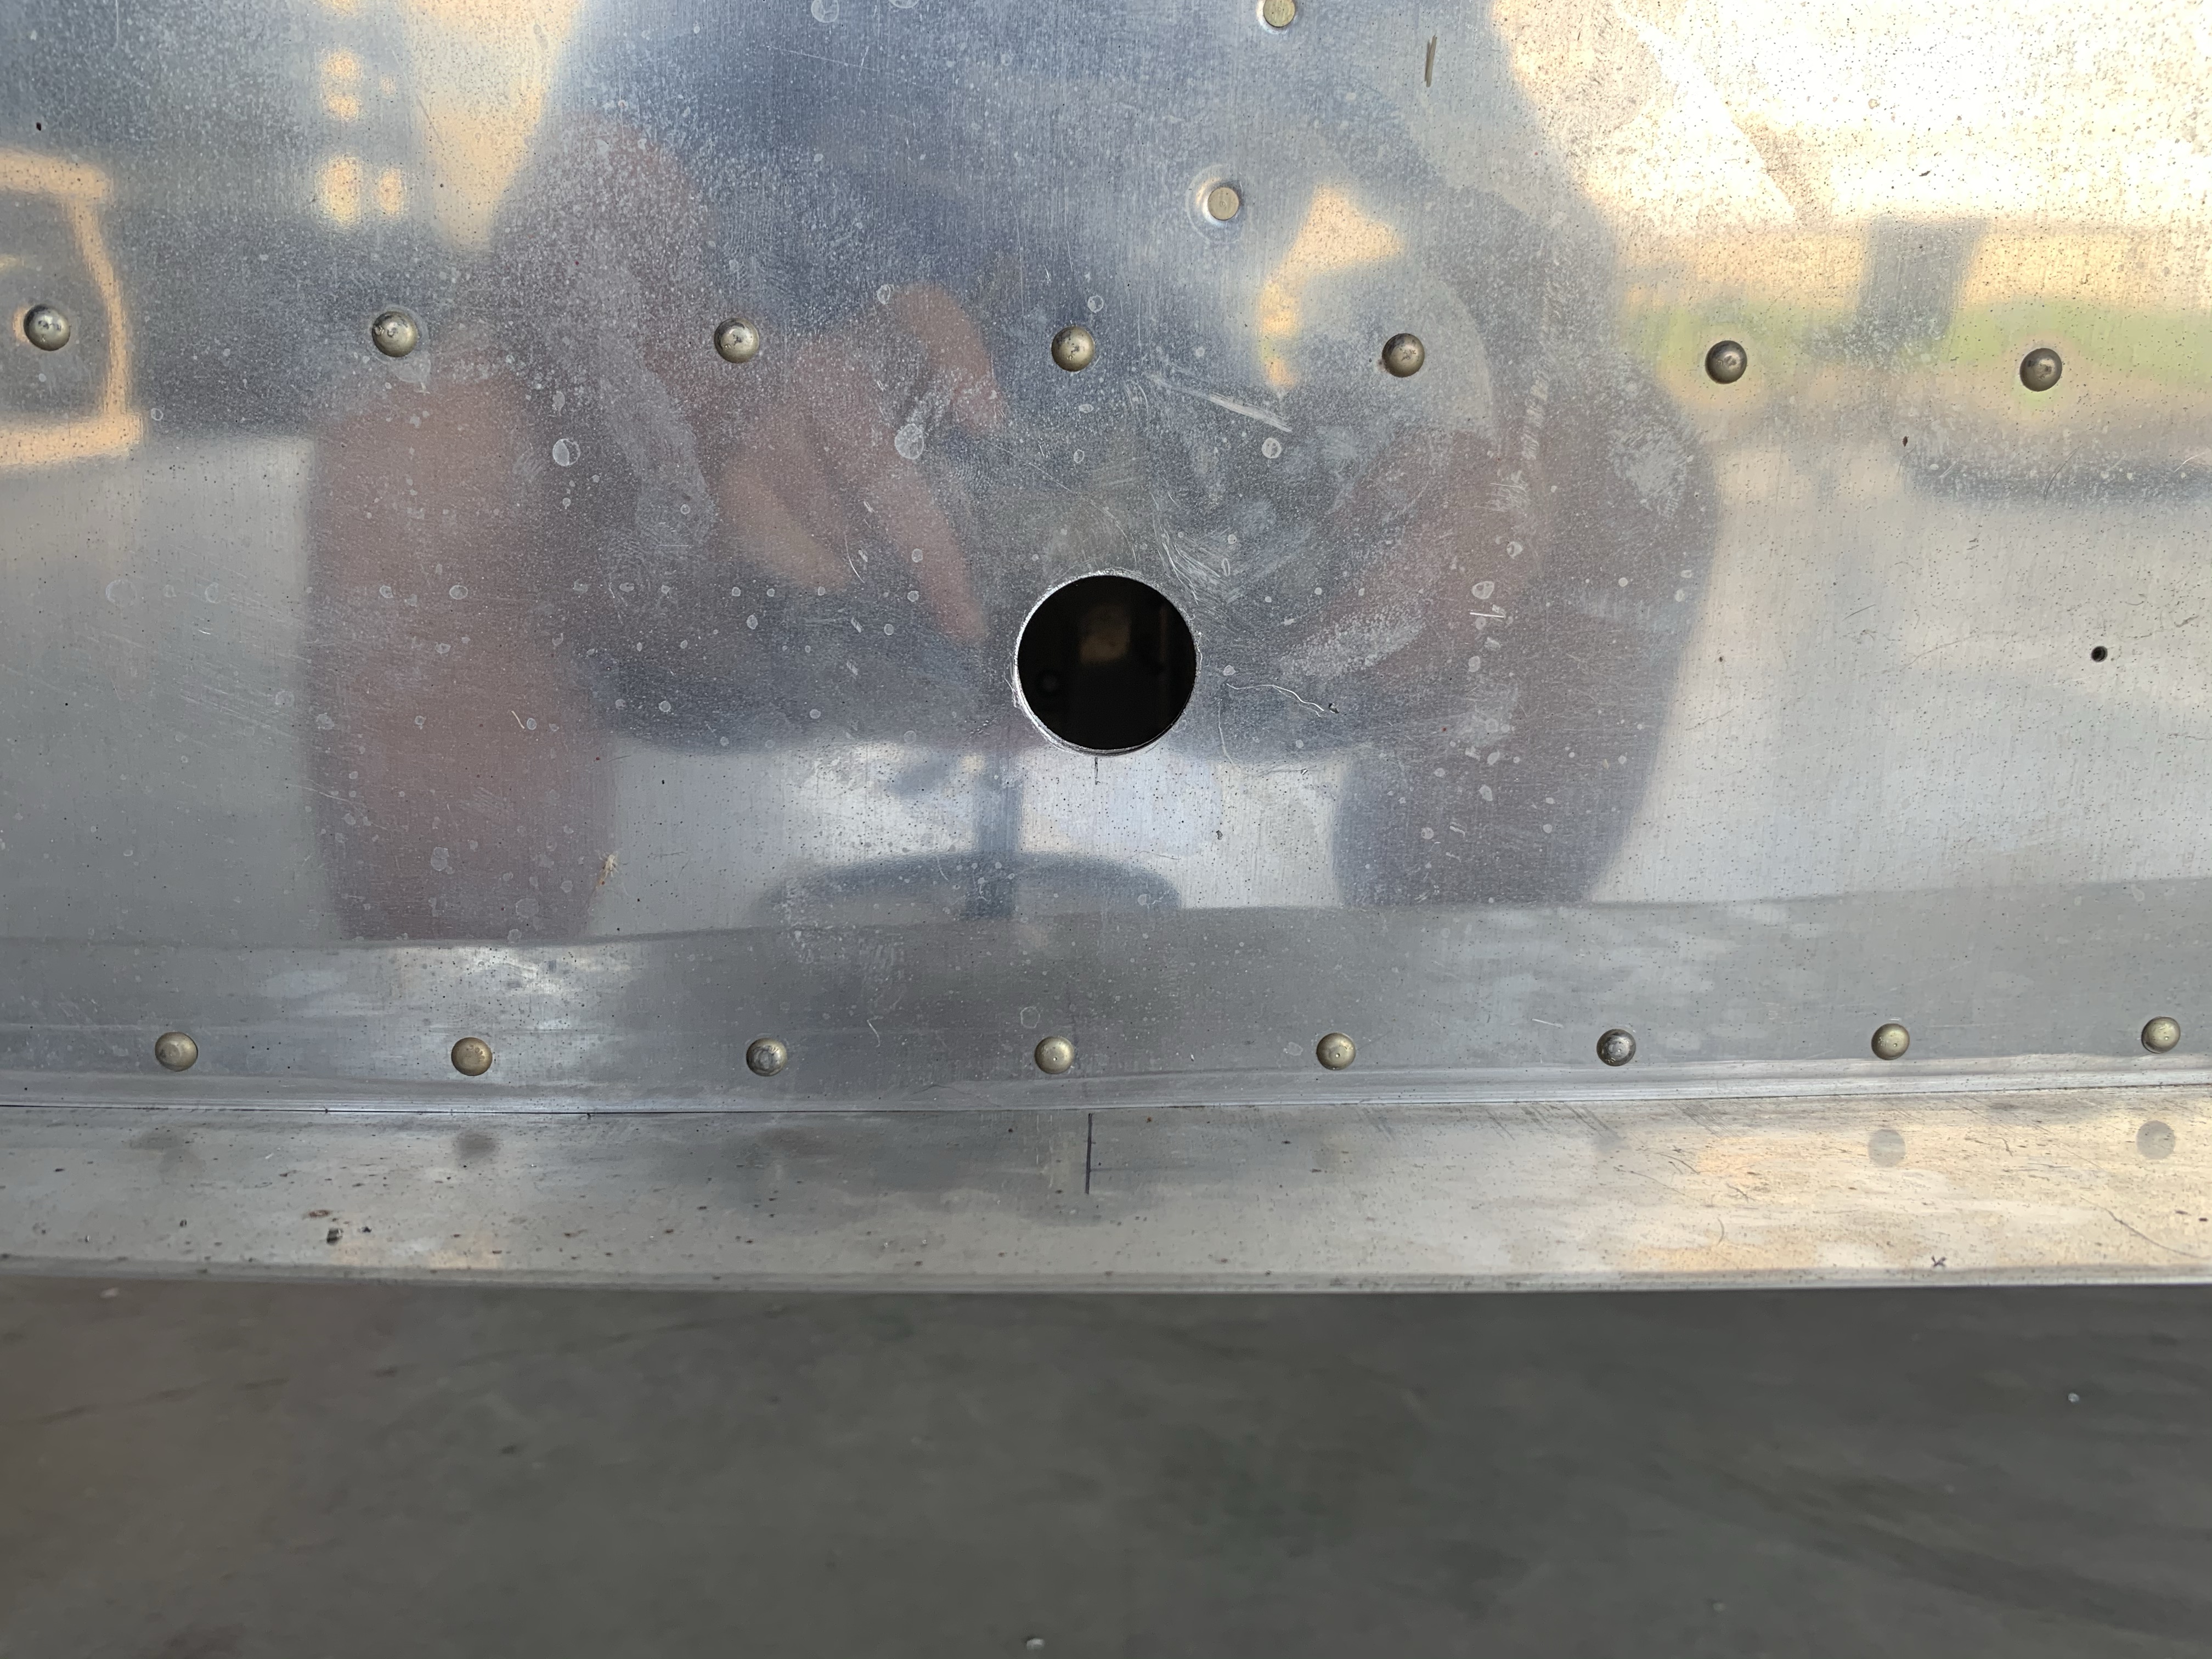
First up, here’s the offending hole. In retrospect, this is obviously wrong; the conduit sits in the bottom of the lightening holes in the ribs, and thus should be closer to the bottom of the fuse:
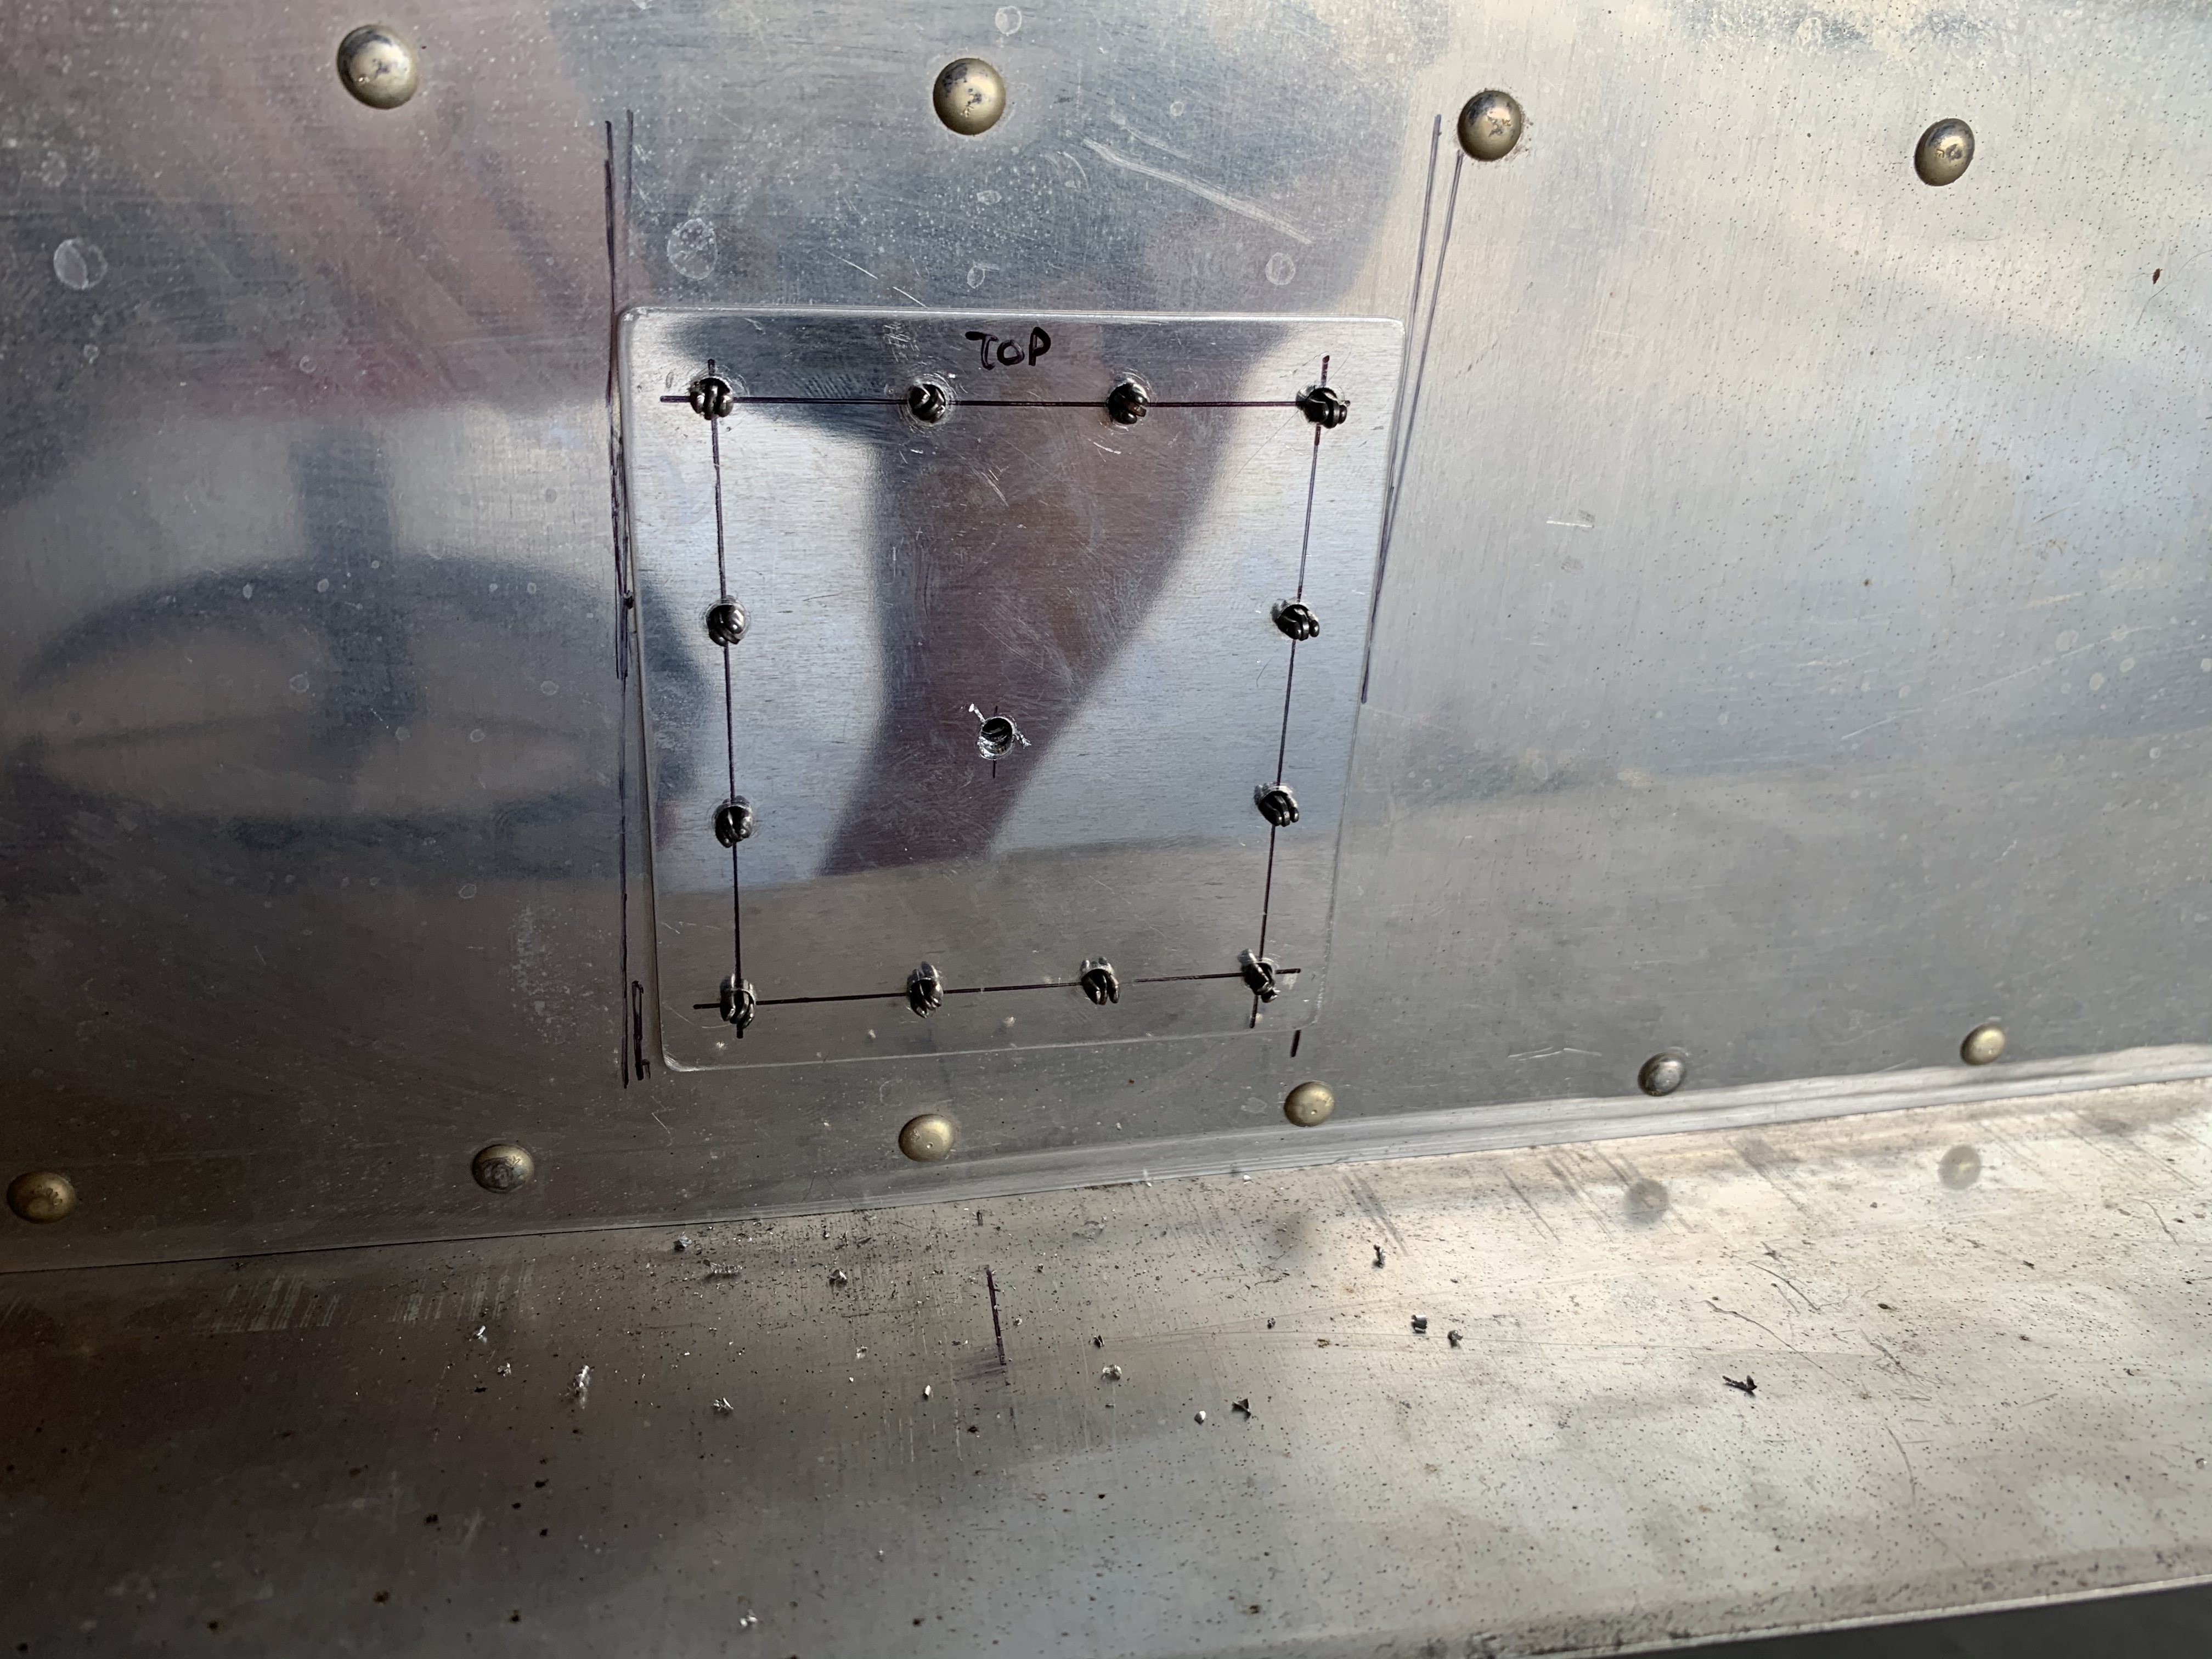
The doubler was made from .040” sheet, the same thickness as the mid side skin here. It was basically sized to provide good clearance both from the rivet rows above and below, and around the original and newly-planned hole locations. Rivet spacing is maybe a bit overboard, but it’ll definitely be strong. Here it is after drilling to the fuselage, and laying out and drilling the new center hole for the penetration:
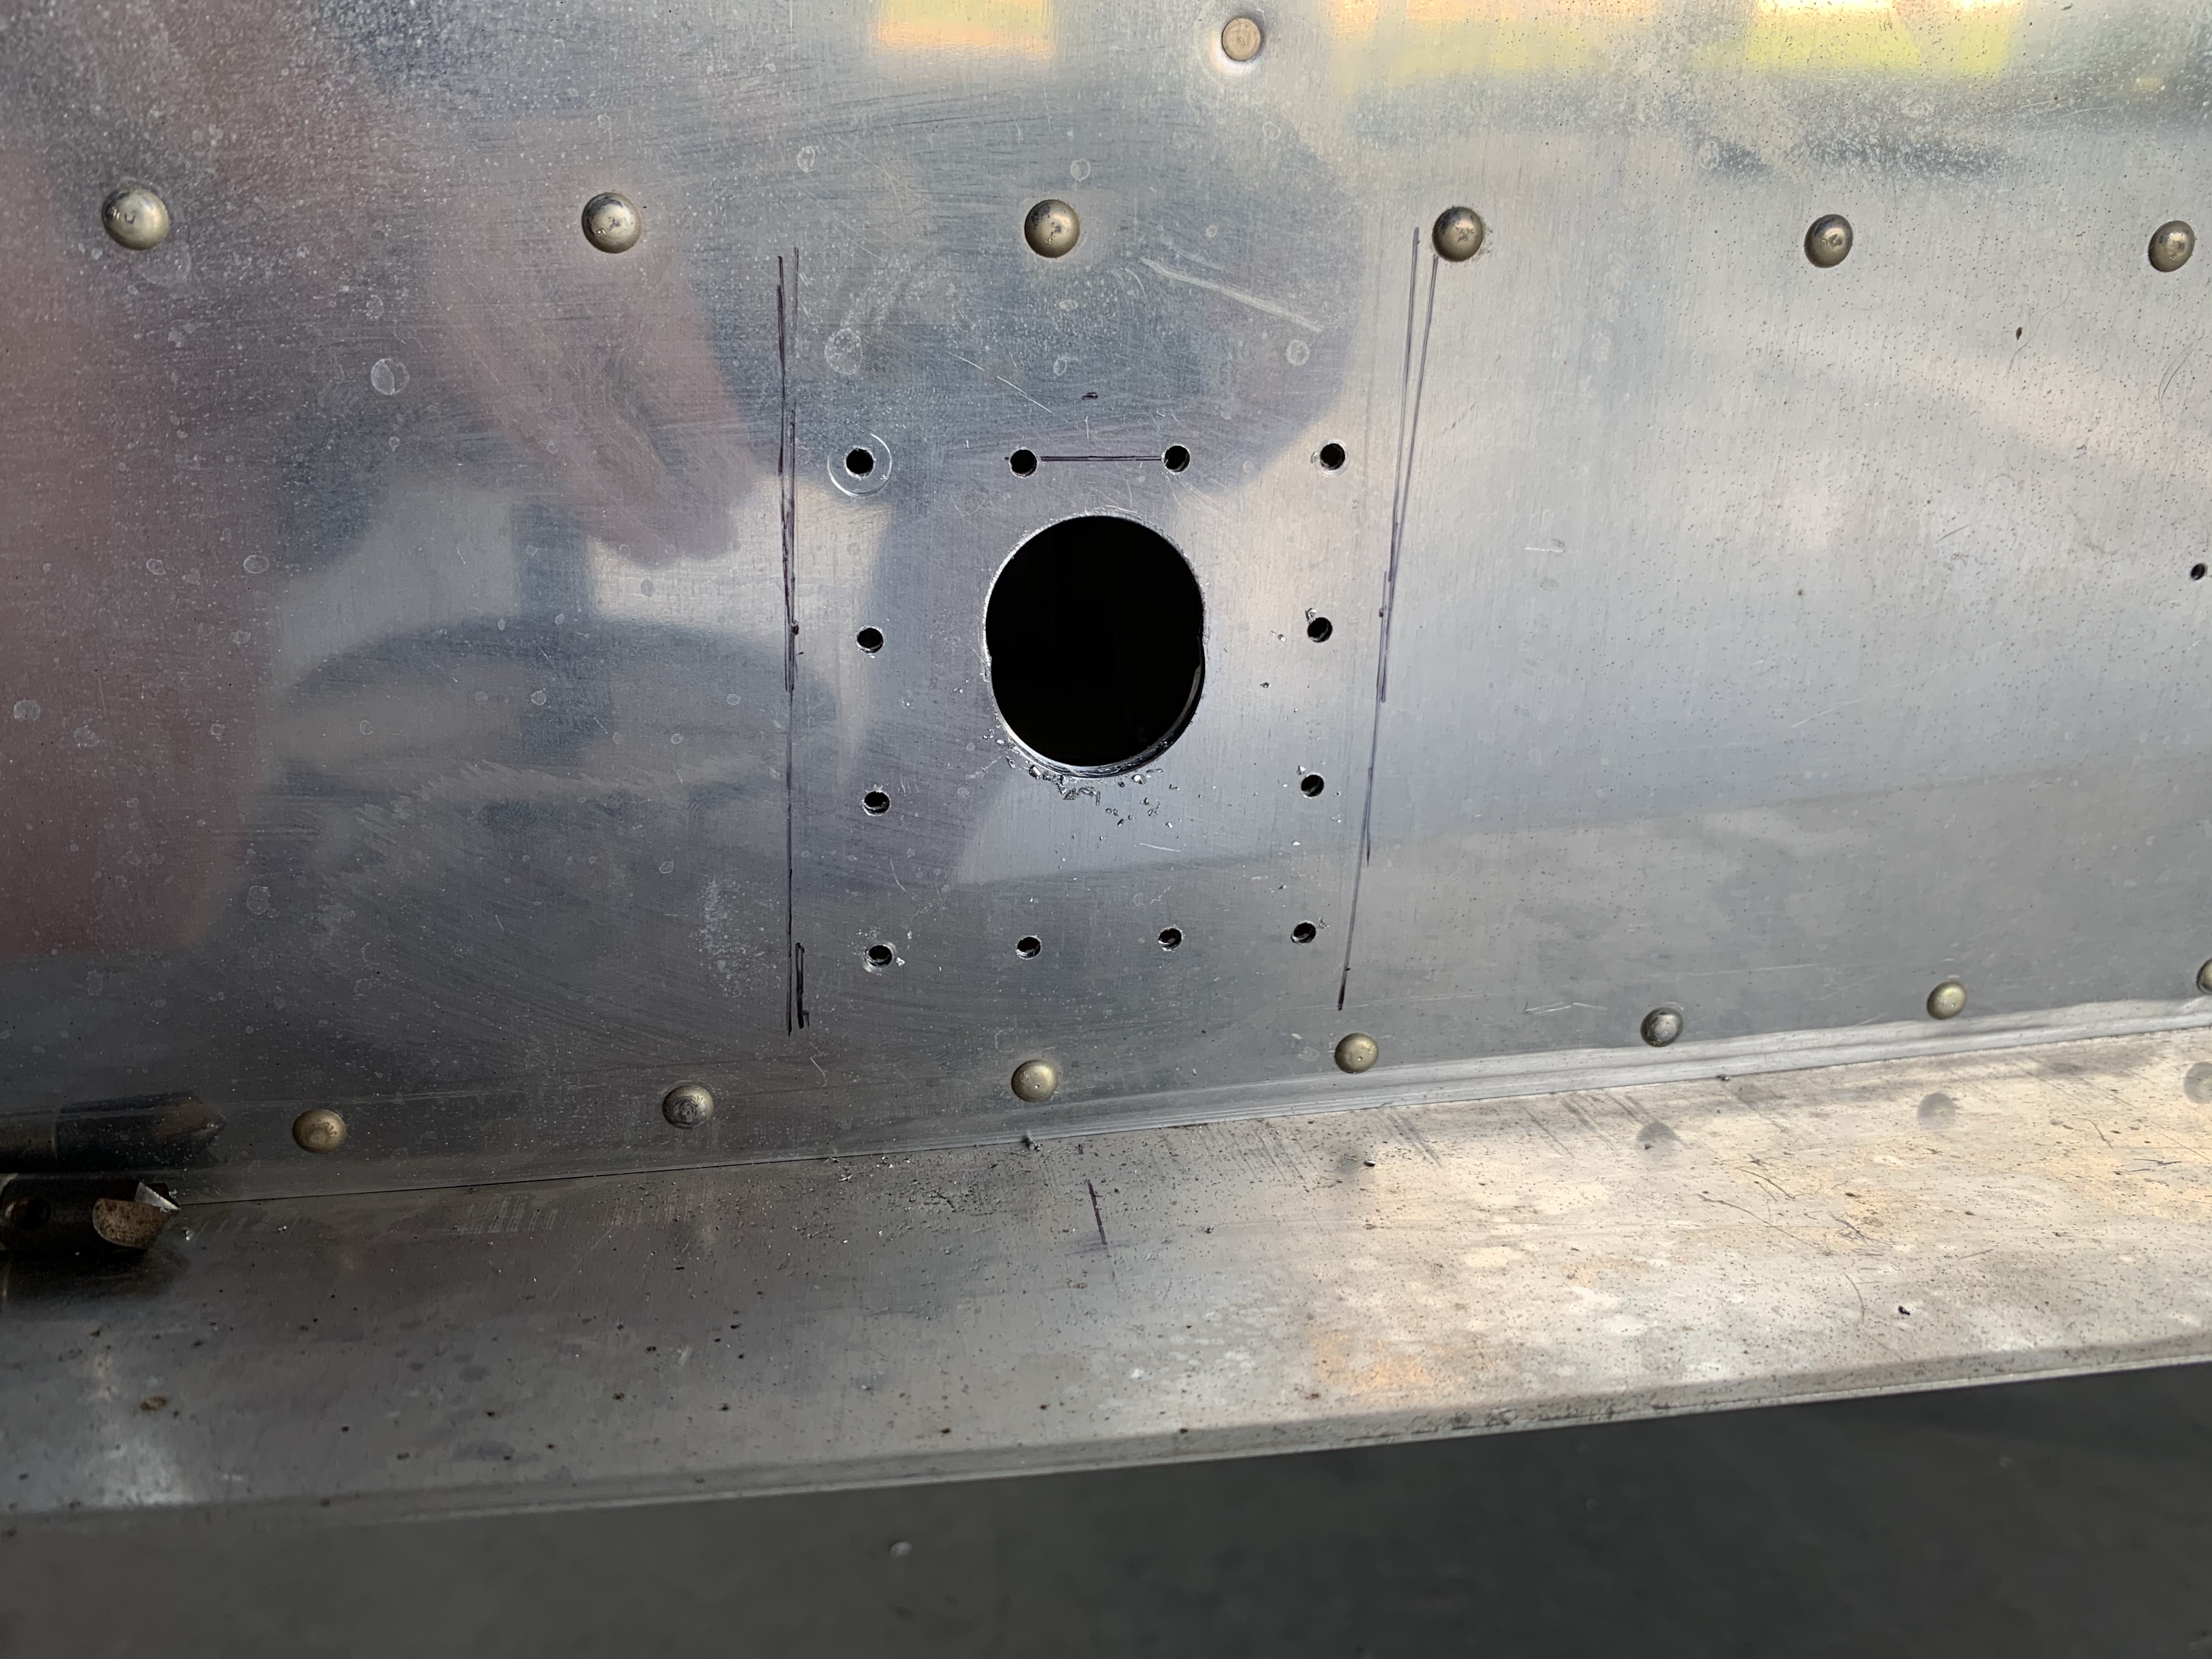
And here’s the skin after drilling the new penetration hole to final size and removing the doubler. Huh, that’s less of a sort of figure-eight hole than I expected:
A measurement check revealed that…the new hole is still too high. I screwed it up again.
I’ll be honest, some part of me considered not mentioning this misstep. It was definitely a confidence crusher, and my first gut reaction was to quit for the day in disgust. But I pretty quickly realized that as bad as fouling a thing up twice in a row sounded, the solution wasn’t that bad at all. There’s plenty of margin at the bottom of the doubler layout…I just needed to make yet another doubler, and start from scratch again marking the penetration center.
Back to not mentioning this…it would have been pretty easy to just gloss over this, but that’s just not a good way to do things, regardless of how embarrassing the mistake might have been.
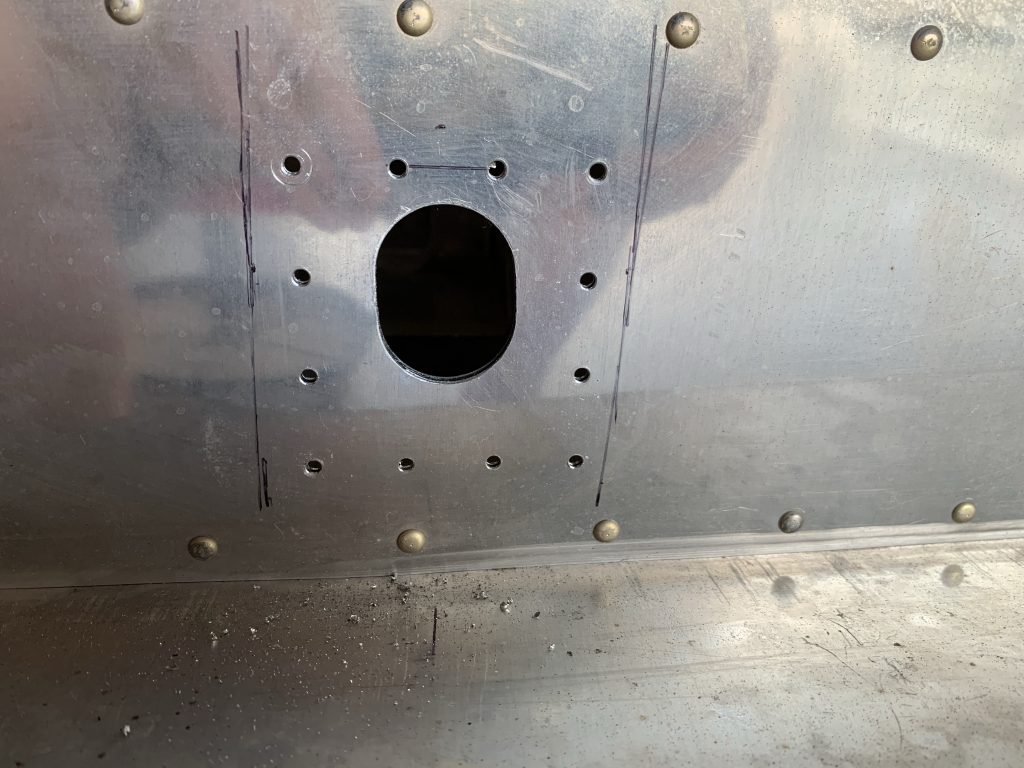
Anyway, I went and made another doubler, used the first doubler to drill the rivet holes on the bench, and got it clecoed in place. Then I laid out the hole center again. This time I went back and forth between the wing and the fuselage roughly 473 times, making really really really really really sure I wasn’t going to have to write about screwing up three times in a row. Back through the drilling process again, and now I just have an even more elongated hole in the skin:
In retrospect, the doubler is almost surely structural overkill. The left side of the fuselage has a second hole far larger than this, a bit further back – this is where the fresh air intake for the rear seat will come in from a NACA duct under the wing. But as mentioned before, the doubler was useful for effectively moving the hole, and for sealing things up a bit better. I may consider adding some fabric boots where the conduit enters for good measure, but that’s a decision for another time.
I also stopped short of actually riveting the doubler in place. On the off chance that I need to enlarge the hole even more when it comes time to fit the wings, I think it’ll be easier to deal with with the doubler still removable. I should probably cleco it back in place so it doesn’t grow legs and walk away, though.
Not shown in photos here was when I started trying to lay our the terminal strips in the floor area. These will provide the interface between fuselage and wing wiring, and they’re looking to be a bit problematic actually. Since they’re long and skinny, and since I’d like them to be accessible without removing the riveted-in rear seat floors (as opposed to the removable forward seat floor), and since I’ve already got the comm antennas in that area…this might be interesting.
One possibility is mounting the strips to the side skins under the floors, assuming they won’t interfere with the rear seat footwells. Even if they don’t that location would make removing the terminals on the bottom side kind of fun. Though now that I think about it, if those are the fuselage-side terminals, then they shouldn’t need removing except in an extreme case (well, even having to remove the wings ever is already an extreme case, this would be even mores).
The other option would be to give up on my desire to have these be easily accessible – maybe they just have to go further back, under the riveted floors. Decisions, decisions…
Oh, I also have to find a home, probably down in this same area, for the Flyleds strobe controller. Looks like I’m in for a few more head-scratching and chin-rubbing work sessions.


