Ailerons

Deburring

Another day with not so much airplane stuff. I had another “little thing” to work on that I thought would take basically no time, so of course it actually took about three hours. The weather was good, but I pretty quickly abandoned the idea of being able to prime today – there’s a ton of prep work to be done before I get to that point. Case in point, I spent 2.5 hours today just deburring parts. I still have to do a bunch of dimpling and countersinking, but at least all the holes and edges are deburred.

I didn’t take any photos today, there’s not much to see really.

Posted in Ailerons, Wings | Hours Logged: 2.5

DImpling

So yeah, it’s been a few nights since I did anything. The main reason is that it’s been rather cold here, and I don’t have a heater for the garage, nor do I intend to get one. While it’d be useful on nights like these, given the Houston weather it’d spent about 98% of the year just taking up space in the garage.

Tonight I got to work dimpling all the aileron parts. First up were the spars, which were mostly easy. However, the bottom holes which are drilled out to #30 for blind rivets need to be dimpled too, and the larger dimple die set has a larger base, and the flange is pretty short. Which is to say, I fired up the bench grinder and conducted another tool modification.

Much better:

IMG 5471

From there I did all the ribs and the trailing edge skins. Before dimpling the leading edge skins, though, I wanted to roll the skin edges a bit. I noticed when I clecoed the ailerons together that the top of the nose skin in particular seemed to want to pillow a bit. I want these skins to fit nice and tight, so I got out the until-now-unused edge forming tool and went to work. I’ve heard lots of guys say that they find this tool hard to use, but I thought it was pretty straightforward.

The slight bend line is barely visible in this photo, just on the outboard edge of the rivet holes:

IMG 5473

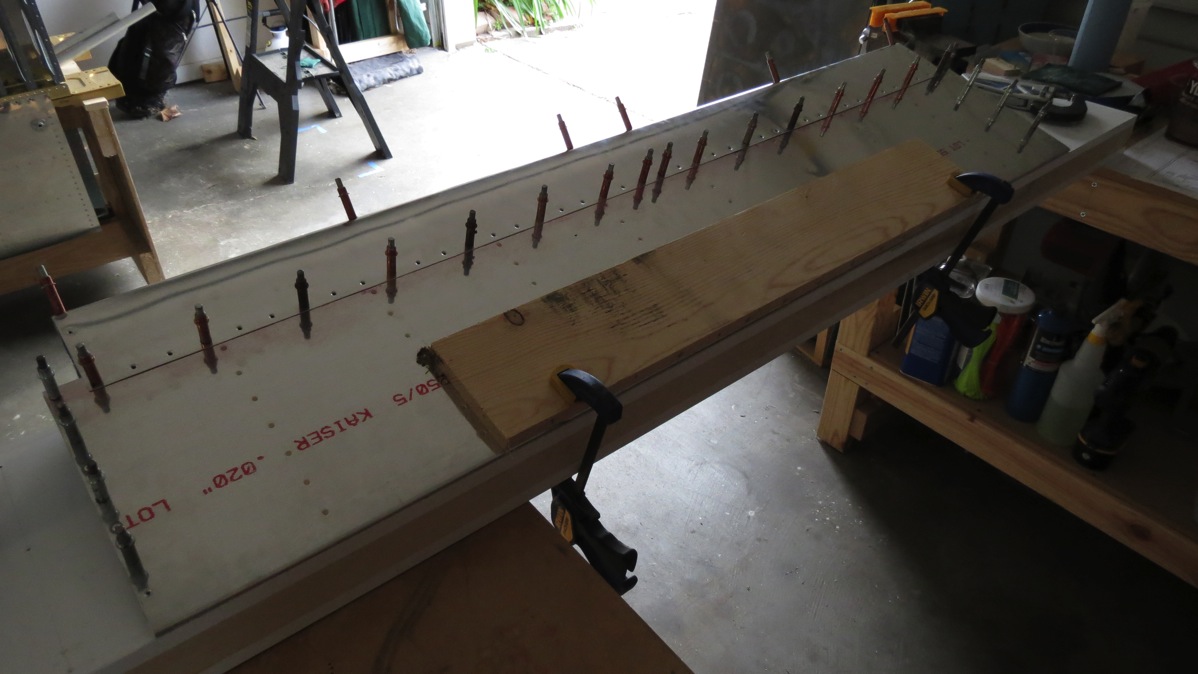
After dimpling the easy holes on the nose skins came the fun part. The rivet holes attaching the nose skin to the counterweight pipe needs to be dimpled for a flush rivet. Problem is, a regular dimple die can’t be used here due to the curvature of the skin. I already knew the accepted approach to this though – just cleco the counterweight pipe in place and use its countersunk holes as female dimple dies. The challenge was figuring out how to support the assembly against me hammering on the male dimple die.

After much experimentation, I came up with this Rube Goldberg assembly of scrap 2x4s and 2x6s:

IMG 5478

Worked great though!

IMG 5476

IMG 5481

And that, I believe, is it for aileron part prep. It looks like the weather will be OK Saturday, so I should be able to get all this stuff primed and then get to work assembling everything. Maybe the remainder of this week I’ll tinker with the flaps some.

Posted in Ailerons, Wings | Hours Logged: 2

Priming, tinkering with flaps

Didn’t get a lot done today. The main thing I wanted to get done was priming, but no sooner had I finished cleaning all the aileron parts when it started to drizzle. So I brought all the parts inside the garage and waited for them to dry even longer than I’d originally expected. I was able to set up my table and shoot primer on the small parts just inside the garage door though:

IMG 5485

But that’s all the priming I got done. I’m on my last can of 7220, and I think I’m going to keep using the 7220 for internal parts that don’t need to necessarily look good or have a tough finish. The rattle can is much easier than mixing up batches of epoxy all the time. So I suppose I’ll make a Napa run tomorrow morning and then try and get the spars primed. I do still want to use the EkoPoxy to do the counterweight pipes, and while I’m mixing up a batch, I figure I’ll prime the insides of the aileron pushrods as well. I cleaned those today too, and considered trying to prime them, but I thought it was better to let them dry overnight to ensure there’d not any remaining water inside them.

In the meantime, I started tinkering with the flaps a bit. The instructions say these are the easiest control surface to build, but I’m skeptical. The construction is actually kind of interesting. First off, in lieu of using stiffeners like the ailerons, the flaps have ribs throughout; I presume this is because they’re subjected to greater aerodynamic loads. Even more interestingly, the skins come in two pieces, but not joined at the trailing edge. The bottom flap skin terminates in a sort of quasi-spar that rivets to the trailing end of the internal ribs. The top skin, in turn, wraps around the trailing edge and includes the aft 20% or so of the bottom skin.

Kind of hard to explain, but here’s the bottom skin with an internal rib in place, showing the design:

IMG 5487

I didn’t really mess with the flaps much though. Some shims have to be constructed before doing any real match drilling, and I didn’t really feel like getting involved with all that today. Kind of feels like I have too many separate things going on right now; I’d rather finish the ailerons before I go nuts messing with flaps. Or maybe tomorrow I’ll feel more like playing with the flaps, we’ll see.

Posted in Ailerons, Wings | Hours Logged: 2.5

Left aileron riveting

Well, that was a lot of fun. Assembling the ailerons starts off deceptively easily: you attach the nose ribs to the counterweight with blind rivets. Then the nose skin goes on, followed by the trailing edge skin, and this is where the fun begins. The top of the trailing edge skin is attached to the nose skin and spar with solid rivets, but even with the bottom of the skin not clecoed to the spar, access to the inside is pretty tight. I must have spent half an hour just trying to figure out how to position the aileron so I could get the riveting done. In the end, my solution came from reading Jamie Painter’s build log, not my own ingenuity. You just put the aileron on end and now you can (relatively) naturally access both sides:

IMG 5526

Even so, bucking has to be done by feel. But I got the hang of it pretty quickly, until I got to a rivet that was close enough to a stiffener that I couldn’t use the tungsten bucking bar. It took three tries to rivet that thing, and I ended up having to draft Josie to hold a flashlight and hold the skin while I worked. Removing the first two bad rivets marred the skin around the rivet head too, but hey, that’s what paint’s for…anyway, getting that one stupid rivet took probably half an hour total. But finally, I had all those top rivets done:

IMG 5527

I’d kind of hoped to get this thing finished tonight, but oh well. It wasn’t for lack of trying, that’s for sure. The good news is that things should be easy from here on out; the rest of the rivets on the aileron are either accessible with a squeezer or are blind rivets. I imagine I’ll have this thing wrapped up pretty quickly tomorrow, and hopefully riveting the left aileron will go faster now that I’ve worked out the technique for the most part.

Posted in Ailerons, Wings | Hours Logged: 2.5

Finished left aileron

And once again, not the most productive day. I had held out some slim hope of priming flap components today, but that was obviously not workable, given how much prep I still have to do on that stuff. So rather than try to do that, I went back to the left aileron. I’d been under the impression before that it’d be really simple to finish this thing up, and that was kind of true, but as usual there were some small things that slowed the process down.

With the top skin/spar joint riveted, the next step is to install the end ribs. There’s a specific riveting order in the instructions for this part of the assembly which I neither remember exactly nor care enough to go look at the instructions to relate. Once you start working on rivets on the bottom, though, it’s important to secure the aileron to a flat surface to keep it straight. The instructions call for weighing the aileron down, but I didn’t have anything good for this purpose. Since the aileron naturally sat nice and flat on the surface, I just took a short piece of scrap wood and lightly clamped the trailing edge down to the surface. Then I just kept checking that the aileron was sitting flat during the following steps.

Aileron secured on the flat surface:

IMG 5530

Before long, a lot of rivets had been squeezed and pulled and I had a finished aileron:

IMG 5531

Next, I installed the hinge brackets, torqued the fasteners, and added torque seal:

IMG 5533

This part of the process took way longer than I expected. As seems to be common, access to the bolt heads was limited, especially on the forward side. At one point I tried turning an old deep socket into a thin wall socket with the bench grinder, but it didn’t work out too well. I eventually ended up holding the bolt heads with an adjustable wrench,

Now, where to store this thing? I guess I’ll just temporarily attach it to the wing. I just put the bolts through the brackets and lightly installed a lock nut; I haven’t bothered with the various washer stickups and spacers that will be in place for the real assembly, though I’ll need those before I can get to fitting the flaps down the road.

IMG 5534

IMG 5537

At this point I broke for dinner, and after that it had cooled off rapidly in the garage, so I called it a night. Tomorrow I should be able to finish the right aileron and get to some flap work.

Posted in Ailerons, Wings | Hours Logged: 3

Right aileron, pushrod fiasco

Did all the riveting on the right aileron today. It sure goes a lot faster the second time around… I did have a heart-stopping moment while riveting the top spar-skin rivets though. As before, I had the aileron standing up on end, and I was almost done, just three rivets left to go. I turned to grab another rivet, and when I turned back, there was my aileron, toppling ungracefully over. Unmindful of my cries of dismay, it rebounded off my work stool and plunked to the concrete. Fortunately, it was undamaged. I figure that between the stool breaking its fall a bit and it landing on the nose skin – which was reinforced by the counterweight – I got off lucky.

There are a lot of blind rivets in the ailerons, which means a lot of rivet stems left over after everything is done:

IMG 5543

Once I had the aileron done, I mounted on the wing as with the left one. Next I went to work putting the appropriate washers and spacer in place at the hinge points. The outboard hinges are easy, requiring only washers, but the wider inboard brackets require a spacer to be fabricated from aluminum tubing. This isn’t a complex process, but it is painstaking, carefully shortening the cut piece of tubing to the proper length for a snug fit.

Here’s the inboard bracket and the washer and spacers and such in place:

IMG 5539

Both ailerons in place on the wings:

IMG 5542

Next I decided to work on the aileron pushrods. I started with the shorter rods, which connect the bell cranks to the ailerons themselves. These pushrods are made from steel tubing, with rod ends riveted into the ends. I spent a fair amount of time carefully cutting the provided tubing to length and then laying out the rivet hole locations – no prepunched holes here! After drilling everything, it was time to rivet.

Riveting these pushrods seems to be a frequent source of consternation for builders. The rivets are very prone to folding over when driven, making for ugly shop heads. I chose to use shorter rivets than the plans call for, and I figured it couldn’t be that bad…wrong. The first rivet I tried with the squeezer clinched in nasty fashion:

IMG 5547

The problem was immediately obvious: I’d tried this with the squeezer held in the vise and me holding the rod in my hand. I imagine the rod rotated a bit when squeezing. That wasn’t too smart of a way to do this.

I decided that there was no way to hold the squeezer and the rod steady for this procedure, so I decided to try the rivet gun instead. I clamped the pushrod in the vise with the rivet as close to the jaws as possible. This worked great on the first two rivets, and for a moment I thought I’d cracked the code.

Nope…the next two clinched despite me being really careful with the bucking bar. So I drilled those out and then decided to call it a night. I was getting into the mindset where I really wanted to solve a problem, at the expense of really thinking through the options. That’s the kind of mindset where I tend to make problems worse.

So I’m not really sure how I’ll handle this. I’ve seen where guys have set the rivets using a C-frame, but I don’t see how that will make the rivets any less likely to clinch. The plans mention the option of welding the rod ends, which I guess I could do, though it seems kind of ghetto to do that after drilling the rivet holes. Another couple of builders have addressed the issue of the rivets bending inside the hollow rod end by filling the rod ends with something like JB Weld to hold the rivets better. I thought about doing that, but it’ll be a little messy since I already drilled the rivet holes.

So who knows…we’ll see.


Posted in Ailerons, Wings | Hours Logged: 6.5

Pushrods done

Not a lot of time tonight, but I figured I’d see if I could get the pushrods done. The epoxy was cured nicely, now to get those rivets out:

IMG 5551

That turned out to be a fun exercise. I was able to get all the rivets moving in their holes with a little touch from the rivet gun, but extracting them was a little more difficult. As usual, the first one took quite some time to get out, but then I had a system down and the other five came out in no time. I was pleased to find that shooting the rivets now was a cakewalk, with hardly any tendency to clinch. The resulting heads aren’t the best I’ve ever done, but perfectly adequate:

IMG 5553

Next, as a precaution, I decided to shoot some primer on the ends of the pushrods. Cutting the rods to length had removed some of the powder coat, and I’d also seen some flakes coming out from under the rivet shop heads as I shot them, so better safe than sorry. I wrapped the threaded portion in masking tape and went to town:

IMG 5556

I like how fast the 7220 primer dries. Ten minutes later and I ripped the making tape off and installed the rod ends and jam nuts:

IMG 5557

After that, I may have pinned one of the pushrods to an aileron and then moved the rod so I could watch the aileron move. This is strictly a rumor, totally unconfirmed…

In other news, my minor griping last night about Van’s not notifying of shipments was premature. Today I got a notification from Old Dominion with my shipment info, including a tracking number. Now I get to spend my time refreshing the tracking page three times a day. I imagine I should have the kit early next week. I won’t have the flaps done by then – I’m out of town at least one day this weekend – but that’s okay. I suspect some serious garage reorganization is going to be in order once we start unpacking the fuse kit.

Posted in Ailerons, Wings | Hours Logged: 1

More pushrods

Rather than mess with deburring flap skins – which I won’t be able to do any priming on this weekend anyway – I decided to go ahead and build the second set of aileron pushrods tonight. These are the long pushrods that will run between the bell cranks in the wings and the control stick in the cockpit. These are simpler to make than the other ones as well; instead of small-diameter steel tubes with solid rivets, these are fairly large-diameter aluminum tubes and the ends attach with blind rivets.

Once I’d cut the rod stock to length and marked and center-punched the hole locations, I got Josie to come out and hold one end of the tube while I drilled the pilot holes in the drill press. Next I inserted the threaded ends, lined them up carefully, and drilled all the holes out to full-size, clecoing as I went:

IMG 5562

Some quick deburring of everything and then it was just squeezing a bunch of blind cherry rivets. Afterwards, I couldn’t resist the urge to install a bellcrank and both pushrods, just so I could sit at the wing root, move the pushrod, and watch the aileron move:

IMG 5565

IMG 5567

IMG 5569

The next time I do some priming, I’ll go ahead and shoot the outside of these rods as well. I figured it was easier in this case to just prime after assembly instead of before.

Posted in Ailerons, Wings | Hours Logged: 2

Aileron rigging pregame

No help for riveting tonight, so I switched gears to work on getting the initial aileron rig done. First item of business was the attach point between the short pushrods and the aileron hinge bracket. Each aileron needs a spacer fabricated from aluminum tubing, which is the main source of work here. So for each aileron, I put the bolt, required washers, and a detached rod end in place, measured the remaining space with calipers, and used that to make a pice of tubing the proper length. This basically just ends up being a lot of trial and error.

Here’s the end product, showing the full washer + spacer stack:

IMG 5649

The bellcranks require similar work; the gap in which the long pushrod (to the cockpit) fits is way oversize, and needs a 1+” spacer. Same deal as before, measure, cut, trim, check, trim again, check, trim, etc… Finished product:

IMG 5651

Next, I went to work installing both bellcranks. Unfortunately, this is where rigging work stopped. Once the bellcranks were torqued in place, they were very stiff and difficult to move. After doing a touch of research, I realized that my bushings fit way too tightly in the bellcranks. For some reason, despite the manual calling for a “slip fit,” I felt that a fit tight enough to require tapping with a hammer was appropriate. I can only chalk this up to being in a “get this task done” mode that particular night.

Long story short, those bellcranks will be coming off and I’ll be cleaning up the insides some more with emery cloth until I get an actual slip fit. It seems that this is a common spot where builders encounter a lot of trial and error – one guy said that he figured he installed/removed the bellcranks about eight times! Hopefully I can be a little more efficient than that…

Posted in Ailerons, Wings | Hours Logged: 2

Aileron bellcrank rigging

As alluded to last night, my first goal tonight was to fix the far-too-tight aileron bellcranks so they’d pivot freely. This turned out to be fairly simple; I got an appropriate-size metal rod, taped on a piece of emery cloth, chucked the whole thing in the drill press, and used that to clean up the inside of each bellcrank. I did this with each one until the bushing slid easily in and out without any binding. Then I regreased and reinstalled the bushing, and put the bellcrank back on the spar. Now the bellcranks move nice and smoothly.

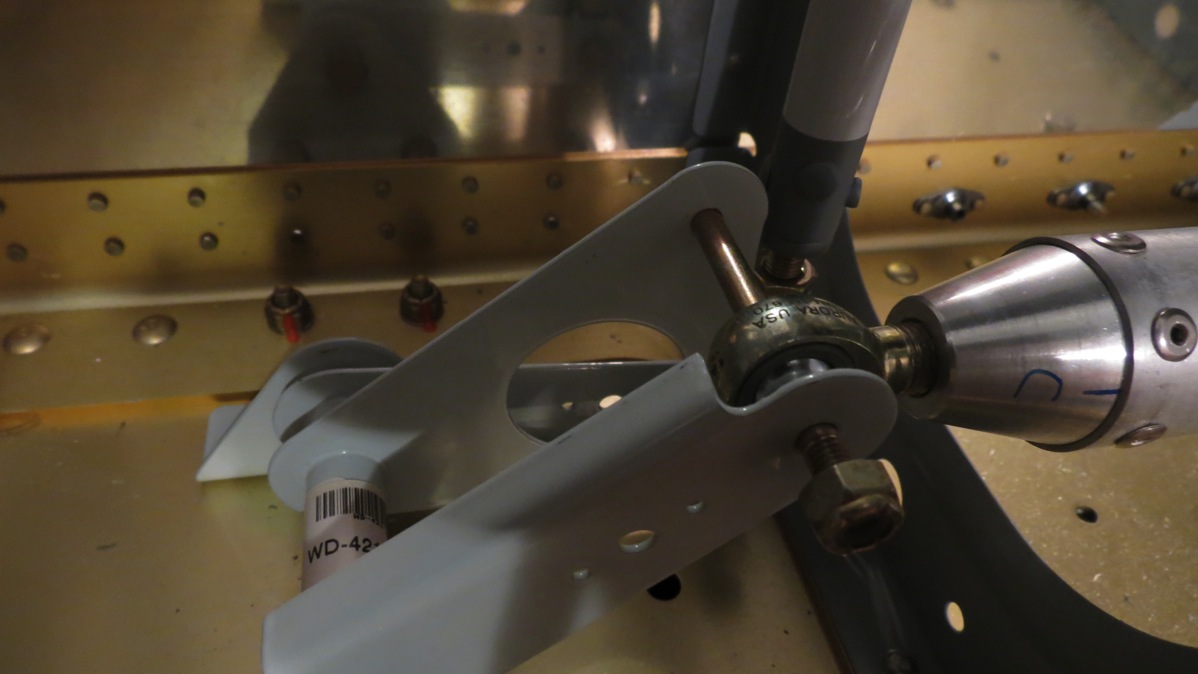
With that done, I moved on to rigging the system and sizing the short pushrods. The procedure is to fix the aileron in the neutral (in-trail) position, then use a provided jig to set the bellcrank in its neutral position. The purpose of the bellcrank jig is to ensure that, when everything is rigged, it’s not possible to over-center the bellcrank, which could possibly result in the controls locking up, a situation I would prefer to avoid. Anyway, with the aileron and bellcrank fixed in neutral positions, the pushrod can then be adjusted until it fits nicely in place.

Here’s the left pushrod adjusted and sitting in place. Notice the cleco clamp I used to help hold the bellcrank jig in place while I dealt with the pushrod:

IMG 5656

Same assembly, different angle:

IMG 5657

Same assembly, but with the long pushrod also installed:

IMG 5660

With both long pushrods rigged, they stick out quite a bit from the wing roots. Not too surpassing, I suppose, since they do have to reach the center of the fuselage. But as much as they stick out, I doubt I’ll leave them this way. Seems like a good way for them to get damaged when someone runs into them:

IMG 5661

And that’s it for tonight. Maybe one of these days I’ll actually get those flaps riveted and hung…actually, at this point, I’m pretty much out of wing stuff to do besides the flaps. I guess if I can’t get Josie to help rivet the next couple of days, I’ll start messing with the firewall.

Posted in Ailerons, Wings | Hours Logged: 1.5