Fuselage

Lower left longeron fitting, part 2

Didn’t get a lot done tonight. For some reason I was dog tired, but I still managed to go get a little something done. There are two holes that go through the forward floor, the longeron, and finally the outboard gear tower weldment. I’d drilled those initially to #30 before, and tonight I drilled them to the final size of #19, then countersunk for flush screws. Then I pulled the longeron out and deburred all those holes I’d drilled. The plans also call for a bit of radiusing on the vertex of the aft end of the longeron, something to do with promoting a better fit of some part down the road. Then I put the longeron back into place and clecoed/bolted/screwed it in place. The next step is to repeat all this on the right longeron, but that’s for another time, maybe this weekend. After that, looks like I get to fit the auxiliary longerons…

Posted in Fuselage | Hours Logged: 1

Tinkering

OK, so this wasn’t even a real work night when you get down to it. I wanted to get out and get stuff done since I didn’t do anything over the weekend, but I was also kind of beat after work today and didn’t really feel like dealing with carefully fitting the right lower longeron. So instead I kind of made it a big-picture-planning night, or something like that. Basically I just read ahead in the instructions, looked ahead through the plans sheets, and got an overall view of how things went together. I may have, in the course of this, clecoed the side skins, cockpit rails, and windshield roll bar in place just so I could look at them and giggle. But that’s just a rumor.

Hopefully I feel better tomorrow night so I can get some stuff done. I’ve also got to start seriously thinking about our Oshkosh trip, which is now only a little over two weeks away. Time to start dragging out and weighing the camping gear again…

Posted in Fuselage

Lower right longeron, mid fuse prep

OK, finally back to work. I’ve been a bit lazy this past week, in addition to trying to get a head start on being ready for out trip up to Oshkosh. I started today by working on repeating all the stuff I did previously with the lower left longeron. I ran into a problem almost immediately when I first put the longeron in place:

IMG 6036

Yup, apparently I twisted the aft end the wrong way. Fixing the twist wasn’t a huge deal, but it did require a few trial-and-error trips between the vise and the forward fuse assembly before I got the twist just right. Then I set to work doing all the drilling. This is especially fun since a breaker trips if the compressor cycles while the garage air conditioner is running. So when I know I’m going to be doing a lot of drilling like this, I preemptively turn off the air conditioner, which of course means that it pretty quickly starts getting hot. And here I am, sitting on the floor and drilling over my head, with aluminum and steel chips raining down on me…and the sweat makes sure they all stick to my skin. Whee!

Anyway, with the drilling, deburring, and refitting done, I final drilled all the #30 holes on the outboard sides of the gear weldments. This is just to remove the powder coating from the holes and make it easier to cleco stuff together later. Next, for each side, I placed the auxiliary longeron in place, followed by the outer gear tower plate, which holds that longeron in place. The fun part about this is that you’re supposed to cleco from the inside, to allow for fitting the skins at a later time. That works fine on the lower portions of the towers, but for the forward upper areas, the baggage bulkhead gets in the way. So I ended up temporarily removing the forward baggage floor along with the bulkhead, just so I could place a handful of clecoed on each tower. I bet it’ll be fun doing all the riveting up here…

Here’s the left side with the aux longeron and gear tower plate in place. Note that the aux longeron hasn’t been drilled at all, it’s just loosely held by the tower plate. I imagine it will get drilled in assembly with the skin at some later time…

IMG 6038

And that’s all for the forward fuse assembly for now. I removed the center section assembly and set it aside, then moved the forward fuse assembly back to the saw horses. That brings us to the mid fuselage assembly, which appears to basically constitute everything from behind the center section to the back of the rear seat; the seat rib assembly from before will be the base for all this. First up is just a bunch of part hunting and deburring. There are four floor angles, a couple of gussets, and ten parts for the rear seat armrest assemblies…and they all have nooks and crannies requiring the needle file to smooth. I spent probably a couple of hours or more just deburring all that stuff.

The instructions also call for you to enlarge a hole in the armrest bulkheads to allow for routing the pitot static line, but they don’t tell you what size to enlarge it to. I spent a fair amount of time hunting through the plans, then searching online, before finally remembering that I have the entire pitot kit from Safeair in the garage. Sure enough, it includes the snap bushings for the line routing, so finally I got past that issue.

Another hangup I’m having involves the rear seat throttle. The instructions say to modify the left armrest now for the rear seat throttle, if one is being installed. Well, that wasn’t an option on the fuse kit, so I don’t have that stuff. The bit of research I’ve done so far seems to indicate that people do lots of different things for the rear throttle, so there’s no one simple answer so far as I can tell. I’ll just have to do some more research and try and figure out what to do here; I can probably delay these modifications without much impact up until the time that I actually rivet the skins on. Maybe I’ll get some good ideas at OSH…

Next up I pulled out the mid side skins, peeled off the blue vinyl, and deburred all the edges. More tedious work here with files and needle files and the die grinder. The next step here is to make a bend at the aft edge of each skin, but it was late enough that I decided to leave that for tomorrow. Instead, I clecoed together the left armrest assembly and then clecoed it to the seat rib assembly, mainly just so I’d have something visual to show for today’s work:

IMG 6039

And that’s it for tonight. Tomorrow I should be able to get the skins rolled and maybe have a nice-looking subassembly by the end of the day…

Posted in Fuselage | Hours Logged: 7

Mid side skin bending and modification

So I started out today by looking at putting the bend in the lower aft corner of each mid side skin. First I had to make a run to Home Depot to get some aluminum angle to use for the bending rig; after that, I got to work. The bend here is basically conical, with the forward portion having a small radius of ~1/8”, and a much larger radius at the aft end. The procedure calls for cutting a piece of wood with a 45° angle and clamping it on the skin at the upper bend line, in alignment with the work bench. This sets to upper limit of the bend. The angle is cut in two pieces and the lower end of the skin is clamped between the two pieces, and the bending force is applied to the angles.

Here’s a look at the bending rig clamped in place for the left skin. As you can see, I’ve already put a slight bend in the skin here.

IMG 6046

IMG 6043

There’s a bevel cut on the forward (left in the above photo) end of the angle to allow it to clear the piece of wood. However, I still ended up making contact towards the end of the bend; I thought this would be OK, but it ends up pushing the wood piece out of place, regardless of how tightly it’s clamped down. Apparently there’s a lot of force applied there at the tight end of the bend. I ended up stopping the bend a little early; the instructions say that it’s better to undergo things here than overdo it.

IMG 6049

I actually ended up going back and tightening this up later on, after removing some more material from the end of the angle to allow me to bend a little further. But first I had to take my skin and loosely test-fit it to the armrest/seat rib assembly I put together last night:

IMG 6051

IMG 6053

The right skin ended up looking a good bit better than the right, as is usually the case when I do something twice. I think the main lessons learned here (for any other builder that might read this) are to avoid contact between the wood and the aluminum angle pieces at all costs, and to clamp way more than you think you need to. At first I tried to just hold the aluminum angle in place with clecos, but it came loose after only a bit of bending, hence the addition of the small C-clamps.

At this point I ended up taking a break; my allergies had been bothered me all morning and I’d been mostly working through it, but I finally have in, took two Benadryl, and surrendered to the ensuing sleepiness. I felt better after that, so after dinner I went out to get a little more work done. First I moved the seat rib/floor assembly to the work bench and clecoed the center section in place, then match-drilled the holes between the seat ribs and the seat rib supports on the aft side of the center section.

Next, a large hole needs to be but in both the right mid side skin and the outer seat rib; this is where the vent hose for the rear seat will pass through. The vent is originally fed from a NACA duct on the bottom of the right wing:

IMG 6055

And finally, it was time to start clecoing the mod side skins in place. This is a bit tedious, mainly because it’s tough to access both the cloches and the parts that need to be pulled together. I got as far as clecoing the left skin in place to the seat ribs and rear bulkhead before quitting for the night. I’ll still need to add the armrest assembly here, and also repeat this for the other side. I need to read ahead in the instructions and maybe evaluate if it’s better to add one side skin at a time to better facilitate match drilling and so forth.

Anyway, I’ll close here with some vanity shots of the side skin clecoed in place (more thoroughly this time):

IMG 6057

IMG 6059

Posted in Fuselage | Hours Logged: 2.5

Mid fuse assembly, joining with forward fuse

Whew, back to work again. It’s been a busy week, between wrapping up a project at work while simultaneously trying to get everything organized for our Oshkosh trip. Yesterday I finally managed to get a good weather day and a non-broken plane, and got my spot landings up to a level commensurate with flying to OSH. I’d intended to try and get some plane work done in the afternoon, but nope…ended up being too busy. Today, though, I finally made some time.

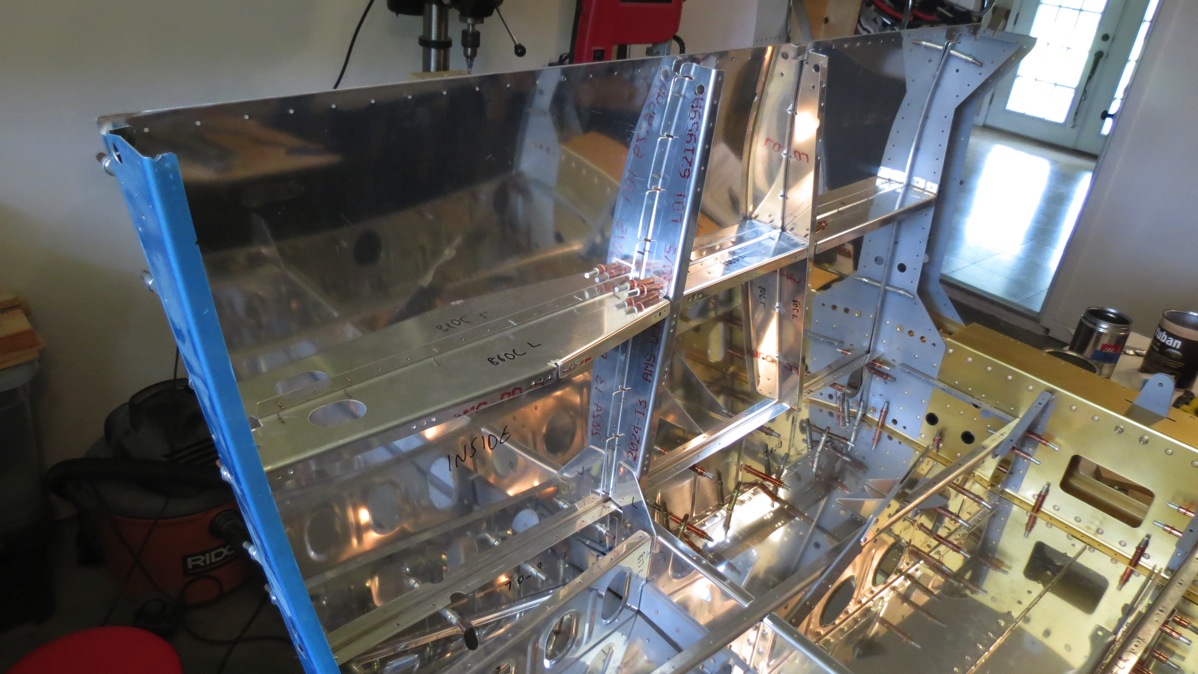
When I left off last, I’d gotten started clecoing the left mid side skin in place, but stopped short of installing the left armrest assembly. So that’s where I picked up today. One thing I learned later in the day is that it’s a lot easier to install the armrest assembly piecemeal instead of trying to put the preassembled thing in place. There are about four or five things that have to be aligned properly while you’re maneuvering this fairly floppy conglomeration.

But hey, I got it, so here’s a look at the left armrest stuff all assembled for good:
IMG 6063

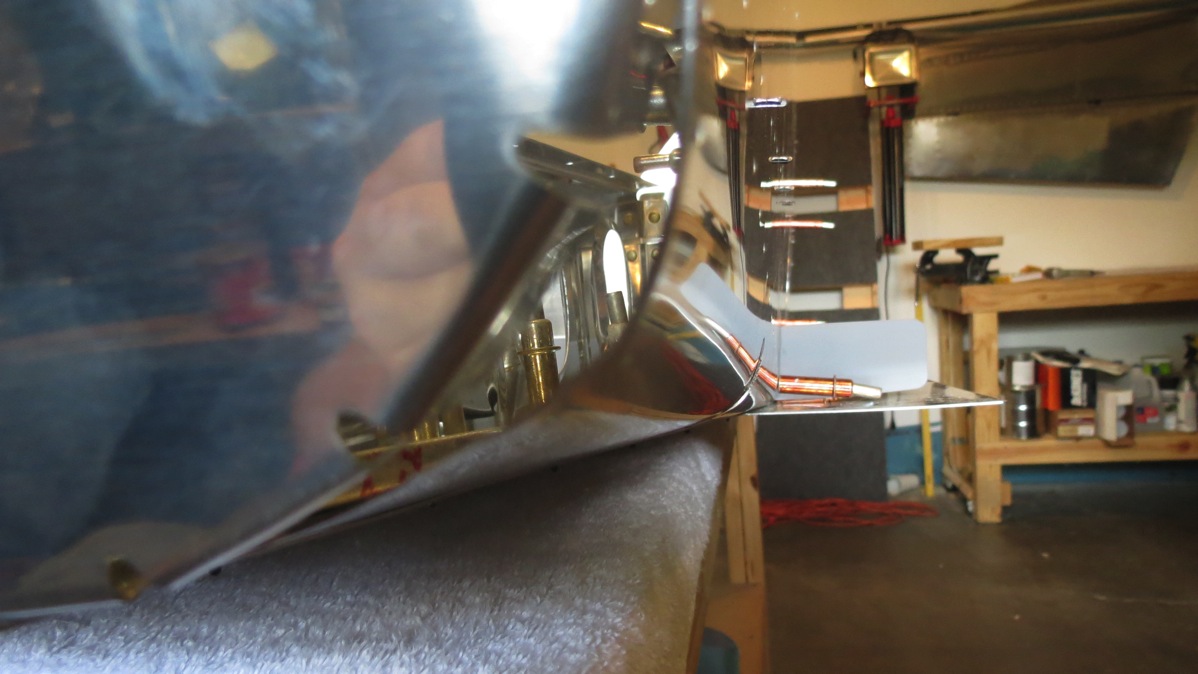
Next, I went to work on the right side. I got the skin clecoed minimally in place, but I kept having trouble getting the rear bulkhead half slid into place – just didn’t seem to want to line up. Eventually, though, I figured out why – somehow the conical bend on this skin got fouled up, and had one tight angle spot on it. I tried to get an illustrative photo, but it was pretty blurry. Reflective surfaces really seem to confound the autofocus…
IMG 6065

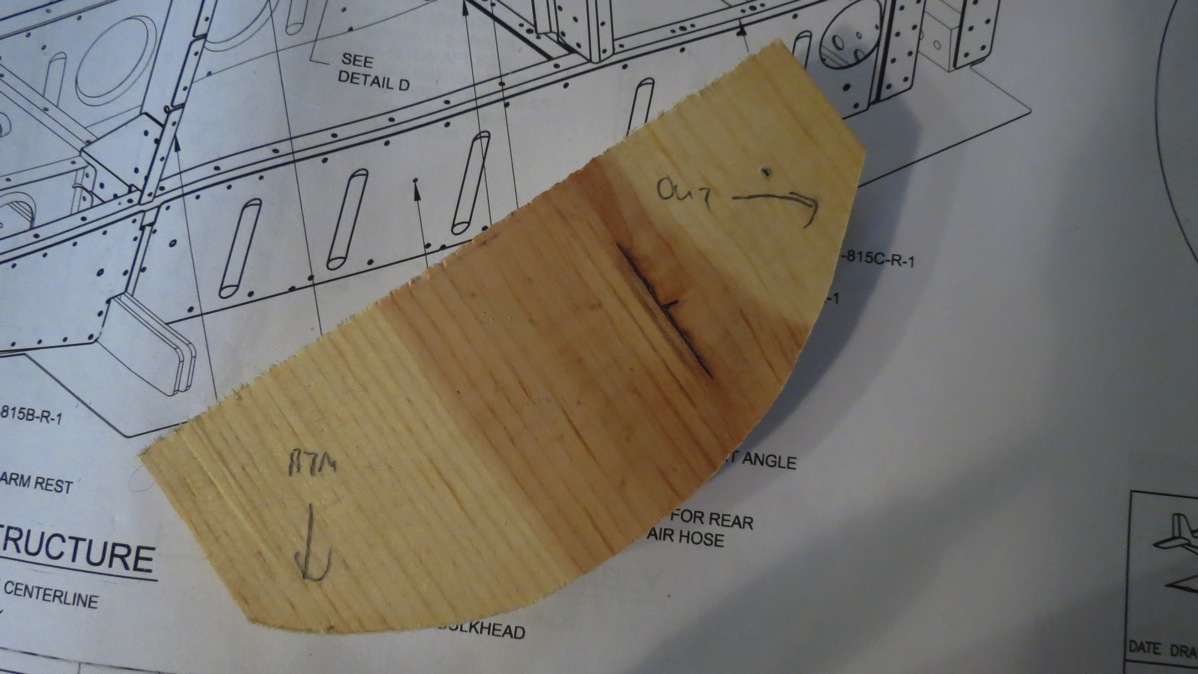
So I got the bulkhead out of the way and was able to massage the bend by hand to a better state. Along the way, I made a little guide block out of scrap wood to help me gauge the bend properly. I just traced the outline of the bulkhead and then cut it on the bandsaw:
IMG 6066

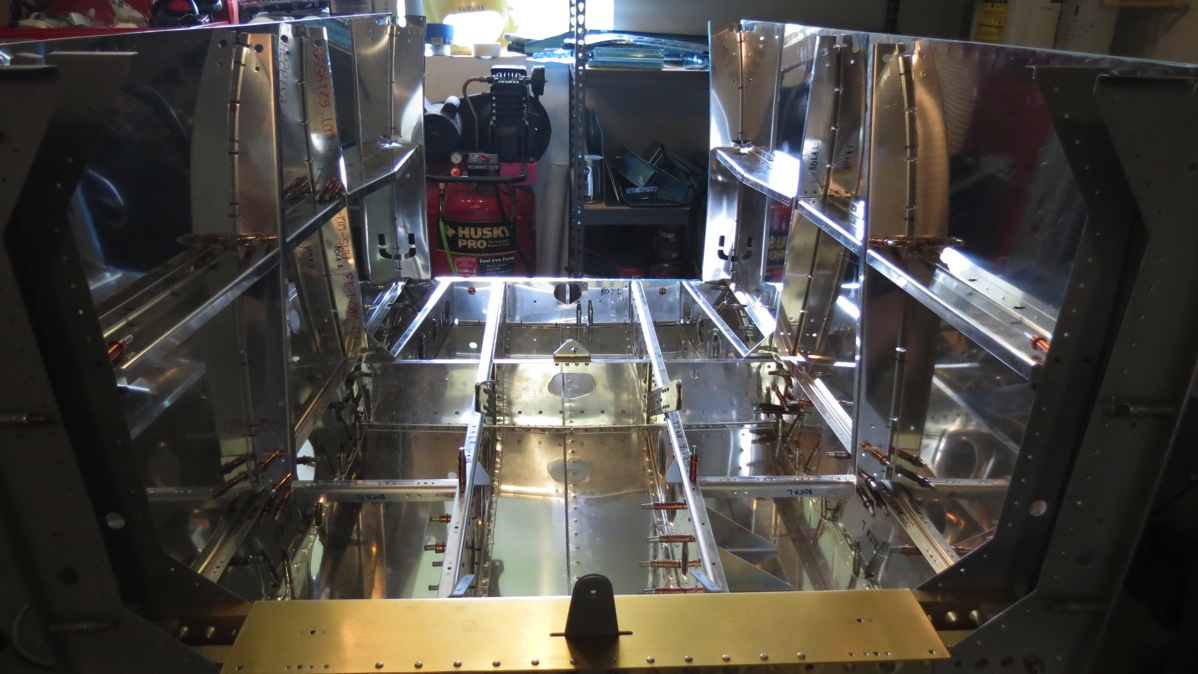
Finally, I got the skin bent properly and then clecoed the armrest and everything into place. This is basically the rear passenger area, though the back of the front seat will be behind the center section here too:
IMG 6069

Then I got to do some match drilling. Not a whole lot in terms of holes, but most of the holes were between the armrests and the side bulkheads, so access was interesting. I used a 12” #30 bit for most of the work, but even that wasn’t enough for a couple holes, where I actually ended up spinning a drill bit with my fingers to final-drill the holes. It wasn’t too horrible, but I’ll be glad if I never have to do that again… With the match-drilling done, it’s time to bring over the forward fuselage assembly and join it to the mid fuse. Surprisingly, this was an easy one-person job. The two assemblies are initially joined with clecos in the lower center section flanges and also joining the mid cabin braces to the top of the center section.

And then it’s time for the forward side skins. I went ahead and deburred the edges of both of these, along with the large punched holes. The left skin was more fun here since there’s the cutout for the NACA duct that will feed the forward air vent. The edges in that cutout were rough, and about all I could use for smoothing were my little needle files.

Once the deburring was done, it was time for a LOT of clecoing. The instructions say to be liberal with the clecos, and it’s obvious why – the skins don’t really want to conform to the bends at the top and bottom of the sides. I’ve got half a mind to try and bend the skins a bit, but I suspect I’d end up doing more harm than good.

And now it really looks like an airplane part. This is basically the entirety of the cabin area; behind this will be the tailcone, mostly empty space but with the rear baggage area behind the rear seat. Ahead of it will be the engine compartment.
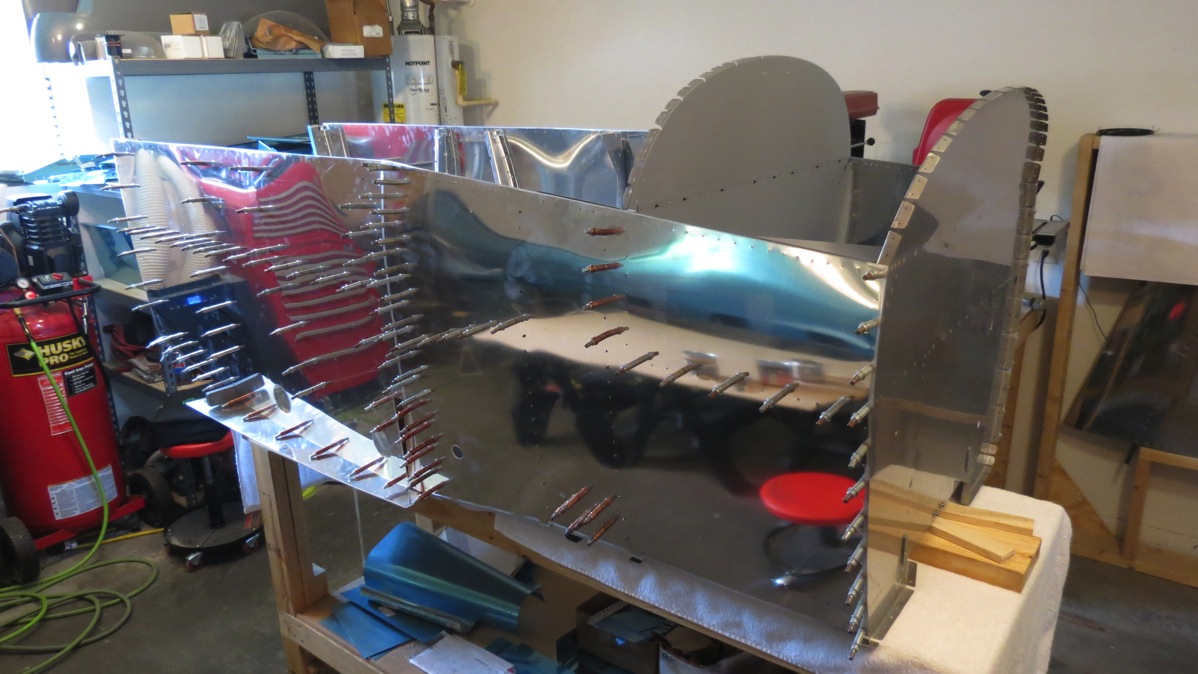
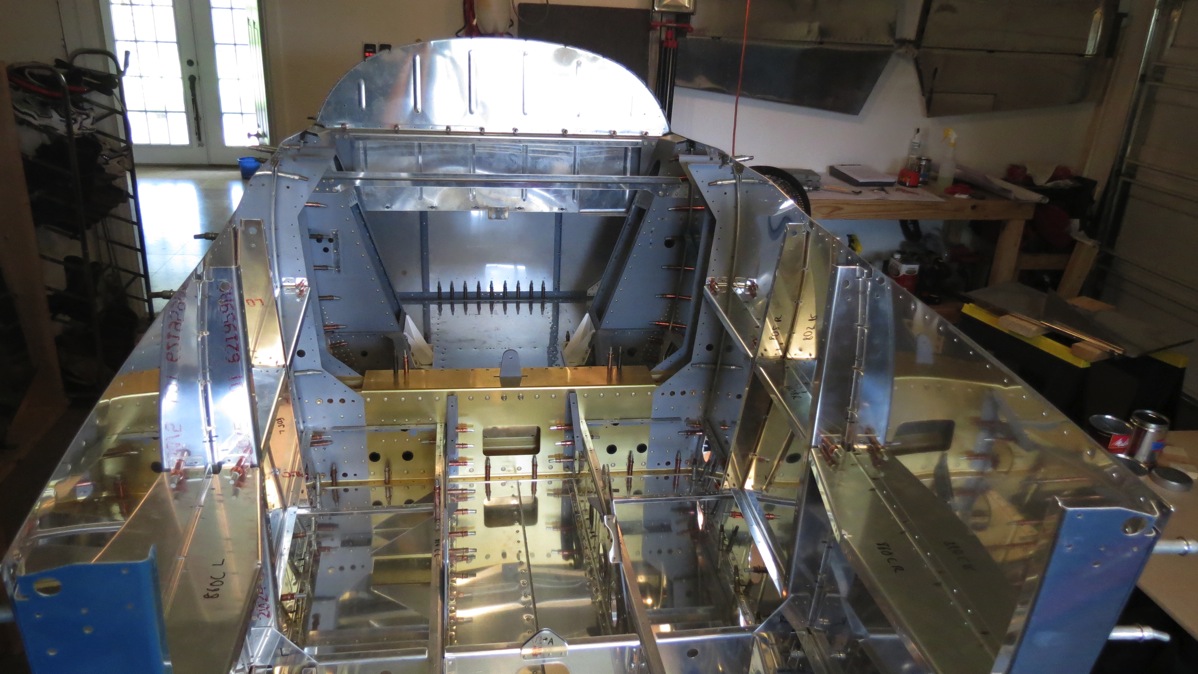
IMG 6071

IMG 6073

Next up: bulkheads for the tailcone. First step here is to separate one angle chunk into several pieces. Two of the will be crosswise angles in the tail, a third is some kind of control stop, and the final pieces will be the rudder stops. Well, I should say that they would have been the rudder stops. I was finishing up the cut on one end of the rudder stop piece when something went horribly wrong inside my bandsaw. It emitted a tremendous bang, froze up solid, and at the same time yanked the piece out of my hand, bashing my right index finger in the process. I’m not entirely sure what happened; the blade had a huge kink and was jammed against the upper and lower blade guides.  The lower blade guide was loose, which might have been the cause, but I suppose it’s also possible that it was loosened by the violent stopping of the blade, so I dunno.

Anyway, the saw wasn’t really damaged, other than the little plastic piece on the table that surrounds the blade passage – that got broken in half, probably when the angle piece was jerked out of my hand. I removed the destroyed blade, installed the spare one I had lying around, readjusted the blade guides and so forth, and it ran like a top again. Unfortunately, it also took an extra chunk out of that rudder stop piece when it went crazy:
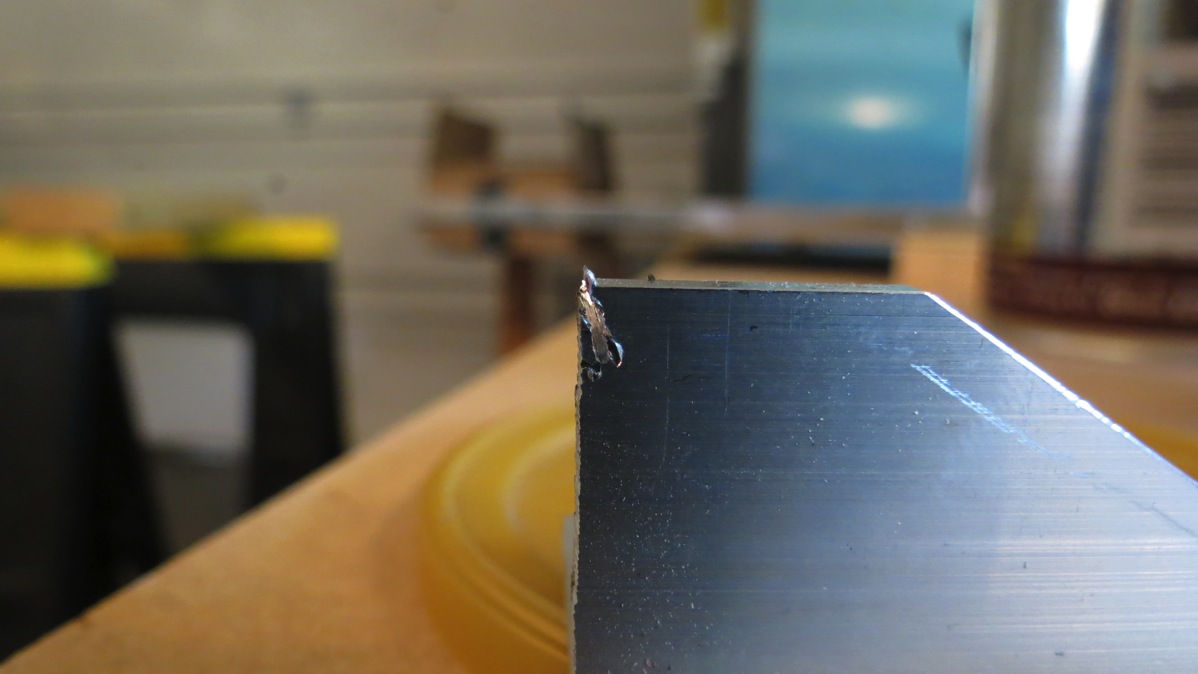
IMG 6075

I spent some time after this radiusing some edges of the tail angles; they have to be rounded to fit properly inside the longeron angles. After that, I called it a day and – what else – went inside to continue gathering stuff for the camping trip. It’s a lot more fun when you’re weighing every single item and keeping a running total. Such is the joy of airplane camping…

Hopefully I can get a little more work in on the tailcone parts this week, but I dunno. We’ll see, I guess.

Posted in Fuselage | Hours Logged: 5

Tailcone bulkheads, tailspring fitting

OK, so there’s still tons to do to get ready for the OSH trip, but I found a little time to do a little work after work today. I match drilled the two F-812 bulkheads, bent the flanges as instructed, and then lined up the tail spring mount and drilled the two keeper rivet holes. That last part took forever, because the drawings here are extremely confusing and vague. After puzzling over them for some time and getting nowhere, I resorted to the internet and found that many others had had the same issue. Fortunately, another builder provided a detailed explanation along with some much more useful drawings and photos, and armed with that info, I finally drilled those two holes, then countersunk them. I stopped short of dimpling the two bulkheads though, because I need the C-frame for that, and I need my workbench for the C-frame, and my workbench is currently occupied by the fuselage assembly. So I’ll just figure all that out when we get back.

Also, my Grove airfoil gear legs finally showed up today. It’s been almost seven months since I ordered them. Grove apparently had some issues with getting this batch of legs heat treated and so they ended up running way behind. I wasn’t really bothered though, since I’m nowhere near fitting the legs, and any annoyance went away when I saw these things:

IMG 6082

IMG 6085

IMG 6083

Posted in Fuselage | Hours Logged: 1.5

Tailcone bulkheads again

So yeah, it’s been a little while. Most of the people reading this already know about the hilarity that turned my Oshkosh trip into a full two weeks away from home, so that was kind of the first strike. The weekend after I got back I was still dog tired and so I did very little. Then last week, well, I was still trying to corral the post-trip mess. Most of the camping gear just got dumped in the garage when I got home, so I had to get all that put away. Oh, and it’s stupid hot in Houston right now. I had every intention of doing some work last Thursday night; I came home, bumped on the air conditioned, and sat down to dinner. When I stepped out in the garage an hour or so later, it was still obnoxiously hot. I’m not really sure just how workable weekday evening work sessions are going to be for the next few weeks. Maybe if I can get Josie to turn on the air conditioner before I leave work, it’ll be cool enough by the time I get home and eat.

Anyway, today I got up relatively early (for me) and went right to work. I figured I’d at least try to get work done before it got really hot, and I could always knock off in the afternoon if it got too hot. But really, it stayed decent all day, presumably because I kept it somewhat cool out there from the beginning.

The first order of business was to get my workbench back. Assembling the forward and mid fuse on the workbench may not have been the best course of action. I don’t think I realized at the time that these parts were going to be going together semi-permanently, not just for some quick match-drilling. So with Josie’s help, I moved the assembly over to the sawhorses. I almost just put it in a random location, but then I realized that I’d probably be adding the tailcone to this assembly before I was done, and I ought to plan for that. So I set up the platform diagonally, with the firewall by the garage door. Once I join the tailcone I’ll (barely) have enough room to walk around the aft end to get to the other end of the garage. I suspect there will be another garage reorg in the near future…

IMG 6354

Then I was able to move on to the tailcone bulkheads that I started on before OSH. I finished up the aft most bulkhead by dimpling the rivet holes and riveting the bulkhead halves together. I also got the tail spring mount primed in between this work. One good thing about the hot weather is that primer dries fast. The next bulkhead forward is a bit more complex, since it incorporates the aft mounts for the horizontal stab. First some material must be removed from the bulkhead halve to accommodate the elevator control pushrod:

IMG 6347

IMG 6349

Then the halves are clecoed together with vertical support bars for the h-stab and a crosspiece to support the aft deck (just a piece of sheet that goes under the stab mounts):

IMG 6350

The rest of the bulkheads are pretty straightforward, but all these pieces share the trait of having lots of little nooks and crannies that are a royal pain to deburr. I spent a lot of time with the needle files today. But eventually I had a stack of bulkheads, all riveted together and ready to go:

IMG 6353

Tomorrow I get to start piecing together the other tailcone internals, including the baggage area ribs, rear seat belt lugs, and aft longerons. I might get to the point of adding the tailcone to the fuse assembly, but we’ll have to see about that. It’d be pretty cool to finish the weekend with a more-or-less full-size fuse assembly though…

Posted in Fuselage | Hours Logged: 7.5

Tailcone assembly

Whew. Working in the garage in this heat is taxing. I really don’t think I’m going to be doing much – if any – work out there in the evenings this week. Forecast highs are in the low 100s every day this week.

Anyway, with the tailcone bulkheads all set, today I started prepping other parts for that area. First up were the baggage floor ribs and angles; these just needed to be deburred and match drilled with each other. Next up were the back seat lap belt brackets. I got the main heavy bracket pieces trimmed, deburred and primed with no trouble, then came back later and riveted the assemblies together:

IMG 6356

There was a lot of other deburring work as well. The aft deck piece, a couple of small spacer pieces, and best of all, the aft longerons. There are two pairs here; the lower longerons run the entire distance from just behind the back seat to the rearmost bulkhead, while the mid longerons just run about halfway to the tail. These are heavy angle and that, combined with their length, makes it a tedious job to get them deburred. But finally, they were done and set aside, and it was time to start assembling the tail cone itself.

For some reason, I was under the impression the tailcone would be constructed on the bench and then joined to the forward/mid fuse assembly, but instead the pieces are assembled individually in place. First up is the baggage rib/angle assembly. The instructions refer to the “rib assemblies,” which makes me wonder if I’m supposed to have riveted the angles to the ribs yet. But I looked back and at no point did it say to do that, so I’m leaving them clecoed for now. If I get to a point where the cloches are a problem, I’ll look ahead and see if there’s any reason not to rivet.

Anyway, here are the baggage ribs in place. This gives a general idea of the size of the rear baggage compartment. Honestly it’s larger than I was expecting; I figured it would be little cubby suitable for a couple day packs at best, but it’s about 3’ deep and could probably accommodate some duffel bags and light camping gear, assuming weight wasn’t an issue. I forget the baggage floor weight limit…

IMG 6359

Next up, each of the aft side skins gets its edges deburred – again, a sort of tedious process just because they’re friggin huge. Once each skin is deburred, the two longerons are clecoed in place, making a nice little semi-sturdy assembly. Then the two assemblies are mated to the back of the cabin area. This is definitely a two-person job: one to hold the aft end of the skin while the other clecos the forward end. Then the tailcone bulkheads are added, giving everything a little bit of structure. Also, the garage is now much more difficult to navigate:

IMG 6361

IMG 6363

IMG 6365

I’d hoped to not have to do any garage rearranging on the near term, but I think I’m going to have to. There’s barely room to get out the garage door, or to walk around behind the tail. And with the fuse assembly sitting on sawhorse, it can’t be easily moved either. I may end up building some kind of rolling cart for this assembly, but even then moving the assembly without damaging anything is going to be a challenge. And it’ll be even more fun when I have the engine hung…guess I’ll just figure that out when the time comes.

I worked a little more after this, trying to assemble the two aft most bulkheads with the small aft bottom skin, but got frustrated. That skin is heavyweight, presumably because it has to support the tailwheel. Getting it to fit to the bulkheads was tough, but I got it done, Then I tried to fit that assembly to the tailcone, and it was just not going well. It was getting late anyway, I was getting tired, and I felt like I was on the verge of getting carried away and breaking something. Better to wait tip another day.

Shame it’s going to be so hot this week. I’m making good progress and I’d like to keep going, but it’s just really unpleasant out there. The air conditioner out there just can’t keep up.

Posted in Fuselage | Hours Logged: 7.5

More tailcone fitting

Just…wow. It’s in the nature of any large project that some things takes far less time than you expect, while others take far more time. Today definitely fell into the latter category. It’s been a light week for the project, but I haven’t been completely slacking – I bought and installed insulation kits for both garage doors, in the hopes of making the garage far more livable. It seemed to work fairly well today – it was still warm out there but better than before.

Anyway, today I kept going with the tailcone fitting. Last time out I’d quit in the middle of trying to attach an assembly of the aft bottom skin and the two aft most bulkheads. Today, I noticed that the bulkheads didn’t fit into the bottom skin very well, so I started by taking care of that problem. A number of the bulkhead flanges needed to be tweaked to fit tightly against the skin:

IMG 6367

This is the whole assembly I’m working with here. The skin itself is quite thick, which just makes fitting this that much more fun:

IMG 6368

In addition to tweaking those flanges, I massaged the skin itself a bit to tighten the curve. That made it a lot easier to cleco the bulkheads in place, which was good, because I removed and replaced them a couple times while tweaking the flanges. Finally I got that done, and I found that the assembly was much easier to cleco in place on the tailcone.

It was the next task that ended up eating a large portion of my day. The final remaining piece in the tailcone assembly is the larger aft bottom skin; this covers the rest of the lower tailcone, from the center fuselage to the other assembly I was working on. So already, this is a large cumbersome piece. To make matters more fun, it has to fit into a very tight space. Already, at the aft end of the center fuselage, we have the bulkhead, the bottom skins, and the side skins, which have a bend around the lower fuse corner that fits tightly as-is. And now the aft bottom skin has to slide between those skins and the bulkhead.

Getting this done required help from Josie, plus some creative use of boxes to support the aft end of the skin:

IMG 6371

IMG 6373

We spent the better part of an hour just trying to wrestle this thing vaguely into position. Finally, I was able to get a cleco at the forward end of the skin on the left side, but I could not for the life of me get the right side to slide into place inside the side skin. It would just barely get started and then stop and refuse to move at all. Eventually I figured out that the side skin fits so tightly there that the aft bottom skin was catching on the bulkhead corner and pushing it forward. Some creative work with a long dowel and a hammer removed the distortion from the bulkhead and allowed the skin to slide a little further in…in the process, distorting the bulkhead again. It took a couple more iterations like this to get the skin in vaguely the right place. Actually, we ended up with the skin too far in, which caused way more trouble than it had any right to.

Here I am “gently massaging” that bulkhead to help the skin go in:

IMG 6374

Clecoing the thing in place was a battle too. Everything seems to not quite line up perfectly, which means getting clecos into the holes is a ton of work. Here I am trying to beat this thing into submission while the dogs look on:

IMG 6380

It all seemed to be going decently until I tried working on the right side. I’d figured that maybe clecoing the left side would help move the right side into proper alignment, but that didn’t happen. I tried about five different things to slide the skin backward again; the result of these was an unmoved skin and a rapidly escalating temper. (At one point I opined that this thing had better be a lot of fun to fly)

Finally, I was able to get the skin into proper alignment by once again using the hammer and some scrap wood to bang on the end of the lower rear longeron and drift the skin aft a bit. Even then, clecoing that skin to the right aft side skin was a battle. I got about 2/3 of the way through that and just decided I’d had enough.

The best part is that I’ll have to do this at least one more time, after match drilling and dimpling. And I’m sure it’ll be even more fun with dimples in place…

Posted in Fuselage | Hours Logged: 5

Initial longeron fitting

OK, not a lot of work tonight really. I finally managed to get the aft bottom skin fully clecoed into place. Next I pulled clecos from the upper portion of all the side skins in preparation for fitting the longerons. Then I pulled the longerons down from overhead storage and tried slipping them in place.

The good news is that the bends appear to be in the right place:

20150818 215012

But I can’t really do a true test fit because at the aft end, they interfere with the horizontal stab bars:

20150818 215047

I assume that the aft ends of the longerons will be notched or something here. And it occurs to me as I write this that those bars are just clecoed in place, and so I can easily remove them to do a full fitting of the longerons. But now I already quit for the night…well, now I know what to start with next time… 

Posted in Fuselage | Hours Logged: 1