Wrapping up the lower shelf

Hooray for shelves! OK, I didn’t finish them yesterday like I thought, but that’s cause I ended up not doing airplane things yesterday. So I maintain that this counts, you just have to interpret “tomorrow” as “the next workday.”

The first part of the day was just figuring out how to get these quarter-turn fasteners installed. I attempted to find some documentation for these Friday night, and about all I ran across were some engineering drawings. So I did some mocking up and tinkering today just to wrap my head around how these should work. The overall idea is obvious: two rivet holes to attach the base to its mounting surface, and one larger one in the center to accommodate the actual fastener.

What’s interesting is that the specs on McMaster-Carr seem to indicate that the center hole should be a different size for the two panels – but that makes no sense, as the fastener has to go through both panels. So I just started experimenting with scrap. A 1/4” hole was a good size to accommodate the fastener shaft with a bit of wiggle room.

Next up was how to actually locate that center hole. I couldn’t just use a base as a drill guide, since the center hole isn’t really round. Instead, I worked out the rivet hole spacing, and just made myself a drill guide using a piece of scrap angle. With this, I could drill three #40 holes in a piece, then enlarge the center hole to 1/4”. I did a test run drilling a set of holes in another piece of scrap angle, and it worked perfectly.

Next I drilled a 1/4” hole in a strip of sheet, and used the fastener to attach them. This worked, but didn’t hold the pieces tightly together. This wasn’t automatically an issue, though; in practice, there’s a little retainer that goes on the fastener, which is what keeps it captive in the panel. I measured one of those and found that it was .040” thick. Just right for me to use a piece of scrap hinge as a pseudo-retainer to test the final fit. (I couldn’t just use the retainer; they’re a one-time use thing, and I had no spares)

So finally, after probably an hour and a half, I was satisfied that I could actually mount these things. Next I had to actually fit them. The challenge here was accurately drilling the center hole in assembly between the shelf and mount brackets, in position in the airplane, clamped together tightly. What I ended up doing was first laying out those holes in the shelf. To do this, I installed the shelf in the plane (for, I dunno, the fourth or fifth time) and marked the outlines of the four brackets. Then the shelf came out again and I marked the counterpoints for each bracket, then drilled a #40 hole at each spot. Then the shelf went back in again, got clamped in place, and I drilled the center holes through the brackets. Finally, it all came back out again, I used my drill guide on the brackets, enlarged holes as necessary, countersunk for flush rivets, and then it was time for primer.

By this time it had been raining steadily for a while, so I ended up shooting primer on the brackets inside the hanger. It’d been windy all day, so ventilation wasn’t really an issue:

While the primer was drying, I went to work finalizing the shelf itself. I still hadn’t final-trimmed it to length, so there was that, and I also wanted to add a small flange to the aft side. The sheet has a bit of a curve to it, which has been annoying while fitting it. In practice, the hinge would keep one side straight, and the quarter-turns ought to take care of the other, but I really wanted to have it be naturally straight. So I laid out a 1/2” flange, did the cuts necessary to set that up, cleaned up the edges, and got the flange bent.

By the time that was done, the primer was dry, and I got the bases riveted to the brackets and clecoed those back into the fuselage. That made it time for a real live test fit, albeit without the fasteners actually captive in the shelf. And…it fit! Whew. So I installed the retainers (necessitating removing and then reinstalling the shelf again), and gave it another test fit.

The only thing I didn’t like was that the fasteners didn’t quite seem super snug – it took hardly any force whatsoever to turn them. It seemed to me that, in this state, they could very possibly vibrate loose in flight, which would not be a good thing with the shelf being right above the stick. I already had a loose plan for this from my earlier experimentation – I went into one of my O-ring kits, got four little 3/8” ID rings, and put one on each fastener above the retainer. With those in place, the fasteners fit nice and tight. At this point, i was satisfied enough with everything to take the final step of riveting the brackets to the brace.

So finally: pictures! Here’s the finished shelf stowed, with the brackets still clecoed. The wings on the fasteners are just visible, as is the flange in the aft end of the shelf:

And the shelf lowered, showing a little more detail on the brackets and bases:

Next, it was time for some live mockups. After having worked on placing the electrical distribution stuff on cardboard cutouts for a while, I could finally look at it in place:

This was a worthwhile exercise. The E-bus alternate feed relay (top right) has vertically-oriented terminals. It’s not obvious from the photo, but the forward upper brace is in somewhat close proximity. I think that large wires going into and out of the relay would be problematic with this layout. Fortunately, this seems easily solvable just by reorienting the battery bus a bit.

A part of the layout tinkering, I laid out some cable guides in their rough locations, and then decided to go to town annotating a photo of the setup to demonstrate the planned wire routing. All wires enter/exit the shelf near the hinge line, necessary to allow the thing to pivot properly. Power feeds enter on the left, while all the individual circuit lines exit on the right.

The red line represents switched power from the master contactor. Normally, this line will be supplying almost everything on the airplane, with the exception of a couple things on the battery bus. The switched power feed first goes to the main bus fuse block on the left, and then continues to the E-bus fuse block, going through a Schottky diode. More on that in a second as well.

The blue line represents an always-hot line, directly from the battery – where it will be protected by an ANL fuse. The line feeds to the battery bus, then continues to the E-bus alternate feed relay. This relay is controlled by a switch in the cockpit, and it allows for feeding the E-bus directly from the battery bus. In the case of a master contactor failure, or any sort of electrical fault with the main bus feed, this will allow keeping minimum equipment online using just the ship’s battery. This situation is also the reason for the large diode between the main and E-bus; without this, closing the alternate feed would also energize the main bus, which is not desirable for a few different reason.

Finally, the green lines represent all the individual wires from circuits, making a nice little bundle. That bundle will also include a switched ground wire that will control the E-bus alternate feed relay.

(now the only question is: will it look anywhere this neat when I’m done with it?)

(also that turned into a lot more of a lecture than I intended)

Av shelf

So now…what next? I think I need to start working up a fastener inventory for actually mounting all this stuff. Between that and the need to get the ELT ordered, I ought to have justification for a Spruce order. I wonder if I should also go ahead and order the large-gauge wire needed for the bus feeds here. With those in hand, I think I can finalize the component locations here and get stuff mounted.

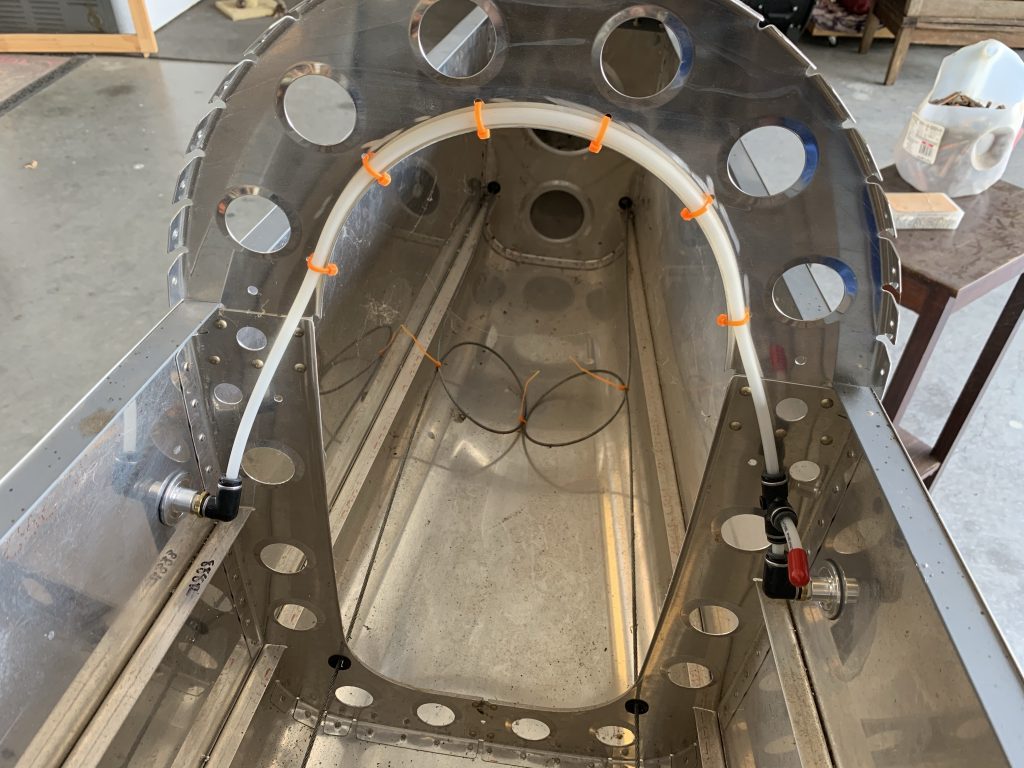
In the meantime, I guess now that I have avionics on hand, I can fabricate the ADAHRS mount in the aft fuse; that’s pretty independent of other stuff, and I could also finalize the static system routing – by which I mean cutting one more piece of tubing probably a couple feet long…

I think I’m going to stop typing now.

Posted in Electrical, Fuselage | Hours Logged: 3.5

Almost done with that pesky lower shelf

So yeah, made good progress on the shelf tonight. First order of business was working on the other half of the piano hinge, which attaches to the lower baggage bulkhead. I already had my layout lines there from a previous session, so this went pretty quickly. About the only real challenge was that since the hinge half is pretty much in the middle of the bulkhead, there was no good way to clamp it in place for the first few holes. I just resorted to holding it by hand while drilling the first three holes, then with it checked it was in a good spot to drill the rest of the holes. Then I just did all the demurring and prep and riveted it on. Nothing to it.

Next up was dealing with the attach point for the aft end of the shelf. I’ve planned all along to handle this by attaching aluminum angle to the aft upper brace, and the projecting lip of the angle is where the quarter-turn fasteners will live. I did change that plan up a bit, though – originally I was going to have the free side of the angle pointing forward, but I decided to reverse it instead. The reason for this was to provide more room on the shelf – with the angle forward, I’d have about 3/4” of the shelf where I couldn’t really run anything. Turning it the other way gets me that space back.

I’d also originally planned to use a single piece of aluminum, but I decided to do the extra work necessary to just have four small pieces in my fastener locations. Might as well save a little weight here and there.

Laying out the angle was a bit more fun than the hinge half, especially since I was working inside the fuselage and not on the workbench. Plus, messing up the brace would be annoying, so better to be careful here. Here’s a look at the brace with the four angle pieces clecoed in place:

Next up, it was time to reinstall all the baggage compartment pieces. In order to really make that bulkhead stable, the baggage floor has to be in place too. So a bit of busy work there, but once that was done, it was the moment of truth: trying to install the shelf. I probably didn’t need to worry, it fit just fine.

Here’s the shelf clamped into its stowed position (also giving me my opportunity to mark where the shelf edge should go, using the angles as a guide):

And then in the lowered position, as I’d see it if I needed to swap out a fuse or service anything else here:

So we’re getting there. The big remaining thing is going to be fitting the actual quarter-turn fasteners. These things came with no instructions or drill templates or anything like that, so while they’re not exactly complicated, I’ve still got to get this hashed out. Maybe I should check the McMaster website and they’ll have some dimensional drawings I can us for drilling.

I’ve also got to get those angle pieces primed before I install the fastener bases and rivet everything in place. I’m leaning towards just using MSP blind rivets here; bucking under that brace might be interesting, especially with the bases installed. But the way I figure it, this should be wrapped up tomorrow.

Posted in Electrical, Fuselage | Hours Logged: 2

Even more lower shelf, plus some more planning

Well, this is actually two nights’ worth of work – I neglected to bang anything out here for yesterday. The main thrust has been continuing to work on that lower shelf. Yesterday I fitted the hinge half to the shelf, laid out the rivet locations, and drilled them together. Tonight I got the shelf dimpled and the hinge countersunk, and riveted the two together. I also removed a few hinge eyelets in the middle of both halves – since space outboard of the hinge will be limited, there’ll be no way to ever pull a single-piece pin out to either side, and thus no way of ever removing this shelf for service once it’s riveted in. I don’t want that, so instead I cut the hinge pin into two halves, which can be removed by pulling either one from the center of the hinge assembly.

The shelf with the finished hinge setup can be seen here:

Note that the far side of the shelf isn’t final-cut yet; I’m going to mark that once I have the whole thing fit into place in the aircraft, and trim to that line, rather than measuring. This should get me a better fit, at the cost of a couple more fitting iterations.

The bigger news, though, is that today the UPS man brought me a sizable package from SteinAir, which contained the bulk of my avionics. Or maybe all of them, depending on how you define the term. I wasted no time in opening boxes and starting to use the actual avionics boxes to verify some of my layouts:

This turned out to be a good thing; it seems my previous upper avionics shelf plan has some issues. The biggest thing I didn’t account for is that I can’t use the entire front-to-back width of the shelf. There are two reasons for this: the first is that there’s about 1 1.5” overlap between the shelf and the forward upper brace, and I can’t put any attach nutplates there. There are also the items I was planning on putting inside the baggage bulkhead; the most notable things here will be the voltage regulators, which are just under 2” tall.

I have a few new ideas about how to resolve this, but I think before I can really commit to any of them, I’m going to need the final missing component up here, which is the CPI2 electronic ignition controller. I shot an email to Ross at SDS this week to get that conversation started, but before I can finalize that order, I need to get back with Jim Ball at Titan for some details on my engine. And I also want to go ahead and get my finish kit ordered. And probably the prop pretty soon too; I haven’t checked recently, but I think Whirl Wind generally runs about a three-month lead time.

Still got plenty to do even without the layout finished. The first minor wiring project will be the switch console, and I think I may go ahead and see about getting the panel cut. Having all the bits in place there will give me a better idea of any potential space constraints between the in-panel stuff and the things on the shelf.

Posted in Empennage, Fuselage | Hours Logged: 3

More lower shelf

Just more poking with this shelf today. I made myself a little diagram and spreadsheet to analyze my idea for letting the shelf flanges act as a stop. Turns out it’s not really a workable idea, unless I want to get really fancy with those flanges…which I don’t. So I changed my mind (again). I’m going to bend the flanges up at the edges of the shelf, which will make the bottom smooth, and just let it rest against the brake lines when it’s lowered. Since this will only ever happen on the ground, I think this is fine.

This decision was the culmination of a variety of head-scratching moments today. At one point I put the baggage bulkhead and other associated parts back in the plane to evaluate how the shelf would sit. I did actually do a tiny bit of metalwork…I took a vixen file and squared up the cut edges of yesterday’s sheet, then got the flanges laid out. I wanted to get to cutting them, but the hangar lights were attracting entirely too much insect life for my liking, so I used that as an excuse to go inside for the evening.

Hopefully soon there will be some photos of the result of all this head-scratching. But probably not tomorrow, the grass is looking like it’s due for a mow, and sunset is getting earlier by the day…

Oh, I did get in my big pile of switches and stuff from Digi-Key. Once this shelf is fabricated, I think I might be moving on to the switch console.

Posted in Electrical, Fuselage | Hours Logged: 1

Lower shelf

Did some more messing around with the lower shelf tonight. After putting the bulkhead and other stuff in place previously, I was able to measure more precisely the width I could make the shelf, so before moving to any fabrication I cut down my cardboard mockup and did yet another dry run of component positioning. This time I made it a little more realistic by laying some of the cable guides I got in place to better simulate the wire runs. I even went so far as to estimate the size of the bundles that will come off the fuse blocks because sometimes I get carried away like that.

The general idea here is that the two supply lines (one switched, one always-hot) will come in from the top left. Switched line goes to the main bus on the left, always-hot goes across to the battery bus on the right side. From there, one supply line will tap off the main bus, across the diode, and to the e-bus; a similar supply line will tap off the battery bus, through the relay, and act as the redundant supply for the e-bus. That feed will be switchable from in the cockpit if necessary. All the individual circuit feeds will be routed together at the bottom and exit at the top right, along with the switched ground for the e-bus relay.

I also rethought the hinge setup for this shelf. Previously I was thinking of using a piece of angle to space the hinge point off the bulkhead a bit, to allow for clearance to the brake lines while the shelf was lowered. Doing the layout work above made me question the wisdom of losing 3/4” of width on the shelf, though, so I decided to retain the hinge point against the bulkhead, and just come up with some means to limit the travel of the shelf when lowered. This can be done rather simply, it turns out – I’ll want to add stiffening flanges on either end of the shelf, and if I orient them downward, they can act as travel stops when they hit the bulkhead. I’ll probably eventually add some rubber or other material on the edges just so it’s not metal-on-metal, though it’s probably not a big deal.

Anyway, tonight I started fabricating the shelf. I cut off yet another section of that old wing skin, trimmed it to rough size, and also cut the piece of piano hinge. I actually ended up stopping at this point, because I want to carefully lay out the stiffening flange, seeing as how it will be acting as a travel stop. I’d like to be careful here, so I can get maximum travel out of the shelf (to provide the best accessibility) without hitting the brake lines.

So I’ll work that out, and then I can probably finish fabricating this thing in pretty short order.

Posted in Electrical, Fuselage | Hours Logged: 1.5

A better removable stick

Alright, so it hasn’t been a great week for shop time…but that doesn’t mean nothing’s been getting done. I’ve been spending a lot of “inside time” working through all the assorted stuff that needs to be ordered. I placed a fair-sized order with Digi-Key, which contains what should be the entire array of switches for the plane, along with some other miscellaneous stuff. From elsewhere, I order a few PWM dimmers – one of these will be used to control the panel lighting, the other two will be temperature controllers for the heated seats, in lieu of the two-position switches that will come with the heat pads.

While I’m here, a quick word about those heated seats. When I mentioned these to Josie, specifically asking a usability question for the rear-seat passenger, she laughed at the idea. Who would need heated seats in this area? Well, for one thing, RV-8s are notorious for not getting much hot air to the rear seat, since there’s just an inlet on the firewall. But also, after getting some advice from folks, I’m actually going to bypass the heat muff on the exhaust for that heater inlet – that is, instead of it being a way to get hot air into the cabin, it’ll just be another fresh air vent, but fed off pressurized air from the cowling. This should be very nice for those hot summers. Hopefully the seat heaters plus dressing warmly will work for these Houston winters, but if not I can also consider connecting the heat muff for part of the year as well.

Anyway, I was talking about ordering stuff. I heard back from SteinAir on Thursday – my avionics are in! So I paid off the invoice balance (ouch), and hopefully those should be on my doorstep this week. Finally, I spent a bunch of time on McMaster-Carr and elsewhere learning way too much about quarter-turn fasteners. I’ll use these to hold my fuse block shelf in place, but allow for a quick release for servicing. I ended up ordering these fasteners from McMaster-Carr, and while I was working that order, I got to thinking about the rear stick, which will eventually bring us to tonight’s bit of work.

The rear stick is a two-piece affair from the factory, with the stick itself sliding into the base that’s attached to the control column. Back when I was working on this I drilled the 3/16” hole through both items, and added an AN3 bolt to hold it on place. I wanted a way to make the stick a little more easily detachable, so while I was shopping I started looking at quick-release pins and other options. Simple having a pin in place of the bolt seemed like a decent idea, but the one thing that got me a bit is that it’ll be sharing that space with the wires coming from the stick grip. It’s probably me being overly concerned, but I figure blindly sticking a pin through a tube containing a wire bundle might one day result in damage.

Thing was, there’s an alternative that lots of builders have done. Instead of a pin or bolt, they use these little spring clips from McMaster-Carr. They’re intended to go in telescoping poles, and provide a little spring-loaded button in two opposing holes. With one of these in the stick, it just pops in and out. The only real hangup is that the smallest size hole they make them for is 1/4”. But I decided to go with them, and tonight I drilled those passthrough holes out to 1/4” and installed the clip, so now I’ve got a slick detachable stick.

Detached:

Attached:

Of course, there’s still a remaining issue for making the stick detachable, and that’s figuring out how to make the wiring for the grip detachable. That problems existed independently of this whole button thing, though. One of the cool ideas I’ve seen for this is to simply take two mating connectors and epoxy one side inside the stick, and the other inside the socket, such that they mate together when the stick is installed. This seems nice and elegant, and it’s probably what I’ll go for, but it does seem potentially fun getting those plugs epoxied in the precise correct location. The other alternative is to have a hole in the stick above the joint, with the wires coming out of that, and mating with a connector outside the stick. Which would be ugly but also functional and simple.

Decisions, decisions…

Posted in Fuselage | Hours Logged: .5

Upper avionics shelf

I was really hoping for some cooler weather this week – we’ve been hearing about a potential “cool front” – but it looks like it’s not to be. And so today was just a normal stupid-hot Houston day, but I worked through it (mostly in short bursts, as per usual). I’d intended to get going on fabricating the lower shelf behind the panel – the one that will house the fuse blocks and other primary distribution stuff – but I ended up going in a different direction. As we’ll see later, this was actually a good thing.

Anyway, to start with I wanted to lay out the location of that lower shelf. The intent here is for the shelf to start at the lower edge of the cross-cabin brace behind the gear towers, and extend straight forward until it encounters the baggage bulkhead. The first thing was to figure out the vertical location at that forward end that would result in a level orientation of the shelf. This I worked out with a combination of a square and ruler, using a rivet line as a guide. With that, I was able to draw a level line on the baggage bulkhead, setting the forward attach point for the shelf.

Next, I wanted to get that bulkhead into the fuselage, so I could measure the distance from the brace to the bulkhead – which would determine the depth of the shelf. This sent me into a side trip of removing the rudder pedals, which was needed to get all the baggage floors in place, which were needed to locate the bulkhead precisely for measuring.

At some point, though, I changed and started working on the upper shelf. I don’t even remember why. The design here is similar – this shelf will start at the forward cross-cabin brace, which is higher than the aft one. At one point I was considering making this shelf actually slant from one brace to another, but that seems overly complex – so instead I decided to just have the shelf go straight back, and then have a 90° bend to a vertical portion that can attach to the aft brace.

So I did the measuring routine again, figuring out the depth of the horizontal and vertical portions. Then I cut off yet another section of my trashed wing skin, and got to work laying the part out. I wanted to also allow material at the ends of the shelf to bend down for stiffness, so that had to be accounted for. (I’ll likely eventually add another stiffener or two, once I figure out the device locations).

Then it was time for bending. Here’s the sheet clamped to the edge of the workbench, ready for me to apply some targeted physical violence with a hammer:

 After making that bend, along with the two stiffening flanges, it was time to take a deep breath and go for a test fit. Whew, it fits nicely!

 At this point I couldn’t resist trying a layout of my cardboard faux avionics boxes:

 This led me to an interesting consideration: namely, packaging things around the brake lines coming out of the gear towers. I haven’t really thought of these at all while conceptualizing all the avionics stuff. My main concern was having the EMS connectors hang off the edge of the shelf and interfere, so I grabbed the brake lines and installed them. To review, these lines go from the top of the gear towers to a point on centerline, just under the baggage bulkhead.

This highlighted an issue with my lower shelf that I hadn’t considered. My original plan was to simply rivet a section of piano hinge to the baggage bulkhead and the shelf, allowing it to pivot down and forward and allow access to the fuses. But with these brake lines running beside the bulkhead, that means the lowered shelf will interfere with them. Possibly not a huge deal – this shelf isn’t intended to be accessed in flight – but I’m not sure I like the ides of the shelf potentially swinging down and hitting the lines repeatedly over the aircraft’s lifetime.

The routing of the lines is visible here. Note the Sharpie line on the bulkhead; that would be the location of the forward edge of the lower shelf:

So yeah, I’m glad I didn’t go ahead and do the lower shelf and then discover this. It probably wouldn’t have been a huge deal – I’d probably just need to add some stops fo keep the shelf off the lines. I’ll probably still need to do that, no matter what I do, but at least I can plan for it instead of having to be reactionary. I’m thinking what I’ll do here is to rivet a length of angle to the bulkhead, and then rivet the piano hinge to that – that’ll offset the hinge point for the shelf by 3/4”. Combined with some sort of stop, that should make things work OK here.

Anyway, back to the upper shelf – I still need to lay out and make the attach holes on the braces, which will use screws and nutplates. I may wait on that until I get my avionics on hand – I’m a little concerned that my packaging designs from before might not work. One thing I didn’t account for was the mount points for boxes interfering with where the shelf overlaps the forward brace. I might end up having to do some creative stuff here, like mounting components vertically.

Oh, and I’ve got a bunch of tentative orders working right now. I need to get some quick-disconnect fasteners to hold up the aft end of the lower shelf – I think I’ll end up getting some quarter-turn captive screws from McMaster-Carr. I also spent way too much time looking at switches last night – I want to nail down an order for those this week, so I can have the switch panel(s) finalized before I get to building harnesses. And I guess I might go ahead and order my ELT from Spruce this week, and see about tacking on some assorted hardware since I’ll be getting free shipping.

…so much to do…

Posted in Avionics, Fuselage | Hours Logged: 3

Back to avionics shelving…well, sort of

OK, so I haven’t been super productive this past week or so, at least in terms of shop time. I did take a giant leap this past Thursday, though…after exchanging a few emails with the folks at SteinAir and running a couple quotes, I finalized and placed my avionics order. Sounds like I can expect to have all that on hand in maybe a week and a half, assuming nothing is backordered at the manufacturer.

This has me back to getting serious about the remaining avionics shelf design, specifically the two shelves I’ll be putting behind the panel. I did a bit of layout work this morning, trying to finalize the design and measurements, but didn’t really get that far. For some reason I’ve been having trouble getting into a work mindset.

This also has me thinking about what else I want to have on-hand to really start laying out and fabricating harnesses. With the main avionics order placed, that takes care of almost all the stuff I’ll need wiring for. The exceptions are the ELT, the assortment of switches and breakers, and the SDS CPI2 ignition controller, so I’m likely going to get those ordered semi-soon as well. This is mostly simple, with the possible exception of the CPI2 – one of the things I’ll need to know before ordering is the required harness lengths.

The main thing that makes that fun is knowing the required lengths for the firewall-forward stuff. I can figure out the required runs from the controller to the firewall penetrations, but I have no idea the required lengths past that. I should probably just get in touch with Ross, I imagine he can help here.

I still need to finish up riveting the forward bottom fuselage. Finalizing the avionics shelf will probably require me to at least rivet the baggage bulkheads into place, and having those in place will make it a bit more fun to get to the rivet locations inside the cabin for the bottom fuselage riveting…

Posted in Avionics, Fuselage | Hours Logged: 1

Assorted fuselage stuff

Boy, it’s hot outside. Kind of hard to maintain motivation to get stuff done, but about the best I can do is just ensure that something is happening, even if it’s not much of something.

I started out the morning taking care of my final antenna location. Research indicated that going just aft of the bellcrank bulkhead was a fine place, so that’s what I chose for my transponder antenna. Just tabbed up another doubler and got it drilled in the proper location and orientation. So that concludes my antenna prep work for now, though I guess I could go ahead and dimple the doublers and the skin for eventual riveting.

OK, so what next? Well, I guess I can revisit the static system. I’ve done a decent amount of thinking on this the past few days; basically, what I need back here is to connect the two ports with tubing, and provide a T-junction for the line that will lead to the actual avionics. There are prepunched holes on the adjacent bulkhead for just this purpose, but…how to secure the tubing?

The official plans method is to just use zip ties, but that seemed inelegant to me. Adel clamps seemed a better option, but that would also require opening those holes up and installing nutplates. Which wouldn’t be the end of the world, but…well, something about that bothered me too. Eventually I hit one of my “stop overthinking this and just do something” points, and decided to just go with the zip tie method.

So here it is. On the left side of the fuselage (right in the photo), the T-junction is placed very close to the static port, the idea being that this will keep it more or less secured. I also cut a short piece of tubing to insert into the open end of the junction and capped it; this is to prevent the possibility of our ever-industrious mud dauber population from plugging it up.

OK…now what next? The thoughts occurred to me to maybe get my conduit runs done back here. What that meant for today was another period of staring at things and scratching my head. One topic was how to handle the conduit run into the tail. I spent some time looking at what other people have done, and it seems common to run a conduit down at the bottom of the tail, roughly on-center. But there aren’t any holes in the bulkheads for that, and it seems weird to make a whole new set of holes when there are preexisting ones, albeit not quite laid out where I want them.

Eventually, I decided that I’m not going to do conduit back here after all. My rationale with conduit is to provide routing through areas that are inaccessible, such as under the seat and baggage floors. And while the tail will be difficult to access, it won’t require removing permanent fasteners. And I’d still have to crawl into the tailcone even to access the forward end of my planned conuduit run. Finally, that planned run would result in a curved path, which would remove some of the convenience of trying to easily run new wires.

So yeah, I’m just going to install snap bushings in some of the existing holes, add a couple adel clamps where needed to support long runs, and if I ever need to add wires back here, I’ll just be crawling an extra foot or two into the tailcone to get it done.

There’s also the question of doing the runs under the seat floors. Here, I have some prepunched holes, though oddly not a matched set. The rear spar carry through has a 3/4” hole on either side, but the next bulkhead back only has one on the left side. So I’m going to want to add a hole there too, but that’ll be challenging. Put simply, there’s no way to get in here with my unibit – no room for a regular drill, and no way to chuck the unibit in my angle drill. I think what I’ll end up doing is buying a knockout punch set to get this done. Another thing that has to wait for stuff.

The other question is how to terminate those conduit runs. They need to go further both forward and aft of those two bulkheads if the ends of the conduit will be accessible. Neither termination spot is at a bulkhead, though, so I think I’ll end up making some small termination pieces that will rivet to adjoining structure. This might be one of the things I work on fairly soon.

Eventually, I got tired of all this head-scratching and needed to do something tangible again. So I took a look at the aft end of the fuselage, where there are four unfilled rivet holes on each sides. These are where the stock external rudder stops would have been attached, but since I went with the internal stop, I now needed to get these holes filled. The two aft pairs aren’t much trouble – they’re on the portion of the skin aft of the last bulkhead, and so can be easily dimpled for a flush rivet. The forward pairs, though, are in assembly with the forward flange on that aft bulkhead. I could maybe dimple those with my pop-rivet dies, but I find them barely adequate for a single sheet of material; two sheets of relatively heavy gauge seems maybe a bridge too far.

I the end, I elected to lightly countersink all the holes and install NAS1097 rivets. Since these have an undersize head compared to a regular flush rivet, I can countersink the skin without enlarging the hole. So now those are done.

Oh, I also spent some time thinking about wiring for the landing/taxi lights. A challenge to be dealt with here is that the terminals for the landing projectors are on the front side of the unit, but the terminals for the taxi light are on then back. I’d like to run these as a four-conductor bundle out to a Molex plug at the wingtip, but haven’t been sure how to do this while still making the light unit removable. I need some way to route the wires from the front two terminals to the back of the unit that doesn’t prevent removal. After a bunch of poking around, I have a plan now, involving snap bushings and some slight modification of the mounts. It’s probably better shown than explained, so that’s all I’ll provide for now. Also, it’ll be a while probably before I get that done – I need some smaller snap bushings than I have, and I’m not going to pay $8 worth of Aircraft Spruce shipping fees to get a pair of ten-cent bushings on-hand. They’ll get to wait until my next parts order.

Posted in Fuselage | Hours Logged: 2

Antenna mounts

Well…time to bite the bullet and drill some holes in my nice fuselage. I knew it was going to happen, but it still felt kind of wrong…

First up were the two comm antennas, and I started by preparing the doublers. I ordered four pieces of .040” sheet to use for these a while ago, and since then I’ve been thinking about how to form them. There seem to be lots of approaches to these doublers, ranging from people who just add a flat piece of sheet inside and call it done all the way to people who make joggles in the doubler so it can be riveted in assembly with nearby structure. Technically, the latter is best practice, but really kind of overkill for our (relatively) slow aircraft.

Anyway, my initial plan had been to make my doublers with flanges on all four sides, to maximize stiffness. But there’s one issue with that, and that’s dealing with skin curvature. Immediately behind the main spar where the comm antennas were going, the skin is flat laterally, but longitudinally it has a slight curve to it. Having a flange in line with that curve would make it tougher to get the doubler to conform properly. And realistically, both these locations are close to solid structure, so I eventually decided forward and aft flanges only would be fine. (this, by the way, is how Van’s supplies prefab doublers for RV-14 kits)

I also had to settled on the precise location for the comm antenna. Things were a bit tight here; first, there’s the location of the aileron pushrods just behind the spar, and then just behind those are the passenger footwells, which project down below the floor. So I needed to make sure I located the antenna center behind the pushrod region, but ahead of the low point of the footwells. I ended up making a cardboard template, which I used to trace the footwell profile on the outboard seat rib, and that let me lay out the fore-aft location.

Finally, there was the issue of drilling the three antenna mount holes correctly. The layout is pretty simple – three holes in a line, the center one 9/16” to accommodate the antenna connector, and the other two 3/16” to accommodate the mount studs. Spacing between the holes is 7/8”. I was a little concerned about marking and drilling all these holes freehand, so I decided to make a drill template instead.

The template just has three #40 holes, which I use to make pilot holes in the actual thing to be drilled, and then I can open those up to the proper size:

Next, I wanted to try the template our on a piece of scrap, to make sure it was correct before I put holes in something I couldn’t easily replace. Works like a charm:

Then there was just a lot of drilling, positioning, clecoing, unclecoing, etc. In addition to the three antenna mount holes each doubler has a row of rivet hole around the perimeter, with which it will be permanently attached to the skin. But eventually I got it all done, and had my comm antenna locations done:

After that, I moved on to relating this process for the ADS-B antenna, just ahead of the rear spar carry through. I still have the transponder antenna, furthest aft, to deal with…for that, I want to do a bit of research first. My original plan was to put it basically adjacent to where the elevator bellcrank lives, but now I’m thinking that puts it below the avionics shelf, which may make routing the coax cable a little interesting. So I’m thinking of putting it just behind the bellcrank instead, but the potential issue there is that the skin isn’t nearly as well-supported there.

Additionally, the curvature issue I discussed before is reverse here – it’s straight longitudinally, but curved laterally. So optimally, I’d put the flanges on the sides – and that might actually be best here, since that’s the dimension in which the skin can flex the most. I still kind of think I’d want a lateral flange at the aft end, though, since it’s far away from a bulkhead and the skin’s pretty floppy.

So once again, it’s time to go look at what other people have done. Hopefully tomorrow I can get this last doubler done, and then…well, I guess I’ll set them aside, since I’ll need a helper to get them riveted. Probably wait until the same time I finally finish the forward bottom skin riveting for that.

Posted in Fuselage | Hours Logged: 3