Fuel Tanks

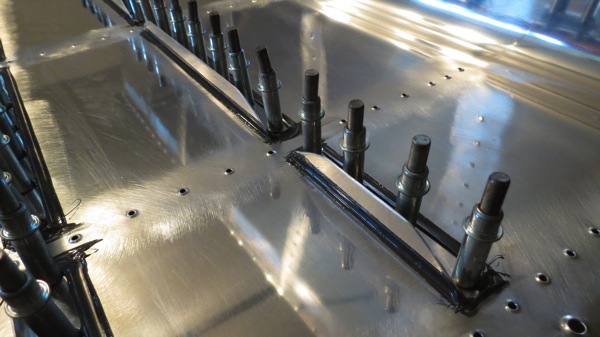
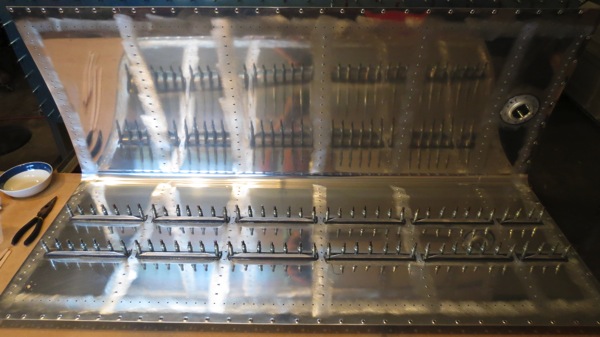
Right tank skin deburred

It’s happened again…me getting a little carried away with my goals. I pretty much figured out by the middle of last week that this wasn’t going to be a tank-sealing weekend, but I was still sort of trying to go for it. Then, at some point yesterday, I just decided to let go and enjoy my long weekend. Yesterday I slept in, we took the dogs to the beach, and watched a movie in the evening. Today we got up super early to watch the MotoGP race at Silverstone, then I slept in some more.

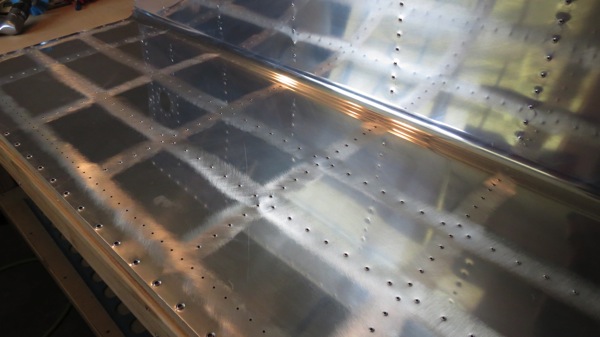
ObviouslyI did get out to the garage, or I wouldn’t be writing this. I set about repeating the work from Friday, reaming out the screw holes and hypnotizing myself by staring closely at shiny aluminum. And now I have two fully-deburred skins, ready for dimpling.

I didn’t really want to get into dealing with the ribs, so instead I decided to do a small trial run with the sealant. I broke out one of the cans and mixed up a small batch, with the intention of doing nothing but spreading someone a piece of cardboard so I could see how the stuff cured. It turned out to be an educational process. The sealant itself is extremely thick, like peanut butter, and it sticks to everything. Scooping a controlled quantity into a plastic cup was quite a challenge. The activator is much better though. Stirring the two together thoroughly in the cup was also difficult, and I found it impossible to not leave streaks of unmixed stuff along the walls of the cup. Clearly this method of mixing is not going to do.

The stuff I did get mixed OK, I put into a cheap plastic food storage bag. Instead of buying an expensive sealant application gun, I figured I’d try using a bag with the corner cut off to make nice beads. This part worked fairly well, although I cut the hole kind of big and made a rather large bead on the cardboard.

Afterwards, I did some research at VAF and saw recommendations for using a piece of tile as a mixing surface. I was skeptical of this approach, given how tough the cured sealant is supposed to be, but apparently it can be easily cleaned off the tile with a razor. So I guess I’ll run to Home Depot maybe tomorrow and see about getting a piece of scrap tile. Mixing on that should work much better, I think.

I may shoot for installing the access plate rings on the end ribs in the next few days as my first sealing adventure. That’ll make for a nice small-scale introduction to working with this stuff.

Posted in Fuel Tanks, Wings | Hours Logged: 1.5

Skins dimpled

Got Josie to come out an help me dimple the tank skins today. With the new c-frame table I made, a lot of this could actually be done solo, but it helps a lot to have a second set of hands, especially when doing the holes up near the leading edge bend. The table worked out pretty good, though I had some issues with the c-frame tending to move around in it and not keep the die level with the table top. I’m considering drilling a hole across the slot for the frame and through the frame so I can put a long bolt through to keep it in place.

I also discovered – once we got around to doing the screw dimples – that the screw dimple dies are not as tall as the #40 dies, so they actually sat below the table top. I solved this problem by making a spacer out of some scrap angle to go between the die and the c-frame. Problem solved!

C-frame table in use:

IMG 2197

Hey look, dimples!

IMG 2199

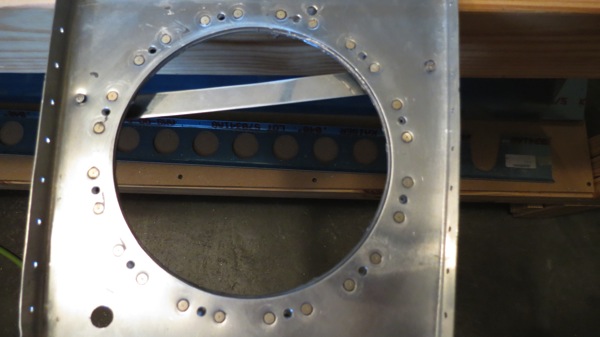
I also prepped the inboard ribs by countersinking the nutplate rivet holes in the reinforcement rings and dimpling the ribs to match. If I can get my mixing tile and a putty knife from Home Depot tomorrow, I’m hoping to make my first sealing attempt with those reinforcement rings starting tomorrow night.

Posted in Fuel Tanks, Wings | Hours Logged: 3

Sealing tank cover reinforcements

Well, tonight marked my first real foray into the world of sealant. The reputation of this stuff is well-earned; it’s about the consistency of peanut butter and ridiculously sticky.

First up, the mating surfaces needed to be scuffed; to do this, I used an abrasive sanding wheel I bought for the drill. I got that thing after reading where another builder used it for his tanks, but I wasn’t too impressed with it to be honest. Maybe I was expecting more scuffing action than I got. I’ll probably keep trying it, but I expect I’ll often be falling back to the good old-fashioned maroon scotch brite pads.

Scuffed parts:

IMG 2200

Next I mixed up a two-ounce batch of sealant and then transferred it into a gallon food bag, which served as my applicator. I put two beads on each ring, inside and outside the rivet/screw holes, plus a dollop between nutplate locations for good measure:

IMG 2201

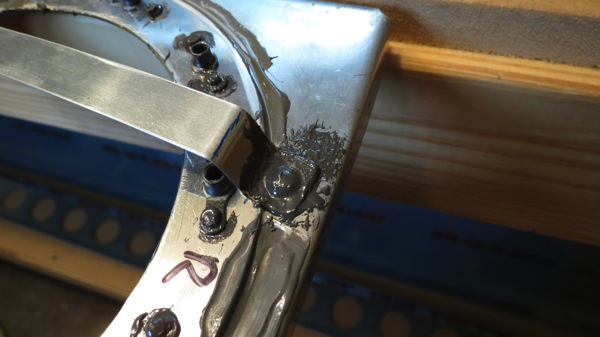
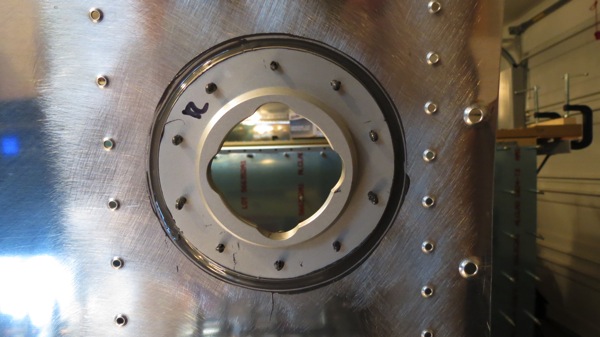
Finally, the rings were put in place and 100% clecoed through the rivet holes. At this point I was thinking that this had been surprisingly painless; I hadn’t even had to change my gloves yet. But there was one thing left to do: clean up excess sealant from the inside of the access holes and smooth the outside excess into a fillet around the rings. And it was through these tasks that my entire world got covered in sealant. After much wailing and gnashing of teeth, plus a few pairs of gloves, numerous acetone-soaked shop rags, and my first T-shirt with a sealant spot on it, I finally had things looking good:

IMG 2202

Well, mostly good. The version of me from two hours ago wouldn’t have liked all that extra sealant outside of the fillet, but the current version of me doesn’t care. It’s inside the tanks, no one will ever see it.

Tomorrow I get to find out about the joy of riveting with this stuff. I should go ahead and cut up a few hundred shop rags just so I’m prepared…

Posted in Fuel Tanks, Wings | Hours Logged: 1

Tank skin countersinking

Well, this night didn’t go exactly as planned. My original intent for the night was to rivet the reinforcement rings I sealed up last night. I probably could have gotten that done tonight no problem, but I had to complicate things. See, I’d need to mix up sealant again and put a dab in each rivet hole before squeezing, but the issue I had was that I doubted I could mix up a tiny enough batch to not waste a significant amount. So I decided to try and combine tasks tonight; in addition to riveting those rings, I could attach and seal the gas cap flanges too!

Only problem with that was that I still had one skin prep task left: countersinking the rivet holes between the skins and the baffles. The directions say to countersink these holes instead of dimpling; the apparent reason is so the baffle can slide into place more easily during final assembly (the baffle goes on last). A fair number of people go ahead and dimple the skins and baffle anyway, and most report no issues with inserting the baffle even like this. I considered this a bit, but in the end I decided against it mainly because the baffles look like they’d be very difficult to dimple; the flanges on them are rather narrow, putting the holes close to the baffle web. Tight quarters indeed.

Anyway, for reasons that I no longer remember, I wanted to get this countersinking done before I attached anything to the skins, including the caps. So I busted out the first skin and went to work.

By the way, there are a lot of skin-baffle holes. My right arm actually feels a little stiff and sore now from pushing the drill for all those holes. Long story short, it took far longer to do that countersinking than I expected. I was almost two hours in by the time I finished up, and it was creeping up towards 11:00.

I actually started to lay things out to mix up some sealant and get to riveting, but then I thought it over and decided to call it a night instead. I would have felt rushed, and maybe messed something up in the process, especially since I would still have had to scuff and clean the gas cap flange mating surfaces. Definitely best left for another night.

Here, look at a photo of some countersunk holes:

IMG 2203

Posted in Fuel Tanks, Wings | Hours Logged: 2

Right tank stiffeners

So today’s goal was to rivet the reinforcement rings I sealed previously, and then get the stiffeners sealed in place on at least one of the skins. By combining tasks like this, I can avoid sating sealant; I hardly need any to seal while riveting, to the point that it’d be hard to mix up a small enough batch for there to be no waste. Instead, I’m going to shoot for doing one large sealing task at the same time as doing the small task of sealing rivets. The fun part of this is being really sure of preparation. Once a batch of sealant is mixed up, it has a working time of a couple hours, so it’s important that everything is ready to go.

I started out by roughing up parts. The stiffeners themselves came first, and I took care of some other small parts while I was at it: gas cap flanges, drain flanges, and the anti-hangup guide for the right tank that goes on the outboard rib (no need to seal the other ones since its attachments won’t penetrate the tank exterior). Then I put my scuffing wheel in an air drill and went to work on the skins. I learned during this time that the drill will consume air about as fast as the compressor will pump it; basically the compressor ran nonstop the entire time I was scuffing, and even the breaks I took to switch skins weren’t long enough for it to catch up.

Here’s one of the scuffed skins:

IMG 2210

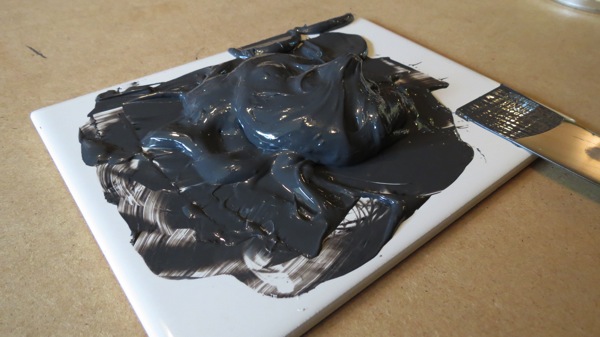
OK, so much for prep work. I made sure everything I needed for the reinforcement rings was laid out, and got to mixing up a 4oz batch of sealant. Just look at this lovely goop:

IMG 2212

Next part was pretty easy. I removed half of the clecos, used a Q-tip to swirl a bit of sealant in each dimple, placed the rivets, squeezed them, then did the other half. Repeat for rib #2 and done. Finally, all the exposed rivet heads on the interior get sealant swirled around them to ensure a good seal.

Finished rivets. Hard to see, but there’s a little dark ring of sealant around each head:

IMG 2214

I also went ahead and put the anti-hangup guide in place and riveted it. Here you can see that and also the sealant covering the interior rivet heads:

IMG 2215

And then it was on to the stiffeners. I scraped the rest of my mixed sealant off the tile and put it in another food bag with the corner cut off. Got the skin on the table, cleaned the mating surfaces, and started laying a bead of sealant on the first stiffener. Then I ran into my first problem. Seems I made the corner hole in the bag a little too small, which in turn caused me to squeeze it a little too hard while laying the bead. I was looking at the bag bulging in my hand and wondering if there was going to be a problem when…there was a problem. The bag split. And here I am with a sealant-covered stiffener in one hand and a ruptured bag in the other.

Fortunately Josie was around, and she fetched me a fresh bag and then held the stiffener by a clean part while I transferred the sealant to the new bag and cut the corner (larger hole this time, thankyouverymuch). Then back to laying the sealant bead. This is a pretty tedious job for sure, holding a tiny part in your hand while carefully squeezing the sealant out. Especially since  was now nervous about the bag ripping again…

As I finished each stiffener, I just laid it in place on the skin, no clecos. Only after all the stiffeners had sealant on them did I go back and 100% cleco them in place. Confirmed good squeeze-out of sealant all around, then went to work making a fillet with a popsicle stick. I did end up squirting some more sealant on the back side of the stiffeners (where the flange bends up). I could see that sealant had squeezed out of those spots, but I wanted to be really, really sure. I don’t want to close my tanks, find out they have leaks, and then have to figure out how to patch them. Better safe than sorry, etc, so forth and so on…

Stiffeners in place with finished fillets all around:

IMG 2216

And a long shot of everything:

IMG 2217

I still had a little sealant left over in the bag, so I went ahead and put the right gas cap flange in place as well:

IMG 2218

So tomorrow I should be able to back rivet all these stiffeners and then get the left tank stiffeners in place as well. I’m knocking off early so we can go have dinner out together for once…it’s been a while.

Posted in Fuel Tanks, Wings | Hours Logged: 5

Finished right tank stiffeners

Boy, I really wish I’d done this yesterday…but my chronic bad back become acute, and I spent most of the day in bed. Went and got some drugs today, so I’m feeling better.

Goal for the night was to rivet the stiffeners and gas cap flange that I fay sealed Saturday. First, though, I needed to clean my mixing tile. I was somewhat amused to find that the putty knife had become more-or-less permanently attached to the tile. It was pretty easy to remove with a razor blade, but before that I stopped to get a humorous photo:

IMG 2219

OK, on to the fun part. Remove the clecos from the stiffeners and make sure everything is ready for the rivets. I learned a bit of a lesson with the rings I did before: the fay sealing process tends to leave sealant in the rivet holes, which gets in the way later. I had lots of this with the stiffeners, so I wanted to clean it out first. After trying a few things, I ended up just running a #40 drill bit at low speed through the holes.

Next I mixed up a batch of sealant and put a dab on each dimple. Then a rivet in each hole (TEDIOUS), followed by rivet tape. At least the back riveting went pretty quick; I forgot how easy back riveting is. I think I did all the stiffener rivets in about 20 minutes.

Here I made a mistake in thinking that I was almost done; I “just” needed to rivet the gas cap flange, and then just seal the shop heads of the rivets. The fun part about the deluxe cap flange is that it varies in thickness, meaning I need different rivet lengths for different parts of the thing. And I came really close to forgetting to put the vent line clip in place. I could get to about half of these rivets with the squeezer and a 4” yoke, but the rest had to be shot. Boy, is it fun trying to hold the flush set in place with a layer of greasy sealant between it and the skin…I botched one rivet and had to replace it.

Finally, that frustrating thing was done and I just needed to seal the shop heads. I strongly considered leaving this for another night, but most of the sealant I’d mixed up was left over, and it would have just gone to waste. Rather than swirl the stuff in place with a q-tip like I did with the rings, I loaded it up in another bag and deposited giant dollops on each head. Bit messier, but hey, it’s the inside of a tank, who cares what it looks like, right?

Stiffeners and cap flange with the shop heads sealed:

IMG 2221

IMG 2220

And that’s all! I’m thinking maybe tomorrow night I’ll fay seal the left stiffeners and plan on riveting them Wednesday night. Tonight’s lesson was that the gas cap is a job all its own, so I think I’ll leave the left cap to be done at the same time as the drain flanges. I’m also a little worried now about riveting the skins for these things… it’s going to be tedious holding the rivet gun still for all those, especially while reaching way inside to buck too.

Posted in Fuel Tanks, Wings | Hours Logged: 3

Deburred tank ribs

So yeah, not much activity these last few days. My back as been bothering me a lot lately, to the extent that I had two doctor’s visits last week. I was getting along OK, but wasn’t sure if going out to the garage and hunching over stuff was the best thing to be doing. Plus it seemed appropriate to take it easy in general. I’m feeling a lot better this weekend, presumably thanks to the steroid pills I’ve been taking.

I still didn’t want to go all out yet, but I felt I should get something done, and I had yet to deburr all the holes in the ribs. That’s a nice, easy task I can do sitting down, so I went for it. No pictures, nothing really to see tonight.

I think tomorrow if I’m continuing to feel better, I’ll see about fay sealing the left tank stiffeners, and then I can rivet those Monday night. There are also some little sealing tasks to be done, like the fuel sender terminals, fuel feed and vent line fittings, and so forth. I think it’s probably best to reserve the fay sealing and riveting of the main ribs to a weekend; those will be quite a bit of work for sure.

Posted in Fuel Tanks, Wings | Hours Logged: 1

Misc tank stuff

Well, I had originally planned to try and fay seal the left tank stiffeners tonight. But fire, I needed to clean up stuff from the last session, and I also wanted to be prepared to make use of any extra sealant after the stiffeners were done. Last time I did the fuel cap flange that way. This time I wanted to have some other stuff ready, so I decided to prep the left tank pickup and the cover plate it’s mounted to. Well, that turned into a sort-of long odyssey of looking up proper torque specs for AN nuts, getting the anti-rotation bracket positioned correctly, discovering the holes between the bracket and the cover plate were the wrong size, so forth and so on.

I’d already gotten kind of a late start, and by this time I’d been out there almost an hour. I figured that there was a good chance I’d spend as much as two hours sealing up the stiffeners and everything else, which would put me finishing up near midnight. So I decided to abandon the sealing plans and instead get everything cleaned up, then I worked on some remaining scuffing work, mainly on the baffles. I put my abrasive wheel in the drill press and tried working on the ribs, but I found it difficult to control the thing and rapidly got frustrated. I’ll maybe figure out a different strategy for those another time.

Posted in Fuel Tanks, Wings | Hours Logged: 1.5

Left tank stiffeners

Tonight was basically an instant replay of when I did the right stiffeners. Got everything cleaned and in place, mixed up a batch of sealant, gooped each stiffeners up and put in in place, clecoed 100%, smoothed out the squeezed-out sealant with a popsicle stick. Just as tedious as ever – nothing makes me go cross-eyed faster than staring intently at a stiffener while squeezing out the sealant.

I had a fair amount of sealant left, so I went ahead and fay sealed the fuel cap flange and then moved on to installing the fuel pickup in the left tank access cover. This turned out to be kind of challenging – I needed about four hands to hold everything in place. First I applied sealant around the bulkhead fitting and put it in place. Then while holding that, I put a bead around where the fitting emerged on the outside of the plate, then set the washer in place before spinning the nut in place to hold everything relatively steady. But then the anti-rotation bracket had to go in place, and it needed sealant under it, so I ended up loosening the nut again so I could ease that bracket into place without getting sealant everywhere. I added some more sealant to go between the nut and the washer on the outside as well.

Finally, after about half an hour of this madness, I had everything in place, and amazingly enough, I didn’t have sealant everywhere (not quite, at least). It was definitely time to quit for the night.

The assembled access cover:

IMG 2223

And some inaugural sealant on the workbench top: (this is after I scrubbed the area with an acetone-soaked rag)

IMG 2224

Posted in Fuel Tanks, Wings | Hours Logged: 2.5

Riveted left stiffeners

I think I’m starting to reach the point where I’m tired of tank sealant. Which is unfortunate, since I’d estimate I’ve maybe done 30% of the sealing tasks on these tanks.

Anyway, I popped out after dinner and went to irk on the stiffeners – removing the clecos, cleaning the holes, swirling sealant in the dimples, placing the rivets, and finally back riveting. It’s almost absurd how fast the actual back riveting goes compared the painstaking work of inserting those rivets without getting sealant everywhere. It’s been a while since I had an Official See, I Really Am Doing The Work On This Thing photo, so I got Josie to come out and snap a few pictures while I was placing the rivets:

IMG 2225

IMG 2227

Next up, I wanted to rivet the fuel cap flange in place. This was just as much of a hassle as last time. I thought that I’d learned some lessons on the other one that would help here, but that didn’t seem to be the case. On the plus side, the new rubber-surrounded flush rivet set I bought is much better about staying in place. But I still clinched two rivets and had to drill them out and replace them. I also squeezed the two rivets that hold the anti-rotation bracket on the access cover I put together last time out.

I had a lot of sealant left over, which I’d intended to use to cover the shop heads of all those rivets, but it had already gotten pretty stiff by this point, and I was kind of over dealing with the stuff for the night anyway, so I quit while I was ahead.

In other news, I placed some orders this week for some important items. I’ve decided to go with the leading edge landing lights instead of waiting and hoping that Aveo Engineering actually has a workable Ziptip kit out in the next couple years. So I ordered two Duckworks Aviation light mounting kits along with a pair of Whelen LED units. I also ordered a pitot mount kit from Gretz Aero – and since that came from Spruce, I also ordered some other misc stuff, most notably some extra piano hinge wire. I’ll be needing that to make the final hinge pin for the fuel tank trap door and the elevator trim tab, and besides, it can’t hurt to have some extra material lying around. Most everything came in today except for the Whelen lights, which I should have on Monday.

Posted in Fuel Tanks, Wings | Hours Logged: 2