Empennage

So it begins… (Empennage reception and inventory)

I’ll start with a straightforward confession: I was pretty much 100% unproductive at work today.  You see, ever since I got the tracking info for my empennage kit, I’d been refreshing that page in a seriously obsessive manner.  As of about 8:30 this morning, the kit was at my local Fedex location…but too late for it to go on a truck today.  No way was I going to just sit back and let it sit all weekend in a warehouse, mere miles from my home.  So I called and was able to arrange to pick the kit up myself after work.  By 7:00, I had two boxes with the lovely label “HIGH DOLLAR AIRCRAFT PARTS” sitting in my garage.  Thirty minutes later, after scarfing dinner at light speed, I was tearing the boxes open and trying not to squeal like a little schoolgirl.  I then spent the next 90 minutes on inventory.  Good news: it’s all there!
Unfortunately, I have plans for the rest of tonight, as well as all day tomorrow, so Sunday looks like the next viable work day.  I still have a practice kit lying around that needs to be built as well, so I suspect that’ll be Sunday’s task.  I’ve also taken a pass for now on figuring out storage for all these parts…so I’ve got some housekeeping items to take care of before I launch into this project.  The good news is that Memorial Day is coming up, which means a long weekend for building.
Let the fun begin!
Kit in car
IMG 3706
IMG 3708
IMG 3710

Posted in Empennage | Hours Logged: 1.5

H-stab rear spar beginnings

Started building in earnest tonight.  Nothing really complex happened, unless you count me very gingerly working with my pricey aluminum bits.  I cleaned up the HS-609PP rear spar doubler, rounded the edges, and then clecoed and match-drilled it to the HS-603PP spar channels.  

I took care of a few firsts tonight as well.  First, I added my first bits of blood to the project. (adding my DNA just makes it that much more personalized, right?)  I still don’t know how I busted my knuckle.  I was match-drilling and wondering what these strange red flecks on the spar channel were when I noticed the knuckle.  Oh, that’s my blood.  That was after I got careless with the reamer and spun it across my formerly peerless aluminum, leaving a nice scratch in its wake.  I’ll have to make sure I clean that up thoroughly before priming later on…

Sorry, only one photo tonight.  I’m going to have to make a concerted effort to take photos as I go; It end to get involved in stuff I’m working on, to the point that stopping and taking pictures is the last thing on my mind.

IMG 3712

Posted in Empennage | Hours Logged: 1.5

More H-stab spar work

Another short session tonight.  I seem to keep finding things I need before I can do certain steps.  Last time, I stopped when I got to a step requiring a drill bit size I wasn’t sure I had.  A large portion of my tool set was bought secondhand as a unit, and it included a lot of assorted drill bits.  I’m pretty sure there’s probably a #21 in there, along with the other sizes I need, but I’m not sure what sizes I have.  I needed to order some stuff from Spruce anyway, so I tacked on a drill bit size gauge.  I could work out the bit sizes, since I have a set of analog calipers, but I’m not sure I trust myself there.  I’d rather wait and make really sure I’m right before possibly ruining parts…

Anyway, my order from Spruce didn’t come today, so I decided to skip ahead a bit.  Next step was to attach and match-drill the outboard elevator hinge points. (HS-412PP and HS-413PP)  These were pretty straightforward, though the inboard pieces were a little trickier since each hinge half has only two rivet holes.  Normally you cleco half the holes between two pieces to hold them together while match-drilling the other holes, then switch and repeat.  But with only two holes, only one can be clecoed while drilling, which doesn’t exactly lend itself to stability.  So I clecoed both holes, added a clamp, then individually removed the clecos and match-drilled.

Next up was the center hinge point, HS-411PP, and the VA-146 bearing.  Only one of the HS-411 halves is pre-drilled, so the halves have to be clamped together over the VA-146, then clecoed to the spar assembly, and then all three pieces are drilled through.  I fussed over this probably more than I needed to, but I was acutely aware that this was a good opportunity to ruin my first part.  But all turned out well; once drilling was done, I deburred everything, cleaned up, and riveted the assembly together.  First rivets on the project are done!

Next, I moved on the front spar.  I got as far as clecoing the inboard holes for the HS-410 and HS-414 reinforcements, but the next step involved tapering the ends of the reinforcements…oh, guess what, I don’t really have anything good to do that.  I went ahead and laid out the taper patterns, but decided to wait until I had picked up a belt sander to do the tapering.  I could have possibly skipped forward to other steps, but I’m getting a bit uncomfortable with having several items I need to go back and address, so I elected to wait.  I’m going to grab the sander on the way home from work tomorrow, and my Spruce order should come in as well, so I’ll be able to go back and finish the drilling jobs I skipped.  Assuming, that is, I have the necessary bits…

IMG 3715

IMG 3717

IMG 3718

Posted in Empennage | Hours Logged: 2

Ruined some h-stab parts, moved on to v-stab for now

Yup, I ruined parts today.  The three or four people actually reading this might recall that in our last installment, my next task was to taper and round the ends of the HS-410 and HS-414 forward spar reinforcements.  That didn’t end so well, but it was a bit of a learning experience.

On Friday, I picked up a shiny new belt sander on the way home from work.  Today, I got to try it out.  Perhaps my expectations were too high, but I was none to impressed with how slowly it was removing material from the reinforcements.  It also heated the pieces up pretty quickly as well.  So I decided to find another approach, but this is where I went astray.  Rather than sitting back, thinking things through, and coming up with a thorough Plan B, I started focusing instead on how I really wanted to get these pieces done today.  Bad idea.  My off-the-cuff Plan B was to rough cut the tapers with a hacksaw and then finish with the belt sander and Scotchbrite wheel.  Problem was, I didn’t have a hacksaw, so I’d have to run out and pick one up.  Then I remembered that I had a Dremel and a load of cutoff wheels.  I tried using that to rough cut, but it was quickly apparent that I couldn’t control the wheel to my liking.

30 minutes later, I was back in the garage with a shiny new hacksaw.  I set upon the reinforcement angles with renewed vigor; it wasn’t much fun, but I finally got the rough cuts done.  Then, I wanted to straighten out the tapers, so I went to work on the belt sander.  Then I had to smooth all those rough edges.  Unfortunately-and I was gradually realizing this as I went along, but too late to do anything about it- by the time I did all that, I’d removed too much material.  The plans call for a 1/4″ radius on the ends, and I ended up down to 3/16″ in a few places.  I should have made my rough cuts a lot further out, then given myself more room to ease material off until I hit the edges I wanted.  I’ll keep that in mind when I redo these…Tuesday I’ll be calling Van’s for my first (and probably not last) replacement parts.

After taking a break and thinking things through, I decided to stop work on the horizontal stab for the time being.  The front spar was the next major subassembly, and while I could have skipped ahead to working with the ribs and such, setting it aside to move on to a different component seemed like a better idea.  Plus the vertical stab looks a lot simpler than the horizontal…in fact, it’s strange to me that Van’s has you start on the more complex h-stab.

So anyway, that’s what I did…and I made good progress.  By the end of the night, I had the entire v-stab structure clecoed together and match-drilled.  Next step was to cleco the skin on and match-drill that.  It was getting a bit late and I didn’t expect to do the match-drilling, but I couldn’t turn down the opportunity to temporarily attach the skin and look gleefully at something that looked very much like an airplane part.  So I did.

Tomorrow’s Memorial Day, which means I have the day off, so I’ll be back to work bright and early.  Hoping to at least get everything in the v-stab prepped and primed, and maybe even get the skeleton riveted together.  Not sure I’ll make it as far as riveting the skins, but we’ll see.

IMG 3720

IMG 3723

IMG 3726

Posted in Empennage | Hours Logged: 5

V-stab rear spar done…well, mostly

Yesterday, I said I hoped to get the v-stab skeleton done today.  I did not achieve that goal, though I got pretty close.  Still, I put in a solid day’s work on the project, and got my hands dirty with a lot of skills that I’ll use throughout the build.

I left off yesterday with the skeleton clecoed and match-drilled, and the v-stab skin clecoed in place but not match-drilled.  So step one today was to match-drill the skin.  Nothing fancy there, just a lot of drilling interspersed with a lot of cleco moving.  Then it was time to tear the entire stab apart and get going on prep work.  First on the docket after disassembly was deburring and edge finishing.  I elected to set the skin aside and focus on the skeleton, since that would be the first thing I’d assemble.  This was probably a good decision, because just cleaning up the skeleton took far longer than I ever would have guessed.  I spent a solid 2+ hours just on that.  Most of it went quickly; long straight edges were a piece of cake on the scotchbrite wheel.  It took a little more experimentation to clean up the tighter places, like the relief cuts in the rib flanges and such.  Some creative use of files and scotchbrite pads took care of that.  Another time sink here was the VS-808 spar doubler.  The edges of this thick piece had very deep tool marks, which I felt compelled to smooth down.

Next up was dimpling and countersinking.  This went fairly quickly, and then it was time for primer.  I moved out into the driveway (and, by proxy, the Georgia heat) and got to work.  I’m keeping things simple with priming; prep is limited to applying Simple Green to clean up and scrubbing with scotchbrite pads to rough the surface.  While Simple Green is a good degreaser, it’s important to remember that it’s a surfactant; a good thorough rinse is essential to leave no traces.  Once the pieces had dried, it was on to my high-tech plywood + saw horse priming station, where I applied a nice coat of Dupli-Color self etch.  That went well, except for when the sky got a little dark and I felt a raindrop or two, which prompted a rapid relocation of my still-wet spar channels.

While waiting for the primer to finish drying, I went back to work on the v-stab skin.  Off came the protective vinyl, and into action sprang the hole deburr tool.  Deburring those holes in the skin is interesting-kind of a challenge to effectively brace the skin while you spin the tool.  And some stuff is in a bad place to do with my right hand, so it became a difficult choice between awkwardly using my right hand or awkwardly using my left hand.  Edges of the skin weren’t too bad, though there were some high tool marks.  I decided to forego the scotchbrite wheel and work only with files and the edge deburr tool I have.  That worked out pretty well, though when I go out tomorrow I may find that I’m less than satisfied.  I may end up using the wheel after all.

Finally, it was back in the garage and time to start assembly.  First step is to assemble the rear spar parts: the VS-803 spar channel, VS-808 doubler, and VS-410/411/412 rudder hinge brackets.  There’s some pretty thick material here, and as such the rivets are looong, -6 or -7 all the way up through the doubler.  Turns out those aren’t much fun to squeeze either.  The first few weren’t bad.  By the time I’d done ten or so, my hands hurt, and I was having to get my right thigh involved to get enough force to get that last bit of squeeze. (I’m sure this would have been fun to watch)  Squeezing took longer than expected as well, mostly due to me taking frequent breaks to let my girly arms recover.  By the time I got all the doubler rivets in place, I was starting to get sloppy (and hungry), so I called it a night.  I still have to go back and rivet the VS-411/412 hinge brackets tomorrow, then the rear spar will be done.  After that, riveting the rest of the skeleton should be pretty straightforward. I might even have time to start riveting the skin on.

Yay pictures!

IMG 3727

IMG 3729

IMG 3735

Posted in Empennage | Hours Logged: 8.5

V-stab rear spar done for real. Rest of the skeleton, not so much.

Short night in the garage today.  I decided to wait on attaching the skin and just finish up the skeleton tonight.  Finishing up the rear spar was a snap; all I had left to do was to rivet the VS-411 and VS-412 hinge brackets.  Those were a piece of cake, and went pretty quick.  Before proceeding, I went back over the plans and instructions and realized that completing the stab was going to be a little different than I thought.  I’d been expecting to rivet together the whole skeleton, both spars and all the ribs, and then attach the skin.  Turns out the actual procedure is to rivet the ribs to the front spar, then rivet the skin to that skeleton, and finally rivet the rear spar in place last to complete the assembly.  And that, my friends, is why we read and reread the instructions before doing anything.

Anyway, back to work…everything was going great.  Upper rib to front spar, piece of cake.  Middle rib to front spar, also piece of cake.  The bottom was a different story.  Here there are two ribs to attach to the spar, which really limits access on both sides of the rivets.  Plus there are three rivets; the outer two are easy to get to with the hand squeezer, but the center one is inaccessible.  To make things worse, the ribs meet that spar at a slight angle, so one side is really tight.  After staring and rubbing my chin for a while, I decided to give it a whirl with the offset set I have for the rivet gun and one of the more odd-shaped of my bucking bars.  Better yet, in order to get in a position to both rivet and hold the bucking bar, I had to switch hands, with the rivet gun in my left hand.  I practiced a few times just getting everything in position, until I was confident I could do this.  A few quick hits on the rivet gun, stop to recheck everything, double-check the bucking bar positioning, everything still looks OK.  So I gave a good blast with the rivet gun again, then stopped to check again…crap.  The shop head of the rivet isn’t square, it’s starting to drift a bit.  There won’t be any saving that, that’s for sure.

I elected to stop for the evening at that point.  I’m going to have to figure out a way to drill out that rivet without ruining anything, and it’s going to be fun considering the confined that contributed to it being a bad rivet in the first place.  In the meantime, it’s time for some research into how other builders have done this.  A better squeezer, one that uses swappable yokes, would be helpful here; my squeezer has a pretty shallow throat, which limits its usefulness.  A 3″ yoke would have made this a breeze, and the rivet gun never would have entered the picture.

Oh, and I forgot to order the replacement parts for the h-stab.

Posted in Empennage | Hours Logged: 1

Frustration

It had to happen sometime.  The introduction section of the RV-8 preview plans contains this statement: “The project you are about to undertake will probably be the most frustrating, time-consuming, enjoyable, fulfilling, and rewarding you have ever experienced.”  I knew frustration was a part of the deal, but it’s still…well, frustrating when it happens.

When we left off last time, I’d failed miserably at bucking the center rivet for the v-stab front spar and two ribs.  Since then, I did manage to get that rivet drilled out without destroying anything, but I hadn’t done anything else.  I did order a new squeezer with a 3″ yoke, figuring that would be helpful for situations like this.  Today, I went out to the garage, confident in the knowledge that with my shiny new tool, I’d make short work of these three rivets and move on to skinning the v-stab.

The good news was that the new squeezer with the 3″ yoke could easily reach that center rivet.  The bad news was that even so, working inside those two ribs didn’t offer a lot of clearance.  If you’d asked me before today, I would have told you that squeezing rivets was pretty much idiot-proof.  I got to eat my own words when the first rivet I squeezed had a lovely clinched head.  Blarg.  Drill-out time returns!  Attempt #3 went better, as I paid a lot more attention to making absolutely sure the squeezer was straight.  I suspect that the flex in that 3″ yoke aggravates less-than-optimal positioning…

But now, I was happy!  With that pesky center rivet set, the other two would surely be a cakewalk!  Actually, no…there’s even less clearance for those two.  And what with the spar web and rib flanges all over the place, I still can’t get at them with my old squeezer.  My first attempt at squeezing one of the end rivets…yet ANOTHER clinched head.  Josie, who was helping me out at the time, suggested I try to hit the other end one before drilling out the first, maybe as a sort of confidence booster.  My confidence was not boosted, however…even though I was being extremely careful positioning the squeezer, the shop head on that rivet started to lean over as well.  At that point, I summoned all my willpower to avoid flinging a tool across the garage, and stalked into the house, turning off the A/C and lights in the garage.  The last thing I wanted to do at that point was to look at that spar again.

After about an hour of sulking, I’d formulated a plan that made me want to go out and play some more.  I’d dispense with the pesky squeezer, and go back to the rivet gun.  Surely if I was really, really, really, really careful, I could buck those two rivets and be done with this, right?  Of course!  So I went back out, drilled out the two offending rivets, spent a good half-hour setting the work up, clamping everything down, thinking through how I’d approach things, experimenting with how to hold the rivet gun and bucking bar, etc.  This was possibly the most preplanned rivet-bucking I’d ever done.  Finally, I was convinced I was ready.  I carefully started the rivet with a few taps.  It didn’t seem to be leaning over, so I gave it a little burst, still being very careful to hold the bucking bar square.  And there, once again, the shop head was leaning to the side.

I wanted to assault that spar with a ball-peen hammer until I had turned it into scrap aluminum, or some kind of modern art masterpiece.  Instead, I just gave up on it.  I’m going to have to swallow my pride and get some experienced assistance on this one.

In an attempt to salvage some kind of progress from the day, I decided to dimple the v-stab skin.  I just wanted some kind of achievement for the day. (besides perfecting my rivet drill-out procedure)  That went well, mostly…except for the nice figure-eight dimple I made.  As far as I can tell, that’s a rite of passage for builders.  Guess I’m in the club now.  At least fixes for figure-eight holes are pretty well-documented, so I’m not all that bummed about it.  Or maybe it just seems so minor compared to the continuing frustration with that spar.

In retrospect, one source of the great frustration is the expectations I put upon myself.  I was convinced that by the end of today, I’d have a skinned v-stab to look at, that I would achieved a nice build milestone…my first complete, recognizable aircraft part.  I didn’t allow for setbacks, and when they did occur, it was like my hopes and dreams were torpedoed.

I guess it’s time to get familiar with some of the EAA folks I’ve been seeing at the pancake breakfasts, and start politely imposing on their free time…
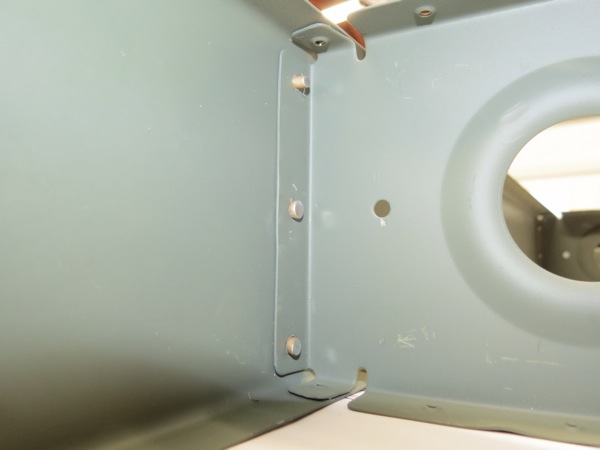
IMG 3756

IMG 3761

Posted in Empennage | Hours Logged: 4

Skipping ahead again…this time to the rudder

So, as noted last time, I’ve been having some trouble with the front spar of the v-stab.  Since then, I once again convinced myself that I could make those rivets good if I was really, really, really careful.  So a couple nights ago, I went down and made another try.  And clinched them both.  Again.  In the process of drilling them out, the drill bit slipped off a couple times and made some divots in the nose rib flange.  I’d already put a couple nicks in before, which I’d duly sanded out and reprimed.  At this point, all those nicks were making me nervous.  And I still hadn’t ordered replacements for the h-stab reinforcements, so after seeing how cheap the replacement nose rib was, I elected to get a new one.  So now all three of my replacement parts are on the way.  And I’m even more convinced that I need another set of experienced eyes on these two pesky rivets.

In the meantime, I didn’t want to just sit around doing nothing…so I decided to start work on the rudder.  I poked through the directions for the rudder, and was going to attempt to gather all the parts together, but then I realized that there are a few parts for the rudder that have to fabricated from raw sheet stock.  So I decided to keep it simple, follow the directions by starting on the stiffeners, and worry about the other stuff later.

Making stiffeners is pretty straightforward, just kind of tedious.  They come as long pieces that have to be trimmed to length.  A bandsaw might have made this faster, but I don’t have one…so it was snips all the way.  By the time I had all the raw cuts done, my right hand was feeling a bit worn out.  Next up was to clean up the rough cuts from the snips using the handy old scotchbrite wheel.  After a lot of shaping and deburring, I had some finished stiffeners, which I proceeded to cleco to the rudder skin.  By this time, it was after 11, so I decided to match-drill another day.

Some fun notes: One might note from the following photos that I left the blue vinyl on while trimming the stiffeners.  This was kind of dumb; if I’d pulled the stuff off before trimming, I would have had (I think) 10 sheets to pull off.  Instead, I had 32 sheets to pull off.  Oops.  Also, there was a moment of crisis while I was smoothing the rough-cut stiffeners on the grinder.  I went to grab the next stiffener, and realized…there was one missing.  I searched all over the garage.  I couldn’t imagine where that thing could possible have gone.  I was completely confused.  Then I found it…under another, longer stiffener.  Completely concealed.  That cost me about 20 minutes of doubting my sanity…

IMG 3764

IMG 3769

IMG 3772

Posted in Empennage | Hours Logged: 4

More rudder work

Short day in the shop-didn’t have a lot of free time tonight.  Match-drilled the stiffeners to the skins, then removed them and deburred all the holes.

There was also some more fun.  As I was trimming the stiffeners last night, I kept thinking it was really odd that the topmost stiffeners were sort of “backwards” from all the others.  Earlier today, I briefly walked out to the garage to check things out, and noticed that those same stiffeners looked to have too much material on the leading edge end.  I set the spar in place, and yep…they were going to need more trimming.  I thought it was especially odd that they didn’t fit quite right in addition to being different from all the others.

It was about four hours later that I had a sudden epiphany.  Another trip to the garage confirmed it-I had tapered the wrong end of those two stiffeners.  Argh.  Luckily, it appears that I’ll still be able to use them; in fact, I went ahead and trimmed them some more this evening so they’ll fit.  I’m a bit concerned about the amount of material on the tapered end of these two stiffeners, so I’ve submitted the question to the bright folks over at the VAF forums.  I might call the folks at Van’s as well to see if this is an issue.  Stiffener material is pretty cheap, but it would be kind of annoying since I just ordered some parts from them.

Posted in Empennage | Hours Logged: 1.5

Stiffeners!

Still here.  Some busy times here, between some vehicular issues and going out of town this past weekend.  I didn’t have a ton of time tonight, but I wanted to get out in the garage and do something.  Luckily, I had a nice, easy task to perform: dimpling, prepping, and priming the rudder stiffeners.  Last time, I had miscut a couple stiffeners, but after contacting Van’s, it turns out they’re still usable, so I went ahead with them instead of ordering more new stuff.  Beyond that, the day was pretty simple.

I did make one little mistake: Since I was trying to wrap things up, I didn’t wait long enough between cleaning the stiffeners and priming them.  Even though I blew them off with the air gun, there was apparently still some moisture present, as the primer bubbled up in a couple places.  So I guess I’ll have to go back and sand/reprime some areas tomorrow.

No pics today, sorry.

Posted in Empennage | Hours Logged: 1.5