Wings

More landing light stuff

Had a bunch of stuff to do around the house this evening, but I made a little time to go do a touch of work anyway. I just put the template back on the right wing and drilled the pilot holes for the lens mount. Then I put the right leading edge in the cradle, removed the two outboard ribs, and drilled the pilot holes for the reflector mounts. Then the quick-disconnect on my air hose failed and vented quite a lot of compressed air into the shop, so I replaced that and then decided to call it a night. So not much done, but hey, something is still better than nothing.

Posted in Wings | Hours Logged: .5

Right leading edge prep

Well, not an especially productive weekend. Saturday was eaten up with tailwheel training and a friend’s birthday, and today seemed to really want to be a lazy do-nothing day. I went along with that for the most part, but figured I should get something done this weekend.

First up, I finished drilling the nutplate holes for the landing light reflector. Nothing to crazy here; the nutplates get clecoed in place through the pilot holes and they’re used as a template to drill the rivet holes. I wanted to mock up the reflector between the ribs for a photo op, but I realized it couldn’t really be done without the nutplaptes riveted in place – something I’m not going to do until I have the ribs primed.

So what next? Well, I guess I might as well start general prep for this assembly. i already had two ribs out, so I pulled the rest after marking them so I could put them back in their places later. First item of business was the joint plate, to which the fuel tank will attach with screws. I reamed the screw holes out to full size, deburred, and then went to work drilling for the tank attach nutplates. And this is where I messed up.

I started just like I had done with the reflector mount nutplates, by clecoing all the nutplates through the screw hole. After aligning them like I wanted, I went down the line, drilling one of the rivet holes in each one. The next step would have been to put a cleco through that hole before drilling the other, but I realized I’d made a stupid mistake. With the reflector mount, I was clecoing through a small pilot hole, so the nutplate was guaranteed to be centered. Not so much here; the screw hole was much larger than the right size cleco for the nutplate. Thus there was no guarantee the nutplate was centered.

If I’d dimpled the screw holes first (these will be flush screws), then there would have been positive location. So I pulled all the nutplates, got out the c-frame and dimpled the screw holes. I figured I’d put the nutplates back on after that and maybe, by some miracle, they’d all line up. And surprisingly, they almost all did, except for two, which looked kind of like this:

IMG 5128

Ugh. My first inkling was to chuck this part and replace it; after all, it’s just a simple strip with a bend in it to match the leading edge profile. No problem to replace, right? But then I thought about it more; this part has to align with three other parts – the inboard leading edge rib, the leading edge skin, and the tank skin. The more I tried to imagine how I’d drill the new parts it would align properly, the more I realized it was going to be a tough task.

The other option would be to drill the offending holes out to #30 and use a larger flush rivet. In almost all circumstances, this would be a complete no-no; there are very specific distances required between the center of a rivet hole and the edge of a material, to ensure proper strength. Nutplates, however, are a special case. Here, the rivets don’t serve any real structural purpose; they merely hold the nutplate in place while the screw is tightened. Once that’s done, the screw and nutplate are taking the entire load.

With that in mind, along with the difficulty of putting in a new part, I went with the larger hole. First I modified two nutplates by drilling one side out to #30 on the drill press. Then I clecoed them back in place on the joint strip and used the nutplate as a guide to drill out the hole in the plate. Then I could drill the other side of the nutplate as normal.

Here’s one of the modified nutplates. Not that the left hole is larger than the right, and as a result there’s less material around the hole:

IMG 5132

With that crisis averted, I sat down and went through the drudgery of deburring all the rivet holes in all the ribs. I suppose next time I’ll repeat all these steps for the left leading edge, and then one night there will be a lot of dimpling to do. Not sure how much I’ll get done this week though, and then I’m out of town for a week or so for Thanksgiving, and the following weekend (Dec 6), I’m doing an EAA workshop on electrical wiring. So it might be a while before I can prime this stuff and be ready for final assembly…

Posted in Wings | Hours Logged: 2

Right tank leak test

This barely even merits an entry here – I’m not even putting down any hours logged – but tonight I put a balloon on the right tank and pressurized it. Hopefully it’ll hold air and my leak testing can stop there. Last time the leak down test didn’t work, which turned out to be due to air leaking out of the base of the balloon. I only found this out when I pressurized it again and covered it with soapy water to look for bubbles.

Unfortunately, the soapy water test requires daylight, something that’s in short supply now that the time has changed. It’s dark by the time I get home from work these days, so the soap test would probably have to happen on a weekend…but I’m about to be gone the next two weekends. So I decided to give the leak down test a try again. This time I rolled up an extra balloon around the vent line fitting to act as a gasket, and put two zip ties around the balloon to hold it in place.

I’m hoping that’ll seal well enough for me to not have to do the soap test. If not, I might go so far as to go into work early one day this week just so I can make it home before dark and do the soap test. I’m feeling a pretty strong compulsion to have the leak testing done before I go out of town for some reason.

Here’s a fuel tank with a balloon attached. Exciting, huh?

Posted in Fuel Tanks, Wings

More leading edge prep

Yes! I am still building an airplane. Kind of surprising how being out of town for a week got me out of the working mood. Last weekend might have been a good time to get going again, but instead I was attending an EAA SportAir workshop on electrical wiring and avionics and such. Just like the sheet metal workshop I did prior to starting my tail kit, it was an incredible learning experience. Yesterday, I had my third tailwheel training flight with Joy at Texas Taildraggers (HIGHLY recommended, by the way), followed by the FlightAware Christmas party in the evening.

Truth be told, I came close to spending today bumming around the house too, but around mid afternoon the weather was so great that it seemed a waste to not finish prepping the right leading edge ribs and get them primed. Of course, as soon as I got started working in the garage, a nice rain shower rolled over and it stayed cloudy the rest of the afternoon, so I didn’t prime after all. My new plan is to get the left leading edge parts prepped this week so I can prime everything next weekend.

Anyway, down to details. Last time out, I’d deburred the right LE ribs and such, so all that was really left before they were ready for priming was to dimple/countersink the rivet holes as needed. I ended up running into some problems here; way back when I drilled the rivet holes in the inboard LE ribs, I felt they were a little closer to the rib web than I’d like, but I figured they were fine. Turns out they were close enough to make dimpling a bit difficult due to the size of the dimple dies. I managed to get all the holes done OK, save for one at the nose of the rib. There was no way to get the regular die in there, and none of my other special dimpling tools fit either.

So on the spur of the moment, I decided to countersink the hole instead. Bad idea; I neglected to consider the thickness of the material, and the resulting countersink went all the way through the material and enlarged the hole. Stupid. At first I considered fabricating a small doubler plate to go inside, but that would still leave a bit of a void in the hole. Finally, I realized this was a great place to use a NAS1097 oversize rivet; the enlarged hole was still smaller than #30, so this is a perfect solution. I’ll just enlarge this hole and the other two holes to #30 and things will be fine.

Here’s the enlarged hole with a rivet to show how oversize it is:

IMG 5133

With the right LE parts ready for priming, I went to work on the left LE. I pulled the two outboard rivets and drilled the nutplate holes for the landing light reflector mount. About that time, dinner was ready, so I went in to eat, and after that, I got to doing some research for my fuselage kit order, which I intend to send in tomorrow. I think I’ve decided on the items I’ll add/delete from the kit – I’m going to do rear seat rudder pedals, mainly because the formation clinics I’ve seen require them, and I do want to do form down the road. I’m also doing electric aileron trim, and I’ll be chucking the heavy stock steel gear legs in favor of lightweight Grove units; in fact, I’ll probably end up ordering the super-slick airfoil legs.

Ordering the fuse kit really starts the clock ticking; I’ll need to have the wings off the stands before that kit arrives, or I’ll have nowhere to put it. But I don’t think that’s a huge challenge to be honest; I only need to get as far as riveting the top skins before they can go into storage. My plan is to leave the bottom skins off for the time being to facilitate installing an autopilot servo and any other internal stuff I may end up needing as time goes on.

Posted in Wings | Hours Logged: 2

Left leading edge prep

So my main goal for this week is to be at a point where I can prime the LE components this weekend, and I’m pretty much there. Tonight I started by working on the left tank attach strip. First I reamed the screw holes out to final size, then pulled the strip and dimpled the screw holes. Finally, I clecoed the nutplates on, drilled their rivet holes, and countersunk the holes for the NAS1097 attach rivets.

The attach strip with nutplates clecoed in place:

IMG 5134

Next was a good old-fashioned deburring session, featuring the attach strip and all the ribs. Then I went back, dimpled all those parts, and peeled off the part ID stickers. And just like that, I have a big stack of ribs waiting for primer:

IMG 5136

The only other part I really need to worry about is the doubler for the stall vane access plate. Since I’m not going to install the stall vane, my intention is to permanently rivet that access plate in place, but I’ll still need the doubler to get that done.

In other news, I’ve placed orders for my fuselage kit and for a set of Grove airfoil gear legs. I won’t be needing the legs any time soon, but Grove only does production runs a couple times a year, so I wanted to go ahead and get my name on the list. Turns out they’re just about to start a run of legs, so I should have mine in March…which won’t be too far behind when the fuse kit shows up. It might get interesting figuring out where to store all this stuff…

Posted in Wings | Hours Logged: 2

Leading edge priming

Yup, it’s priming time again! With the LE ribs prepped, it was finally time for the joy of scrubbing and priming. Before I got started priming, I decided to try to work out a better way to hold the ribs while I primed them. Most of the time I’ve just been setting parts on on sheet of plywood on saw horses, but it’s tough to get good coverage this way, and things become even more annoying as the spray can gets empty and it won’t pray if not held straight up. When I did the main wing ribs, I rigged up a whole system of little hooks on a string in the backyard, but that had its own annoyances. Even with the ribs secured at the top and bottom, they would twist in the wind, which made things annoying in its own way.

So today I started to think of maybe using the plywood, but at an angle. That would probably hold the ribs steady, but mostly vertical. But how to do it? Nails would be annoying. I hunted around the garage waiting for something to jump out at me, and finally it happened. I had some little twists of aluminum from trimming something a while back, and I cut them into short lengths that I then bent into little s-hooks:

IMG 5137

These fit nicely on the 1/4” plywood sheet I use, and as a bonus, they’re not permanently attached and so I have some flexibility for how I use these things. I suspect they’ll continue to be handy. But now I had another little issue: I tried leaning the plywood against a sawhorse, but that put the lower part of the ribs pretty close to the ground, which would probably be an issue for ease of spraying. Maybe I could somehow mount it up higher on the sawhorse…back in the garage to look for something I could use. Aha! I still had the length of 14” tubing that was intended for the fuel pickups, but I didn’t use it. I cut it in half and made two little hooks that hung on the sawhorse, and finally I was in business.

Here’s the final product:

IMG 5138

About the only issue is that I can’t easily spray the outside of the flanges, but I found I could easily just hold each rib after I’d sprayed everything else and get those flanges.

The only problem I ran into was…I ran out of primer while spraying the inside of the second batch of ribs. So that kind of put an end to work for the evening. I’ll have to see if I can get to a NAPA tomorrow and get some more 7220 primer, and maybe finish shooting those ribs after work tomorrow.

Posted in Wings | Hours Logged: 5

Finished priming

Forgot to write this up last night, but I got out of work early, what with it being Christmas Eve and all. That meant I was actually home before dark, so I went ahead and finished priming the leading edge ribs before coming in for dinner and a movie and such. Time to start putting stuff together. Might even get to riveting this weekend since I have three days in a row…

Posted in Wings | Hours Logged: 1

Nutplate Mania

Well, so much for having a big productive day – though I kind of knew today wouldn’t go so great since I had a flight scheduled in the middle of it. I went out into the garage today thinking forward to getting some mundane tasks out of the way, figuring that it wouldn’t be long before I could start riveting the LE units together.

First task was to rivet the nutplates onto the W-423 joint plate, which joins the LE unit to the fuel tank. It didn’t take long before I realized that there were some real problems here. The nutplates didn’t seem to want to line up right with a cleco in one side, so after futzing around a bit I ended up putting a screw in each one to hold it in place. That’s when it became clear that the nutplate rivet holes weren’t drilled correctly. This was the plate that I started out wrong, by trying to cleco the nutplates in place before dimpling the screw holes. I thought things had turned out OK, but apparently not. I guess there was just enough slop in the clecos before to fool me.

Bad rivet hole! No donut!

IMG 5143

So long story short, it looks like I’m going to be replacing this part. It’s going to be a bit challenging, since this plate has to align with three other parts (the LE skin, the tank skin, and the inboard LE rib). I think I have a pretty good idea how to make everything fit together, but it’s going to be a bit tedious. On the other hand, I have abundant material around to fab up a replacement, thanks to my ruined skins. Even better, I think I’ll make the replacement out of the ruined LE skin, so it’ll have the correct bend in it right off the bat. That might help some with getting everything aligned correctly.

Anyway, that ate a lot of time this morning: figuring out I had a problem, sulking about it for a while, searching around on VAF to see if anyone else had had a similar problem, all that fun stuff. Before long it was time to get ready for my flight – which ended up not happening due to some gusty winds. Probably a good idea, since I had trouble last week with relatively minor crosswinds…should probably tame the taildragger in those conditions before I go out when it’s really blowing.

Finally, in the afternoon, I was in a mood to go work again. I started with the other joint plate, and was relieved to find that I didn’t have the same alignment issues there. The nutplates went on without much trouble, and once I had them all riveted, I got out the left tank and screwed the joint plate in place to verify fitment:

IMG 5145

Next I turned my attention to the outboard rib pairs for both LE units; the landing light reflector mount will go between these ribs, and those nutplates needed to be riveted in as well. Fairly straightforward work really. Once I had one pair done, I got out a reflector and screwed it in place between two ribs to illustrate how the light mount will look:

IMG 5146

And that was it of the day. I set about putting together some dinner, and then we sat down to watch a movie. I guess tomorrow I’ll set about trying to make the replacement joint plate. We’ll see how that goes…

Posted in Wings | Hours Logged: 2.5

Replacement joint plate, access cover

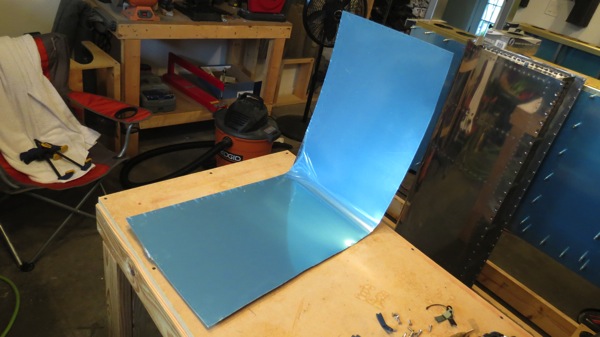
Today’s main goal was to have a go at making a replacement for the W-423 joint plate that I found out was fouled up. This turned out to actually be easier than I thought, though it still took a fair amount of time since I was being careful about the fitment. I started by hacking off a section of my scrap LE skin; I figured there was a decent chance it’d take more than one try to get this joint plate done right, so I gave myself lots of extra material:

IMG 5148

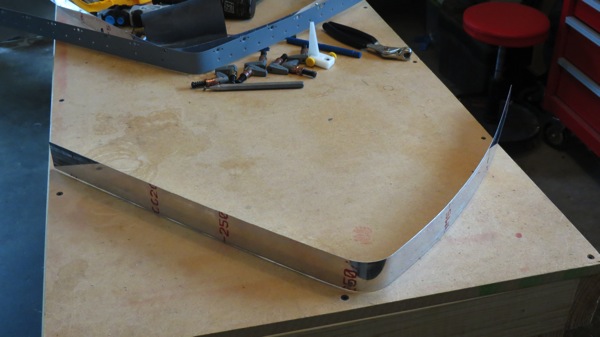
Next I trimmed off the prepunched edge using the band saw. Which, by the way, was lots of fun – feeding this fairly large bit of metal carefully through it. The bent area was especially enjoyable. Next I set the bandsaw fence to the right width for the joint plate strip, plus an extra sixteenth or so for good measure. Any extra width will just sit inside the LE bay and not get in the way of anything, so better to make this too wide than too narrow:

IMG 5149

Now for the tedious part. I started by using the right tank as a template to drill the nutplate holes. The challenge here is that the tank is dimpled, and I was worried about the dimples causing inaccuracy. I mitigated this by doing one hole at a time down each side of the strip; I’d clamp the strip in place, center punch the next hole, drill that hole to size, deburr and dimple, then clamp everything back together again. I worked my way down the tank like this, and in the end things lined up pretty nicely:

IMG 5151

IMG 5153

The next step was to drill the joint plate to the right LE skin. I put the tank on the spar and ran in a few of the screws on the top and bottom to hold it to the spar. Then I assembled the right LE unit, sans the inboard rib. This allowed me to use the LE skin as a drill template for the joint plate. Here again, I worked my way gradually down each side, clecoing as I went to ensure everything stay together nice and tight:

IMG 5155

That’s all well and good, but next came the real test: would that inboard rib fit inside the joint plate strip? I figured it was possible that it distorted enough during fitting to the tank that it might have been too small. But I was able to get the strip clecoed to the rib, though it took some coercion. I ended up taking the nose of the rib to the scotchbrite wheel just to remove a little material and facilitate a better fit:

IMG 5156

Finally, it was time to put everything together and do a full-up fit test. The rib and joint plate were clecoed into the LE unit:

IMG 5158

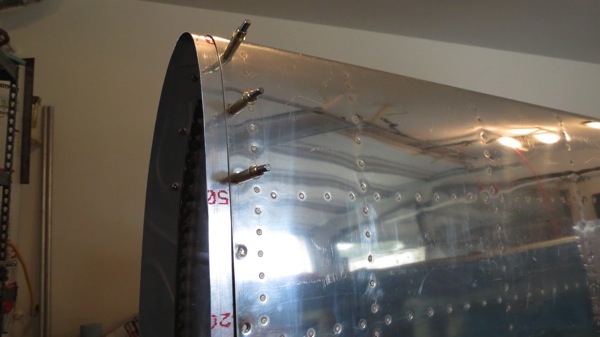
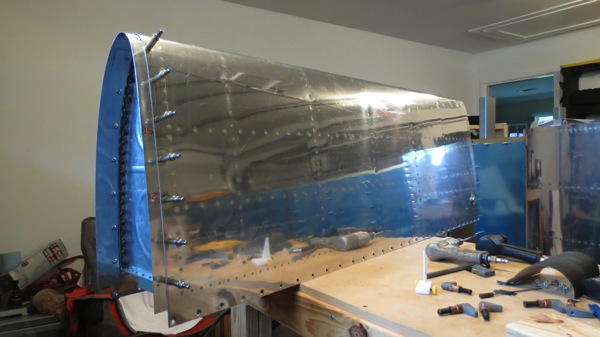
And then I put the LE and tank onto the spar. Fits great, and the tank and LE line up really nicely:

IMG 5159

IMG 5161

Whew! It’s a relief to have mitigated that problem.

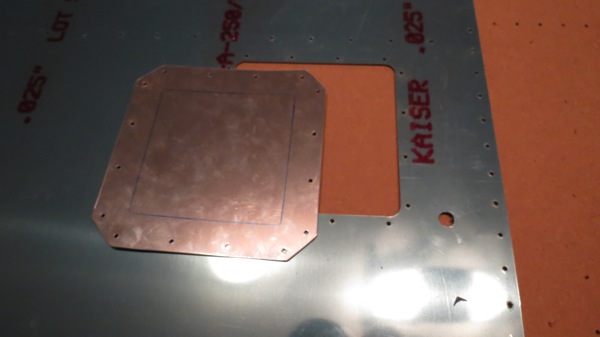
I wasn’t quite ready to call it a night at that point, so I decide to set about making a doubler and access plate for the left LE skin. There’s an access hole precut in the skin to allow for access to the factory stall warning system. But I’m not going to install that, since I intend to install a real AoA system instead. As such, I’m going to permanently seal up this access hole; I could do that using the parts provided with the stall warning kit, but I intend to sell that kit as a unit, and the buyer would probably appreciate having the doubler and access plate included. Besides, the prepunched holes in the access plate are for screws; by making my own plate, I can drill for flush rivets instead.

First up was the doubler. I just traced the outline of the provided doubler, rough cut with snips, and then refined the edge in the band saw. The edges were cleaned up with the scotchbrite wheel, and then I used the LE skin as a template to drill the rivet holes. I decided not to cut out the center; it would just be extra work for not much reason (other than saving a tiny amount of weight):

IMG 5162

Next was the cover itself. This took substantially more time as I fine-tuned it to fit the hole. I started by using the LE hole to trace the outline, then cut to almost-there size with the band saw. The straight edges were refined right down to the marker lines with a vixen file, and then I used a cutting bit in the Dremel to round the corners. From there, it was a long and repetitive process of carefully filing down the edges and refining the corners with emery cloth until I finally had a nice snug fit:

IMG 5164

And that really is enough for one day. Tomorrow I suppose I’ll lay out and drill the rivet holes between the access cover and the doubler. Hopefully I can also get to deburring and dimpling both LE skins. It’d be nice if I could clean and prime the new joint plate and that access cover doubler, but tomorrow is going to be rainy. Maybe Thursday will be nice, we’ll see…

Posted in Wings | Hours Logged: 5.5

Misc. leading edge stuff

Kind of a catch-all day, moving towards the point where I start riveting the LE units. At this point the main task remaining is to dimple the skins, along with priming the replacement joint plate and the access cover/doubler I made yesterday.

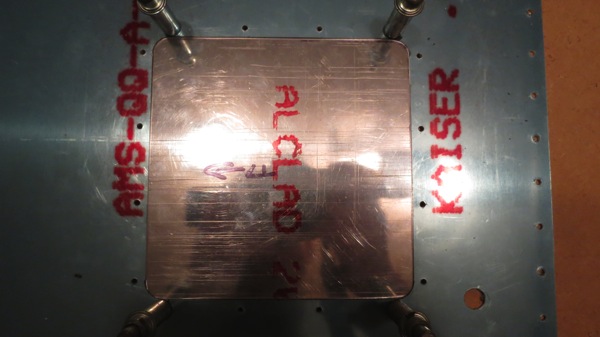
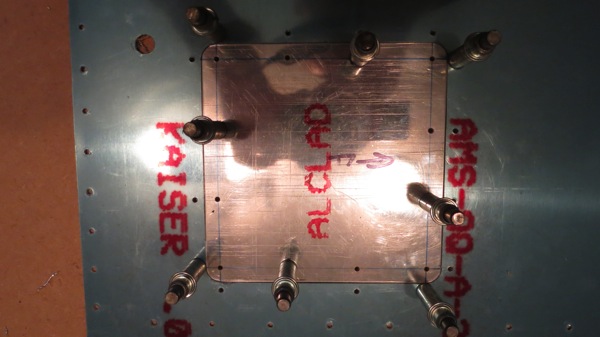
First task today was to finish up that access cover. Not much to see here; I just laid out the rivet lines, drilled the holes in the cover, and then used the cover as a template to drill the holes in the doubler. I went ahead and deburred and dimpled all the rivet holes while I was at it.

IMG 5165

Next, I addressed another issue caused my my decision to skip the stall warning kit. There are prepunched holes in the left LE skin where the stall vane would mount, plus two holes right on the leading edge that serve as guides for the slot for the vane. These needed to be filled somehow:

IMG 5166

There seem to be several approaches to this, mainly either using body filler, or filling the holes with rivets. I opted for the latter, going with NAS1097 small-countersink rivets. So I reamed the holes out to #40, deburred, and then put a slight countersink on the skin side. I intentionally made the countersinks a little shallow so the rivets would sit slightly proud. Once I’d set the rivets, I carefully filed and sanded them down until they blended nicely with the skin. They’re still noticeable on bare metal, but should be all but invisible once the airplane is painted:

IMG 5168

With that done, I set about deburring both LE skins. This constituted most of the time I spent today; hitting every rivet hole with a hole deburring tool, then going to town on the skin edges with the die grinder.

After that, I decided to look at the directions – which I haven’t don’t in quite some time. They mentioned installing a pitot tube fitting before building the LE units; I’m using an aftermarket pitot that will mount differently, but I figured I should take a look at it anyway. I verified that it won’t interfere with the LE installation, but after reading through the directions and looking at the mount, the backing and washer plates needed a touch of filing to fit around the mast. Apparently Gretz intentionally cuts these plates a little small, since the batches of mast tubing vary slightly. This allows the builder to fine-tune the fit, which is exactly what I did – a touch of filing, and now everything fits together nicely:

IMG 5171

I guess I’ll see if I can get the skins dimpled this week, and maybe next weekend it’ll be time to rivet. Though I just remembered (as I was typing) that I’ll need to countersink the main spar flanged to accept all the wing skin dimples. Maybe that can be an evening task one day this week; should be pretty straightforward, just time-consuming. (lots and lots of holes…)

Posted in Wings | Hours Logged: 5