It’s funny how a task that seems nigh-impossible can suddenly become really easy once you introduce the proper tool. That’s basically the story of today. When we left off yesterday I’d decided to try bending a cheap Harbor Freight wrench to make a special tool for installing the transducer. Today, while I was out, I picked up a nicer Mapp gas torch, and when I got home, I went to town on said wrench.
In the end, I basically put one 90° bend, plus a second smaller one. Combined with the existing angle of the box end of the wrench, the result is basically a U-shaped wrench that clears the AN fitting on the bottom of the transducer. In addition to the bending, I also did some grinding on the box end, thinning it out to better work in the tight confines of the mount bracket:
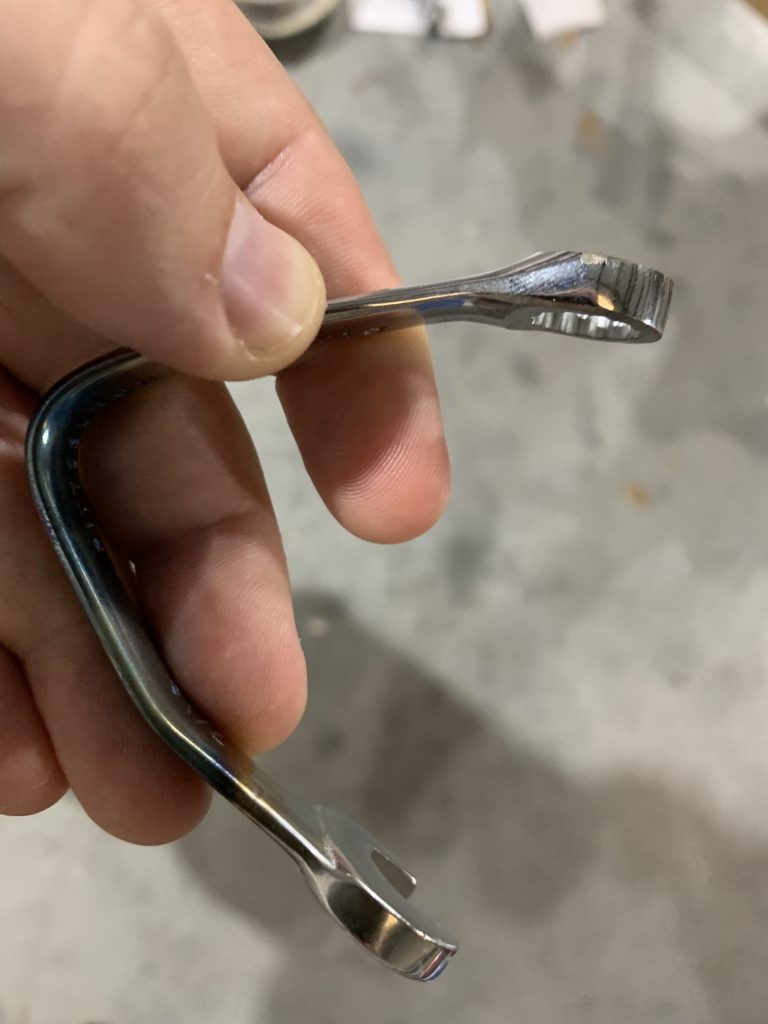
Armed with this device, it took me barely half an hour to get the transducer installed. Those hours of futzing with a stubby wrench were replaced by about five minutes of carefully maneuvering my special tool in between the cylinders:

So now I have the plumbing between the throttle body and the flow divider complete. Just need to add some torque seal on those fittings:

The other thing I got done tonight was safety wiring those ignition coil mount bolts. This is definitely not the best work I’ve done, but it’s almost impossible to get good angles on things in this tight spot. I’m honestly kind of inclined to install lock washers here in place of the safety wire, but I think even a not-great safety wire job is probably more secure than a lock washer, so I’m leaving it like this for now:

My second fuel supply hose shipped today, so hopefully I should have that this week. At that point I can finish this plumbing work, and I think it’ll be time to hang this thing on the fuselage again to finish the firewall layout.


