Finally, a good day’s work, Unfortunately, it wasn’t all fun and games, as we’ll soon get to. I wanted to get started priming as soon as possible, since I know the epoxy primer takes longer to spray than the rattle can stuff. I immediately set about getting set up, giving the tower pieces a final wipedown, hanging them on the priming board, getting the spray gun out, etc. Finally, all that was left was to mix the primer. When I opened the can, I found this:

The stuff is now pretty much the consistency of pudding. A look at the label revealed an important bit of info that I completely missed before, something to the effect of “Store in a cool dark place, not to exceed 100°F.” If there’s one word that does not describe a garage in Houston, it’s “cool.” I don’t know if maybe this stuff can be salvaged if I thin it down again, but I highly doubt it. So there’s $200 worth of primer down the drain, all because I couldn’t read a label.
The best part is that it took a solid month to get this stuff from Spruce in the first place. I have no intention of stopping work for a month to wait for more, so my interior finish plans have changed again. It won’t be bare primer after all; I’ll shoot Napa rattle-can as needed and then figure out what topcoat I want down the road.
The interesting thing was that this made the morning go a lot faster; the Napa stuff dries so fast that if it’s at all warm, the stuff flashes dry almost immediately and you can prime just about as fast as you want. Within about an hour, I had all the gear tower components primed:

Once those were done, I also cleaned and scuffed the firewall angle pieces. I left them out to dry in the sun while I took a short break, then I went back out and got those primed too.
A further side benefit of using the rattle can primer is that I don’t feel compelled to wait a few days for it to cure. In fact, about two hours after shooting the gear towers, I went ahead and started assembling them. This is, at first, a simple affair: rivet the corner angles to the tower sides, then rivet the tower web to the side assemblies. Of course, it took me more time here since I had to deal with my access cover modification. Lots and lots of nutplates to rivet:

But before too much longer, I had the basic gear tower structures together (shown with and without the removable cover:

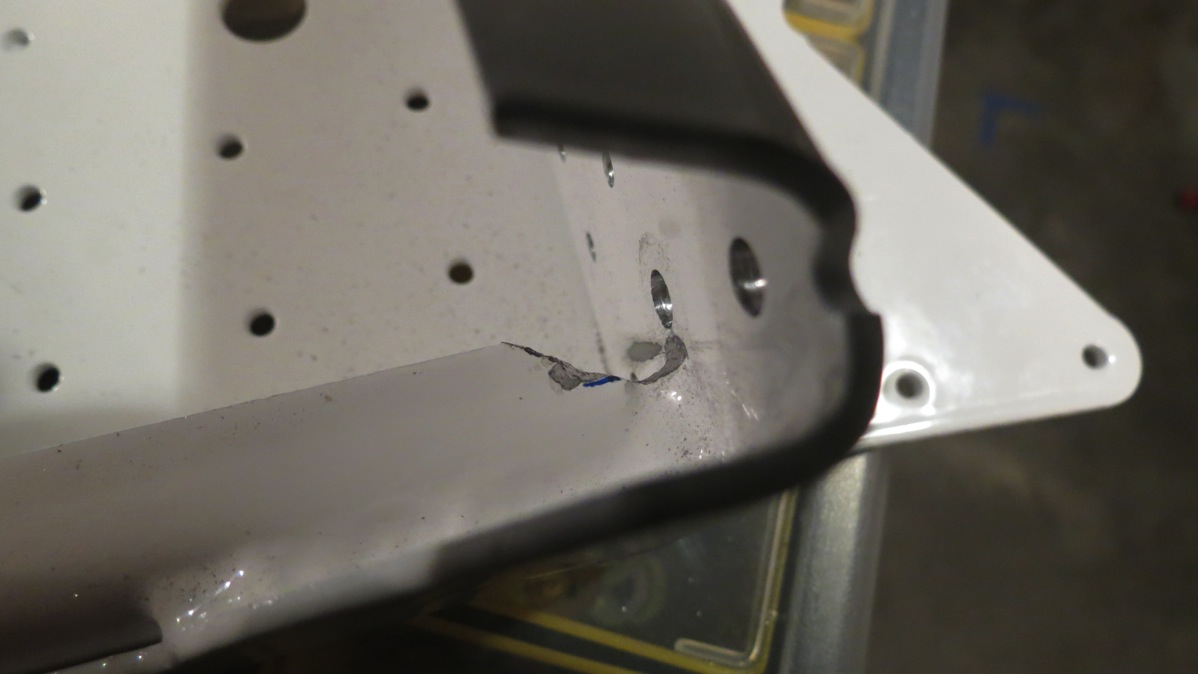
The next steps involved fitting the steel weldments at the base of each tower. There are two bolt holes in the inboard weldments (foreground above) that need to be drilled in assembly; what makes this fun is that instead of just clecoing the weldment in place, the instructions call for bolting it on, presumably to ensure better alignment. That, in turn, makes it a little more tedious to to this work. But with the inboard weldments done, next the outboard weldments get match drilled for a lot of -4 rivets, then bolted in place. And here I ran into another issue; the rear side of both outboard weldments has some extra material from the welding process, such that it interferes with the fit of the washer/nut for the bolt:

A bit of research showed that this had happened to others, and as I suspected, there was no reason not to just trim the weldment a bit. So I went to work with files and the dremel and eventually had removed enough material for a good fit:


Then I spot primed the areas where I’d removed the powder coat:

And now those guys were good to go. And at this point it was a good time to call it a day and enjoy dinner and a movie. Tomorrow I should be able to finish bolting up the fitting the weldments, at which point it’ll be about time to actually attach the gear towers to the forward floor and start making something looking like a structure. And I guess at some point I need to stop, go back, and rivet the firewall together too…
It’s kind of surprising (and nice) how quickly things seem to go together with the fuselage. The wings were lots of endless prep of a ton of components, followed at long last by some actual assembly. Here, the assemblies are smaller and go together faster. It’s definitely more satisfying, that’s for sure.