Well, it’s been some time since I got in some weekday evening work, but I think I made up for some lost time tonight for sure. A tick over four hours in the garage, and I’m down to just dimpling and priming before I start riveting the right elevator together!
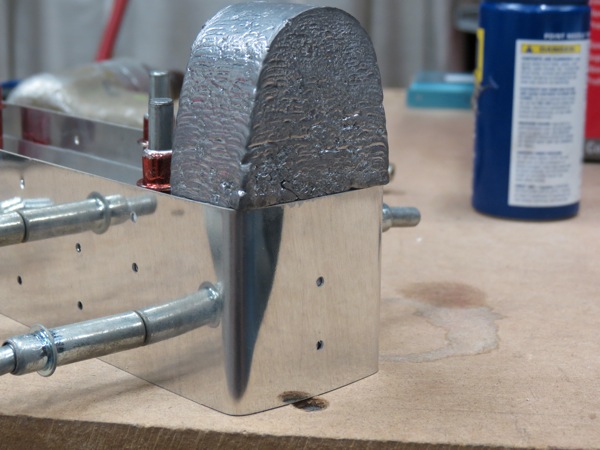
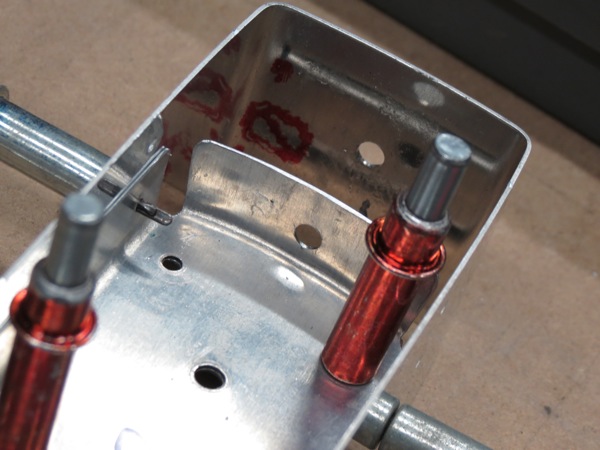
The evening started with clecoing and match drilling the reinforcement plates to the spar. Then I edge finished and fluted the E-703 and-704 ribs. (the instructions seem to call for doing this for the ribs to both elevators, so I did, then promptly tossed the left-side ribs back under the workbench) The two ribs for the right rib got match-drilled, the I clecoed on the counterbalance skin, fitted the counterweight, and prepared to drill the counterweight attach holes.
I spent some time agonizing over this – here I had to drill a hole into the counterweight skin, through a couple inches of counterweight, and out through the end and counterweight rib flanges. I was acutely aware that if I drilled at a bad angle, I could come out on the far side and be in a bad position on those flanges, and then they’d be ruined, I’d have to order more replacement parts, etc…
A drill press might have come in handy here, assuming I could have somehow mounted the rib/skin/weight assembly in such a way that I could drill it. But since I don’t have a drill press, I set aside my fun air drills in favor of the cordless. The sole reason for this is the cordless has a little bubble level on it, which I could use to ensure I drilled straight. This technique worked like a charm…I was still all kinds of nervous, but the holes in the rib flanges ended up located quite nicely.
Next the counterweight came out and the end rib assembly got clecoed to the spar along with the root rib. The root rib was match drilled to the spar, then out came the skin and the skeleton was clecoed into place.
The next step was to cleco the control horn into place. I had a tough time getting that thing lined up…seemed like it wanted to really fit snug against the spar and rib, and I had to use a little grunt to get the holes to line up so I could cleco it in place. This was made even more difficult due to the powder coating on the control horn – the holes are already undersized and tough to get the clecos through, and with the powder coat on top of all that, it’s even tougher. But I finally got the thing clecoed in place and match drilled the rivet holes.
Next I match drilled all the skin-skeleton holes, and took one last longing look at my temporarily-assembled elevator before tearing the whole thing apart again. The counterweight skin was dimpled for the attach bolts, the counterweight itself was countersunk to fit against the skin, and then I got to spend some time in my Deburring Chair hitting up all the rivet holes and lightening holes before firing up the bench grinder one last time to finish the edges of the rest of the skeleton pieces.
I still have a couple unanswered questions I’m going to research before proceeding further. The attach between the E-702 spar and E-709 root rib uses flush rivet, since the control horn has to sit on top of that particular joint. The instructions call for countersinking the spar, but this material is thin enough to dimple…I mean, after all, I’m going to be dimpling the flanges where it mates with the skin. I’m not sure why countersinking is specifically called for here, but I want to find out before proceeding. I’d rather dimple personally, I find it easier to do consistently than countersinking.
The instructions also call for beveling the edges of E-713 where it tucks under the skin to provide a “smooth transition.” This seems fairly straightforward, but I’m curious if there’s any particular technique here. I feel slightly weird just going to town on the edges of the counterweight skin…
Anyway, I’m not sure if I’ll get in any more work until after Christmas. Josie and I are planning to rent an Archer and fly to North Carolina to spend the holiday with my family, then head back home Christmas afternoon to catch dinner with here family, but the weather is looking iffy. In any case, we’ll be gone all weekend and well into next week. Hopefully I can get my dimpling done and prep and prime next weekend, maybe finish assembling the elevator during my New Year’s days off work.
Preparing to drill the counterweight

Completed counterweight attach holes. You can see in this photo how much distance is between the skin and flange, and how there’s ample opportunity to drill crooked and cause a problem.

And the temporarily assembled elevator just before I tore the whole thing apart.
