Let’s get the bad news out of the way of the bat: you astute observers may have noticed that yes, I’ve switched components again and it’s back to the v-stab. The short story is that in an extended moment of frustration working with the rudder counterweight skin, I kind of brute-forced things to get them to fit. I knew when I did it that it wasn’t the best thing, and once I had a couple days to think about it, I decided that while it might have been OK, I didn’t want it on my plane. Hooray, another replacement parts order for the folks at Van’s!
Fortunately, only a day or two later, my new parts for the v-stab came in. This past weekend was mostly booked solid, but I had Labor Day off. After sleeping in a bit to recover from a long weekend, I hit the garage running. First order of business was to get the new parts ready to roll; after a good long session of match-drilling, dimpling, deburring, fluting, etc, that was covered. Then it was out to the driveway to clean the parts prior to priming. They dried quickly in the sun, out came the primer, and it was time for assembly.
Now, some of you might recall the very tough time I’ve had getting the root ribs riveted to the front spar. I already re-ordered the nose rib once, then re-ruined it, along with the spar and main rib, prompting this most recent parts order. But I also acquired a Main Squeeze rivet squeezer from Cleaveland Tool, along with a thin-nose yoke, figuring that this would help me get into the tight space and get those ribs riveted. I’m pleased to report that I was correct. Yes, I finally got those ribs riveted to the spar. Re-riveting the other two ribs was a cakewalk, and wonder of wonders, it was finally time to start riveting the skin!
Riveting the h-stab was good practice for this; that taught me some good techniques for holding the bucking bar in the tight space inside the part. The v-stab is actually thicker than the h-stab, so in a way it’s easier to do the riveting. I made pretty short work of getting the hard-to-reach skin rivets done. Then, I clecoed on the rear spar, which had been waiting patiently for about three months since I finished it. (I just looked back at that post, where I opined that I might be riveting the skin on in no time. Pretty humorous in retrospect…)
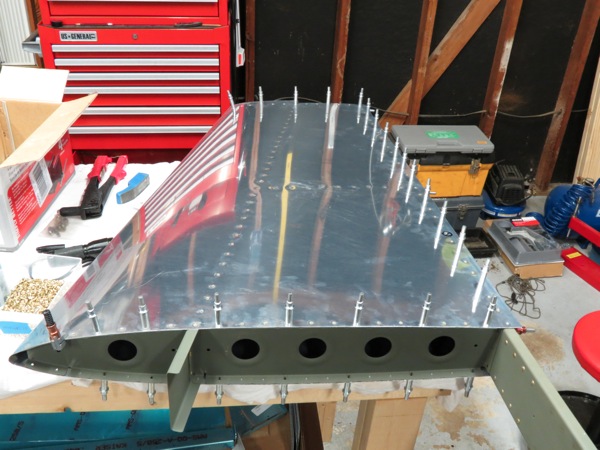
I started working on the skin rivets on the edge, all of which can be reached with the squeezer. I figured that I’d be able to knock these out, rivet the rear spar to the rest of the skeleton, and have myself another finished component. But I ended up with some odd problems. I botched one of the first rivets I set; the shop head is way too thin. I think I somehow used the wrong length rivet. Then things got weirder still. I ran across several holes where the rivets simply wouldn’t sit flush with the skin. I can only assume that way back when, some of these holes didn’t get dimpled enough. Fun thing to find when all the stuff is mostly permanently assembled. Luckily, I was able to clean up the shallow dimples I found by simply using the dimple dies in the squeezer and hitting the skin and skeleton together. Maybe not the best way to do it, but at least the rivets sat flush.
I squeezed a number of rivets on one side, but a look at the clock made me decide to call it a night. It was going on 10:30, and I knew I had a couple rivets to drill out later on, plus most likely some more work with the rivet gun, which the neighbors might not appreciate. (particularly since I was working with the garage door open today) I could also feel myself starting to get a bit sloppy. Plus, it’s an unwritten rule that, following completion of the v-stab, the builder must prop them on his workbench in the rough position they’ll sit on the aircraft and take a picture while grinning madly and holding the v-stab up. Seeing as how my h-stab is hanging from the ceiling, I didn’t want to deal with taking it down. (and I knew that if I did finish the v-stab, I’d be unable to stop myself from getting it down for the photo op)
So I’ll go out tomorrow after work and finish this thing up. And, of course, get the required photo. Hopefully my new rudder parts come soon so I can keep working…not much reason to hurry right now, since the wing kit isn’t ordered yet, but I’m feeling some momentum and would like to capitalize on it. I’m having fun out there!
The rivets that gave me so much trouble, finally tamed by the Main Squeeze:

Mostly assembled stab, waiting for a recuperated builder to finish it:
