Once again, we have a post here that covers several days worth of work. Most of this work was from a few days ago, but I just consistently kept forgetting to actually write this.
Fun fact: I took all of last week off work, with the intent of putting in a lot of time on the RV. It didn’t really work out that way, due to a combination of being more worn out than I expected, plus lots of other to-dos and prep work for our upcoming vacation. Still, I did put in some time, and I feel like I’m developing that habit of working on the project again. A lot of that probably comes from pushing myself past the “think everything through” stage into “just do stuff.”
The actual form “just do stuff” took was starting to throw fiberglass material at my shaping/fitment issues. The first question at hand was whether I wanted to do any shim work at the forward edges where the hinges were really pulling on the upper cowl. To evaluate this, I assembled the cowl on the workbench and moved all the hinge clecoes to the inside, so I could actually get a better look at the alignment. That also gave me the chance to deburr the hinges after all that drilling. After getting everything together, I decided that shimming wasn’t necessary.
That left the other two big fitment issues: alignment of the spinner surround and forward corners. I really don’t understand how the spinner got misaligned – somehow everything lined up nicely on the bench, but after all the trimming and hinge fitting was done, the lower cowl sat forward of the upper by about 1/8”. The choices to fix this were to either fill the holes at the firewall on the lower cowl, then re-do the trim and hinge drilling, or just work with the front of the cowl…I chose the latter. It helped that I ended up with a slightly larger gap between cowl and spinner on the upper cowl, so adding some thickness there won’t hurt my feelings.
Overall, the plan is to add about 1/16” to the upper, then sand off about 1/16” on the lower, to get the alignment I want. At first I considered adding a few layers of glass for the initial buildup, but at some point I realized that there was no reason not to just use dry micro here as a filler. I also decided to take the same approach to getting the outside corners lined up.
Before I could do any of this, I had to sand off the gelcoat in all the areas I was going to build up…boy, that stuff is tough. After putting a lot of elbow grease trying to hand-sand this, I found that the Dremel with a flap wheel makes much quicker work of it. It doesn’t leave a nice flat surface, but that doesn’t really matter when I’m going to be covering with micro anyway.
Finally, it was time to actually mix the micro and glop it on. As per usual, this stuff refuses to be coaxed into any sort of neat-looking shape on application, so I just put on more than I think I need and accept all the weird resulting protrusions:

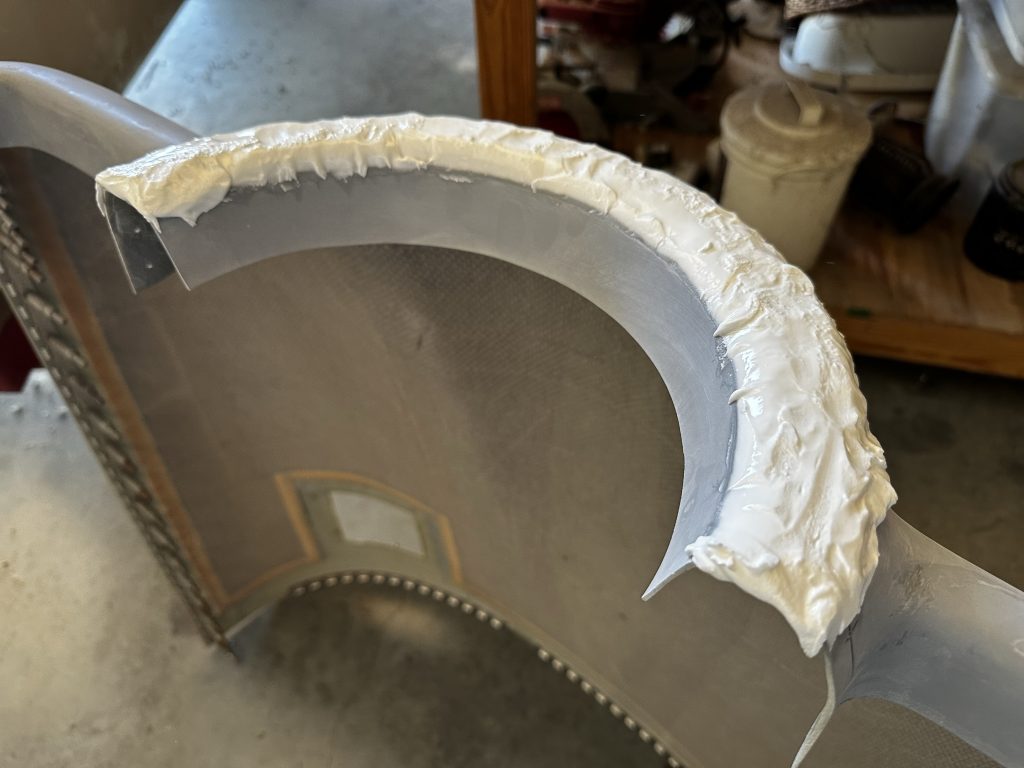
Yesterday, I started working on sanding this stuff. First step is just knocking off the obvious peaks and high spots, and getting things somewhere in the neighborhood of the proper form. That wasn’t so bad on the corners, but the spinner area is different. My approach to sanding this to get the gap I want is to make a couple of sanding “files,” which I can slip between the spinner backplate and the cowl with the cowl installed; this allows the thickness of the “files” to easily control the final gap.
The downside to this approach is that the cowl has to be installed first, which means enough of the micro has to be sanded off for it to clear the spinner. To do this, I once again assembled the cowl halves on the bench and used the lower spinner area as a reference for the rough sanding. Then I went to install the cowl halves on the airplane, and had one of those annoying little sidebar issues…which I’ll get to in a second. For the time being, I got the cowl installed and started working on the sanding…which has been tedious, but I’m making slow, steady progress.
OK, back to that sidebar issue: I had the worst time getting the hinge pins started to join the halves. I tested this back when I was deciding if I could skip redoing the upper cowl, and things seemed to go together well…but not today. I probably spent an hour trying to get those pins in. To make a long story short, I probably need to do some shimming of the upper cowl after all.
But this also got me thinking about how I laid out those hinges. Because I wanted to not have the hinge teeth visible in the gap between cowl halves, I offset the hinges up. This means the hinge pin isn’t in line with the cowl split, but rather about 1/4” above it. This causes a couple of annoying problems: one is that maneuvering the pins in the small temporary access holes I cut is tough, but another one is that my rivet holes on the lower hinge half don’t have proper edge distance. The latter would probably be OK, since I intend to epoxy the hinges to the cowl in addition to riveting.
The other result of this decision was that I was going to make my own custom fiberglass cover plates for the hinge pins; these would be removed to access the pins and remove the cowl. At this point, I think continuing with what I’ve done is just going to add more work and time, and I need a lot less of that if I want to get this project done next year.
End result? I’m going to redo the horizontal hinges. This time I’ll put the pin in line with the split line, and I’ll just use the prefabricated cover plates. Those plates are a little pricey, but I think the reduction in custom work is well worth it. I’ll just have to fill the rivet holes I already drilled with flex and start over…that will probably be my next task once I get this spinner shaping done to my satisfaction.