Today, in my continuing effort to avoid sanding fiberglass, I decided to take a stab at routing and so forth for the engine control cables. The idea wasn’t to end up with them final-installed with the throttle quadrant in place, but i did want to verify that the cables Van’s had supplied with my FWF kit would work with my nonstandard fuel injection and sump setup.
The cables are identical in design, but different lengths – there are two 55” cables and one 60” one. Despite looking all through my plans, construction manual, and other materials, I couldn’t find anything specifying which cable was for what. But it’s not really hard to figure out – for example, the prop governor is mounted on the back of the engine, close to the firewall, so clearly that’s where one of the shorter cables should be used. And the mixture arm is further forward and right than the throttle, so logically it should require a longer cable than the throttle.
In order to test all this, I routed the cables through the firewall and the left gear tower, and simply secured them to back side of the gear tower. This places them close enough to where they’ll eventually be affixed to the quadrant to allow for fitting – there might be an inch or so of variance, but that shouldn’t be enough to make the fit-up invalid.
Meanwhile, I got the required cable bracket attached to the prop governor, and routed one of the 55” cables over to it and temporarily added the nuts to secure the cable. This application, as expected, worked just fine. Honestly the 55” cable is a bit long, and I briefly considered replacing it with a short one, but considering this is the cable Van’s specs here, I don’t think there’s any reason to second-guess things. The extra length my be a good thing to help keep the bend radii in the cable larger.
Well, that was easy…time to start looking at the throttle and mixture cables. Before doing that, I needed to test-fit the cable bracket I bought from Showplanes. This piece is CNC cut to mount to the Superior cold air sump, and provides several sets of holed for attaching cable brackets. I still need to order the right bolts to attach this, so for now I’m just using some 1/4-20 screws from the cylinder baffles to secure the bracket for test-fitting.
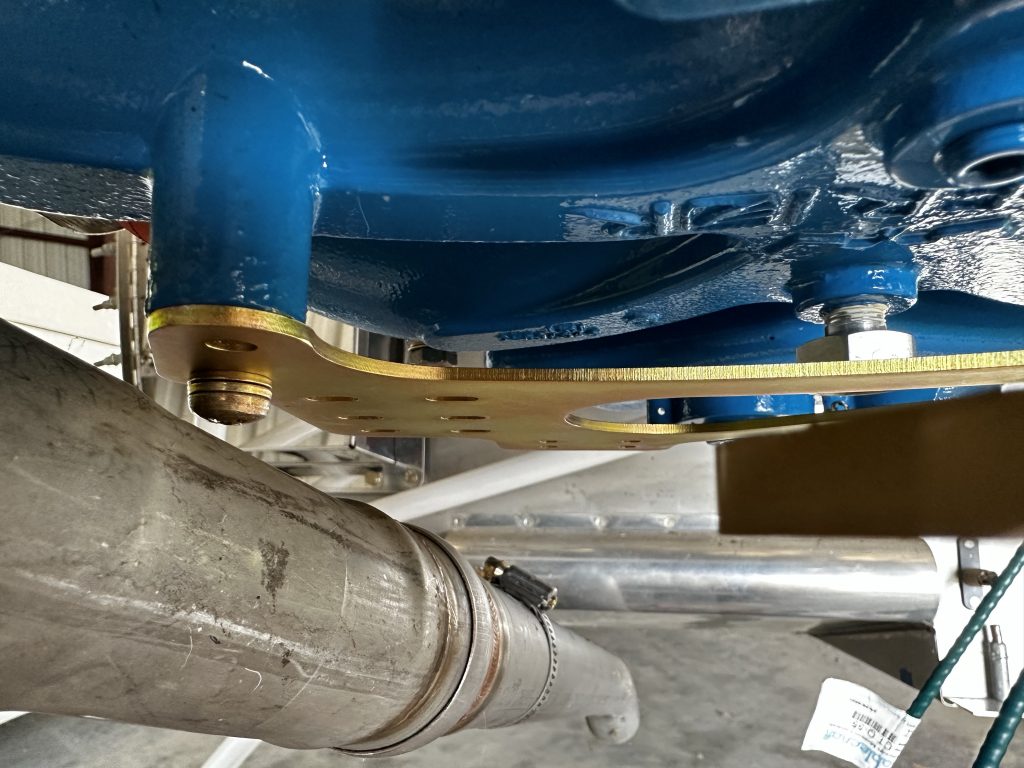
The example photos on the Showplanes site show the cables routing above the bracket – that is, between it and the sump – but that seems way too cramped to me. It’s definitely too cramped to use the cable brackets that I also got from Showplanes. I thought about maybe using washers to space the bracket down a bit for more space, but the real critical concern here is clearance with the exhaust. The #1 pipe is really close here, to the point that even the attach bolt is going to be a tight squeeze. Moving this entire assembly down by even 1/8” just isn’t going to happen:
That got me to trying the throttle cable routing; this uses the rightmost set of holes in the above photo. For this spot, putting the cable bracket on the bottom of the mount bracket works fine. and it lines up nicely with the throttle arm. The only downside is that the 55” cable is too short – but the 60” cable works perfectly. I was able to fully mock this up, with the rod end on the cable, a bolt through the throttle arm, and of course I had to go reach in the cockpit, move the end of the cable, and make the throttle arm move.
So the next question was – could I also use the 60” cable for the mixture. Since I only had one 60” cable on hand, that meant I had to detach the throttle stuff and try routing that same cable to the mixture arm. But before anything, there was the issue of the exhaust clearance. The mixture bracket is further left and forward, and none of the mount hole options clear the exhaust.
To make a long story short, after a lot of thinking and trying a lot of different stuff, I hit on the idea of mounting the cable bracket from below the mount plate, but with the actual bracket posting up. This allows the cable to route between the plate and sump, and to sit low enough to clear the sump. Doing it this way did require me to grind some material off the cable bracket, and also to open up the holes on the mount plate, but in the end I got a setup that allowed the cable to properly align with the mixture arm:
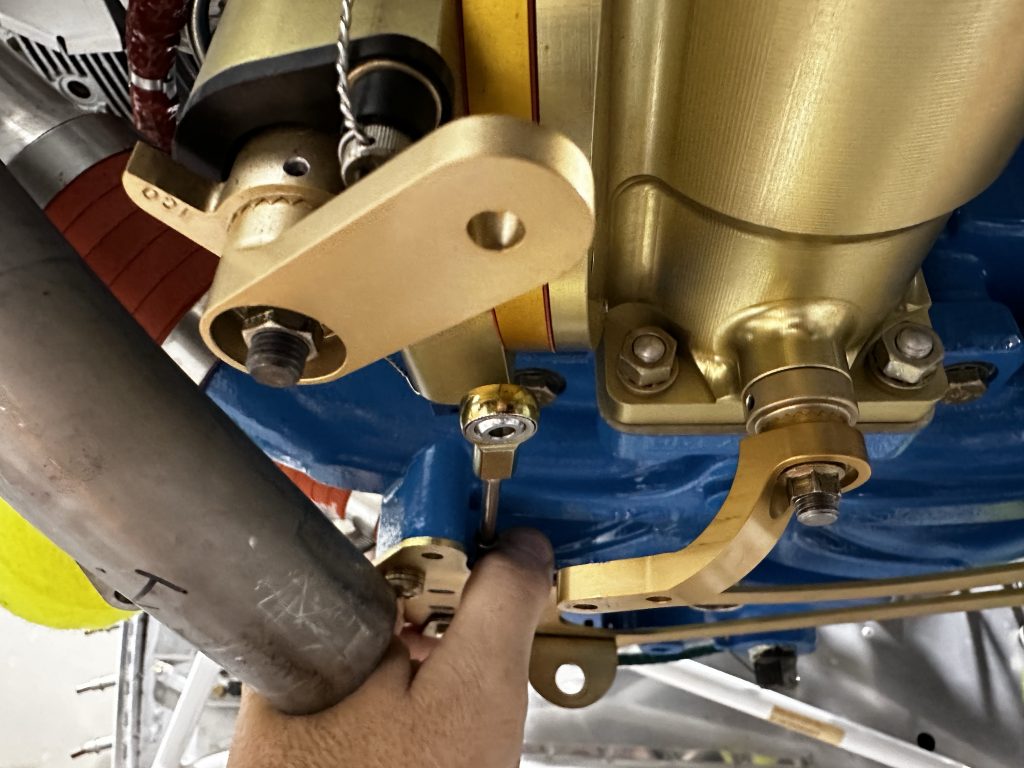
The only problem, as seen above, is that the cable doesn’t reach the mixture arm. A longer cable also won’t help here, because that would require the cable bracket o be further forward, which isn’t possible with this positioning. Instead, I’m going to add a 3” extension to the end of the cable to get the reach I need…which is something else to throw on my Aircraft Spruce order list.