As mentioned before, my current goal is to verify as much internal tail stuff as possible before I get down to permanently attaching the turtledeck skin, since that will turn any work behind the rear seat into a sort of cave diving expedition.
First up, I figured I’d see if the tail strobe wiring was OK. I didn’t really have any reason to suspect issues – compared to the wiring for the avionics stuff in the tail, this is dirt simple – but it doesn’t hurt to check. Plus it’s just fun to flip switches and make things happen, especially if I can then go walk out to the end of the ramp and say to myself, “yeah, I should be pretty visible to other aircraft.”
Next up was the more fun thing – trying to get a GPS fix out of the GPS-175 so I could verify it was sending position data to dependent components, specifically the transponder and ELT. At first I was intending to figure out a way to move the entire fuselage out of the hangar to get a clear view of the sky, but I couldn’t figure a method of moving that 1) I trusted to not potentially go wrong and cause damage and 2) wasn’t way too much work for a one-time verification task.
Instead, I worked out an alternative method – move the fuselage as close to the open doors as possible (much simpler than moving it out since I didn’t have to deal with bumping over the concrete lip and hangar door tracks), and then put the actual GPS antenna as far as the cable would allow. Since Garmin requires a minimum cable loss, which in turn means a minimum cable length of 6.5’, this was pretty doable. With this setup, the antenna had a clear view of a little more than half the sky, which I was hoping would be enough for a solid fix – and it was.
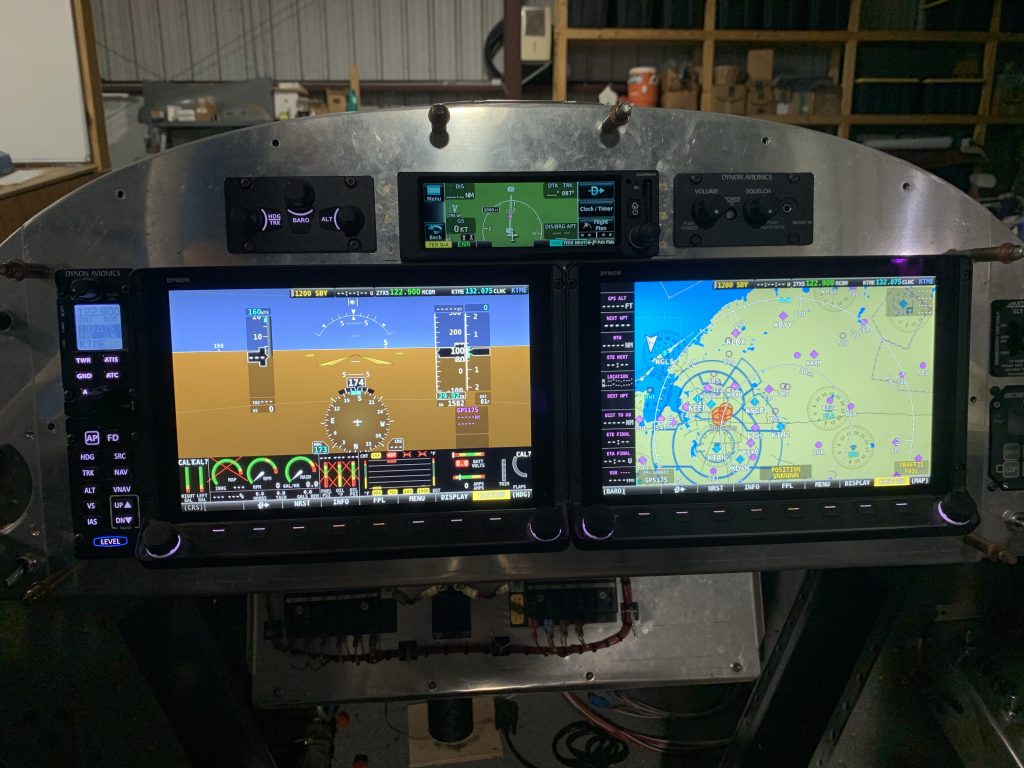
So then I went into the Skyview setup menu and went to look at the transponder page, which would tell me if it was getting position data from the GPS-175. Everything was indeed kosher, and the system now believes it is ADS-B Out compliant (this means the transponder can transmit position data accurate enough to meet legal requirements):

That just left the ELT. Here, I had to do some documentation mining – the Artex 345 I have says that it accepts aviation format serial data at 9600 baud, whereas the GPS-175’s serial setup options offer both “Aviation 1” and “Aviation 2,” with no mention whatsoever of baud rate. The Garmin manual provided no clarification I could find, nor did my Google search attempts yield anything, so eventually I decided I’d just pick one format, try it out, and see if it worked – if not, I’d try the other one.
The fun part here is that unlike all the other stuff I’m playing with, the ELT provides no sort of user-friendly UI to get setup info. The only way to check for setup issues is to have the unit run a self-test and see if it reports problems – which it does by blinking the LED on the remote panel switch. Kinda reminded me of checking trouble codes in OBD I cars, where you had to count how many times the check engine light blinked at you.
I was a little surprised that I got no error codes on the first self-test, which seemed too good to be true. So I did a typical software troubleshooting move by intentionally causing the error condition – in this case, powering down the GPS-175 so that the ELT ought to report no position data – and that did indeed get me the error I expected. GPS back on, one more self-test, and once again no errors.
Oh, and I don’t recall if I mentioned it before, but while testing and tinkering with the EFIS, I’ve seen some other aircraft show up as nearby traffic, which confirms that the ADS-B receiver back in the tail is doing its job correctly. So at this point I’m pretty confident that all the tail wiring is in good shape. The only thing I haven’t tested is the elevator trim motor, because I think rigging up a test with that will be more trouble than it’s worth.
So…I guess its really time to pull that turtledeck skin down, finish prepping it (I know it needs to be dimpled, pretty sure I haven’t done any demurring yet either), and get that thing riveted on. Which will unfortunately mean spending one time lying inside a really snug cave in the summer Houston heat, but such is life.