So…I’d originally planned on being at Oshkosh this week, but those plans got changed. I could have just cancelled my vacation time as well, but instead I decided to make it an airplane-building staycation.
I’ve been all over the place as to hat to work on next…previously I was looking at routing the EGT/CHT leads, but decided I wanted to see the spark plug wire routing first…and then I wasn’t sure about making the plug wires until some other stuff was done…finally I settled on making the starter supply cable and the ground cables.
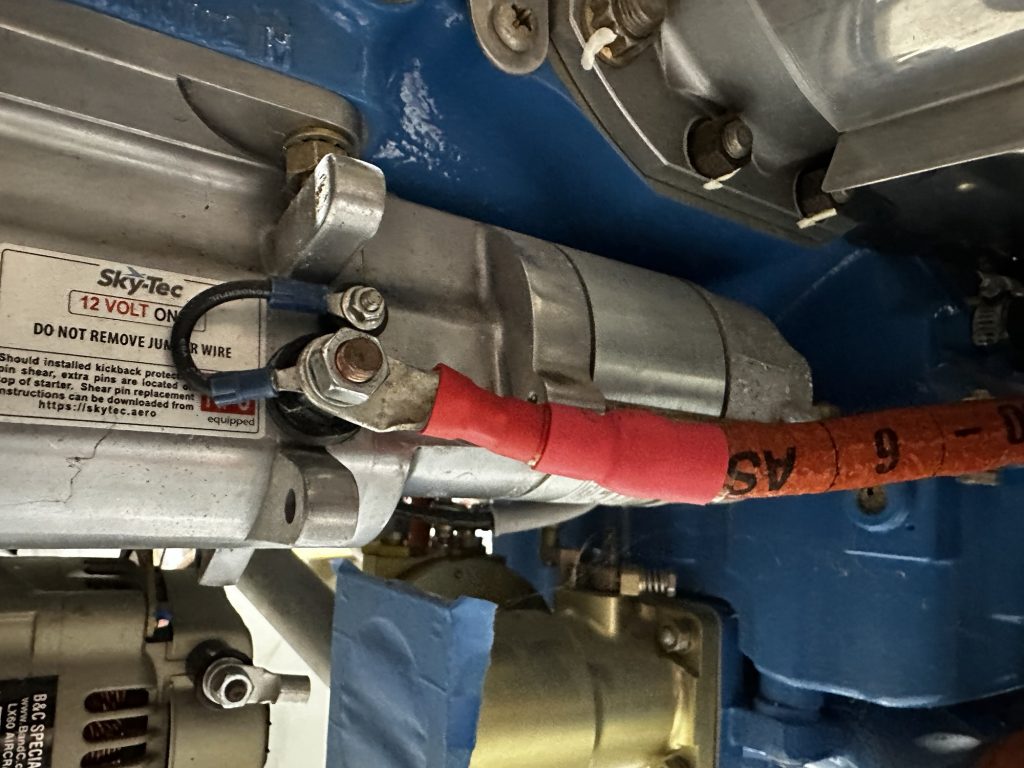
So that’s what I’ve been working on. These are fun tasks where the actual cable fabrication is pretty simple, but there’s lots of thinking and trying to figure out the best way to route things. For example, the starter cable pretty clearly needs to route behind the engine, then above the intake runners. The fun part is figuring exactly how to route it across the back of the engine.
In the end it just becomes a trial-and-error exercise; crimping on terminal (the starter end n this case), securing it in place, then wrestling the cable around and just figuring stuff out. I also decided to firesleevea this cable given its proximity to the exhaust pipes, especially right at the cylinders. That added another fabrication dimension, but at least it looks neat:
Then there were the ground cables; here I decided to go with two cables. First there’s a heavy 2AWG cable from the negative battery terminal to the right side of the engine case, which is big and fat since it’ll be handling the starter current. Then there’s a smaller 6AWH cable from the left side of the case to the firewall ground bus; this one is smaller since it’ll just be handling all the other loads in the airplane.
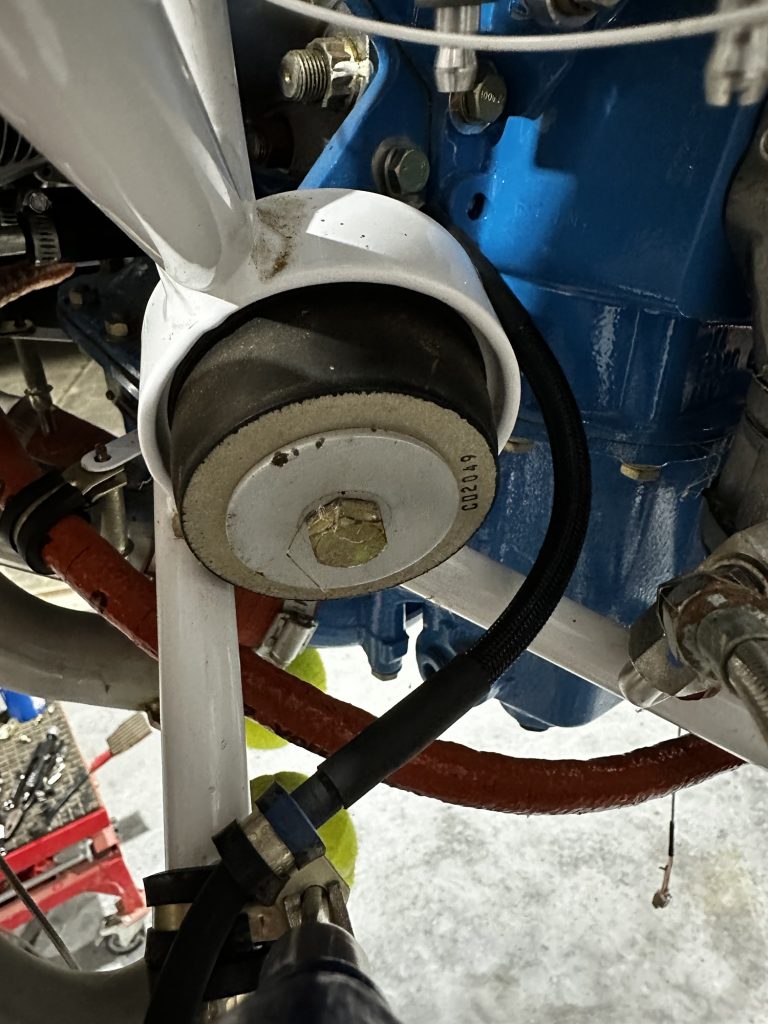
For the engine case connections, there are two bosses near the lower engine mounts that work well for this purpose. The real fun was figuring out how to get in there with a wire brush and remove the paint so I could get a good ground bond. It’s also necessary to allow for the engine moving relative to the mount here; a bit of an anti-strain loop is necessary, as seen here on the right side:

Then the cable runs down the lower mount tube to catch the battery terminal:
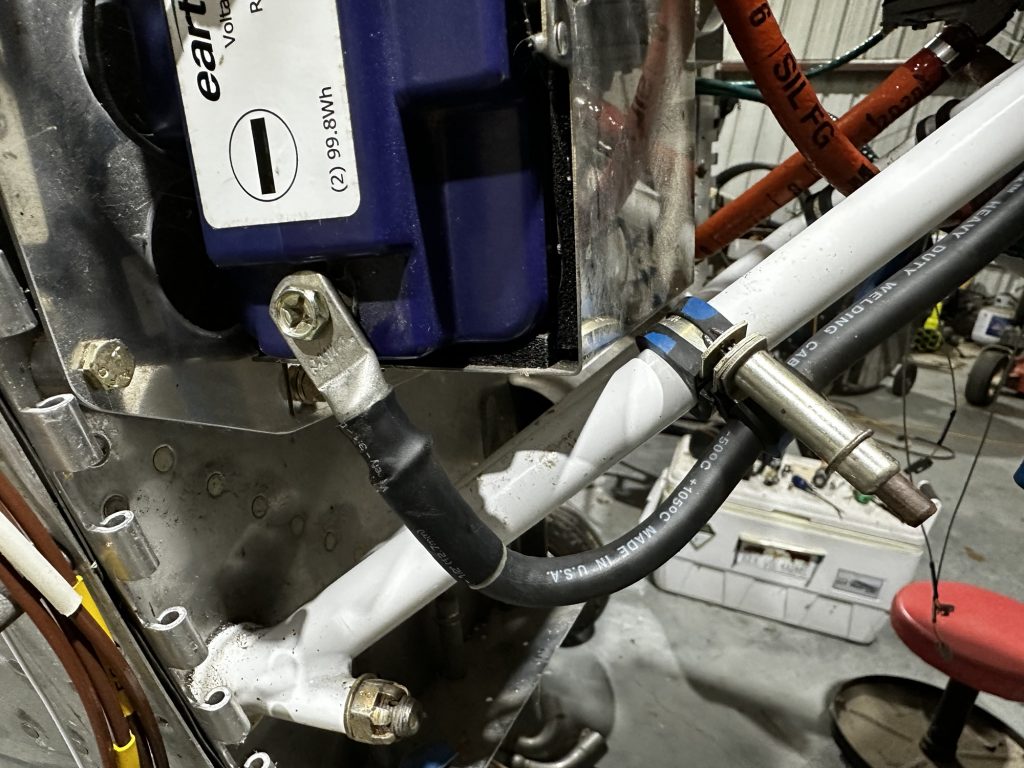
Things are a little tighter on the left side, and I had to bend the terminal just to get some reasonable semblance of an anti-strain loop. I also decided to add some snakeskin wrap to the cable there just for some additional anti-chafe protection. It’s not obvious in this picture since it’s kind of dark, but the heat shrink near the lower adel clamp is there to secure one end of the wrap:
Then, as with the other cable, it follows the mount tube to the ground bus lug:

I’m thinking that tomorrow I may go ahead and fabricate the last two heavy cables, which will run between the alternators and the power distribution stuff.
That said, the more of this I do, the more I think that I should maybe switch back to finishing up the engine baffles. A lot of the questions around where to route stuff have involved baffle-related stuff that I can’t quite be sure about. I’m also concerned that the more wiring stuff I put in place, the harder it’ll be to remove baffle parts, which I’ll need to finish that up. If nothing else, I should at least figure out the oil cooler mount…