Well, that was quite a productive day…seems like as of late, even when I work on stuff on the weekends, I can only squeeze out a few hours. Today I managed to get in basically a full day’s work, and ended up with a nice payoff.
I’ve been sort of wracking my brain over today’s assembly for some time. I knew I needed to mount a few fuse holders, plus the E-bus relay, on the firewall, and I was pretty sure I wanted to mount these items to a panel, and then mount the panel to the firewall, rather than just direct-mounting everything. The main reason for this is to have only four new holes in the firewall instead of ten. A side benefit is that if stuff needs to be modified down the road, it’ll be possible to modify or replace the panel, instead of turning the firewall inset Swiss cheese.
About a week ago I made a cardboard mockup just to test the layout of everything, and ensure that it’d all fit where I wanted it. Today I actually got to work on building the panel. It’s fairly straightforward – just a rectangular piece of sheet, to which I added 1/4” flanged top and bottom for some stiffness. It mounts to the firewall at the four corners; the top two screws go through one off the angles, while the bottom two are just through the stainless.
Actually building this was more involved – I worked out an order of operations for things to go relatively smoothly, cutting the panel piece, laying out the flange bends, then the attach screw holes, then transferring those holes to the firewall. That part required some creativity, because things were tight in a few places thanks to the engine mount tubes.
I didn’t bend the flanges until I’d laid out the attach holes for all the components, and drilled the rivet holes for the nutplates. Only then did I bend the flanges in my little sheetmetal brake, followed by riveting a bunch of nutplates, mounting the parts, and doing the most fun part – building out the various wires. I did what I could with the panel on the bench, before mounting it in the airplane and working on integrating it with the battery/contactors/etc.
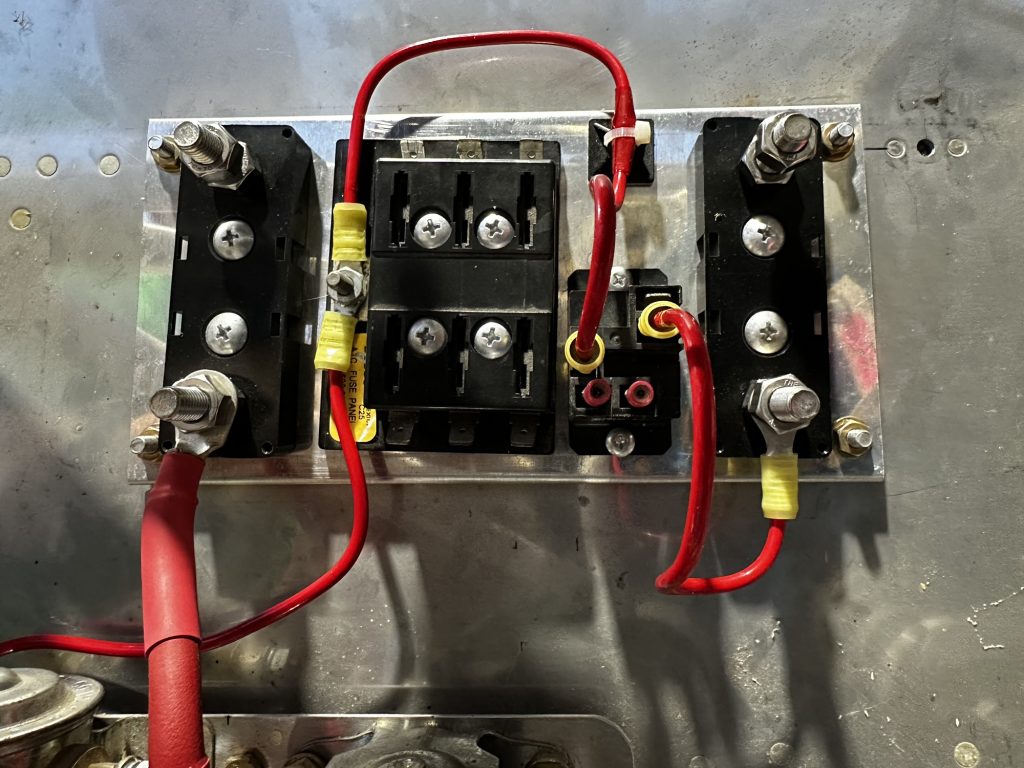
Here’s the final product mounted on the firewall. From left to right, we have:
- An ANL fuse holder for the main bus feed. This will protect all the circuits downstream of the battery and alternators.
- The battery bus – just a small fuse block with a few always-hot circuits
- The battery bus then feeds a relay, which can be activated by a switch in the cockpit. This provides a way to power essential equipment in the event of a master contractor failure
- Another ANL fuse holder for the alternate feed
Obviously we’re still missing some things here, like the alternator feeds, and the cables from the fuse holders feeding across to the firewall penetration and into the cabin. This long runs will come later.

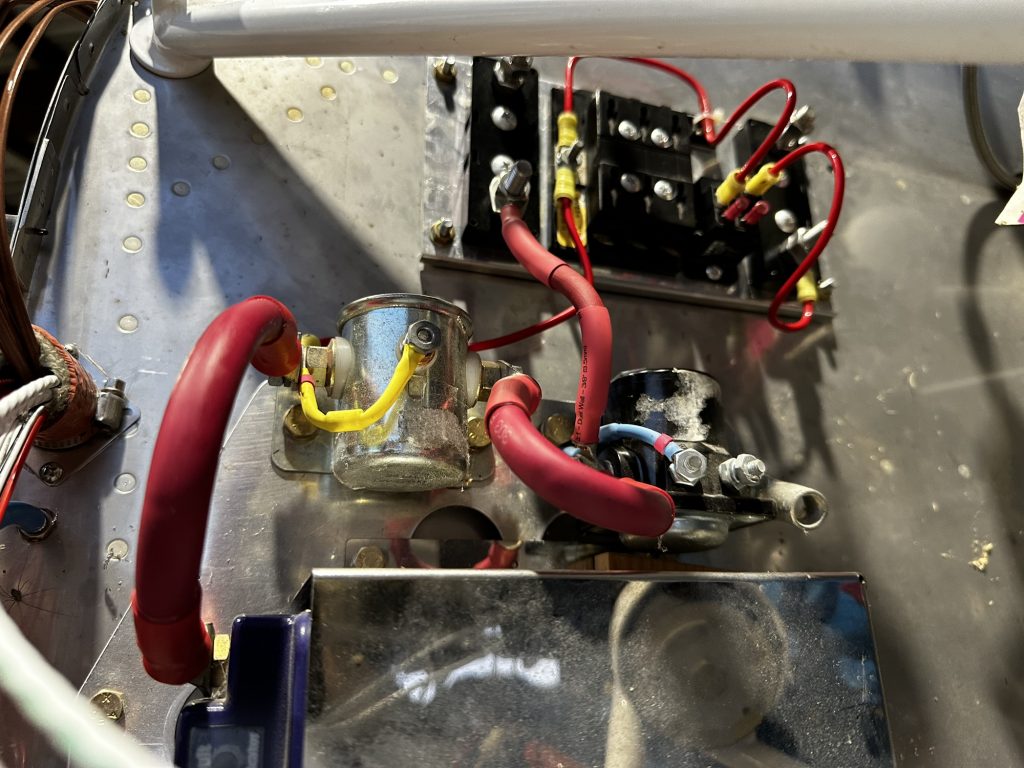
Here’s a slightly wider shot, showing how the panel sits above the contactors:

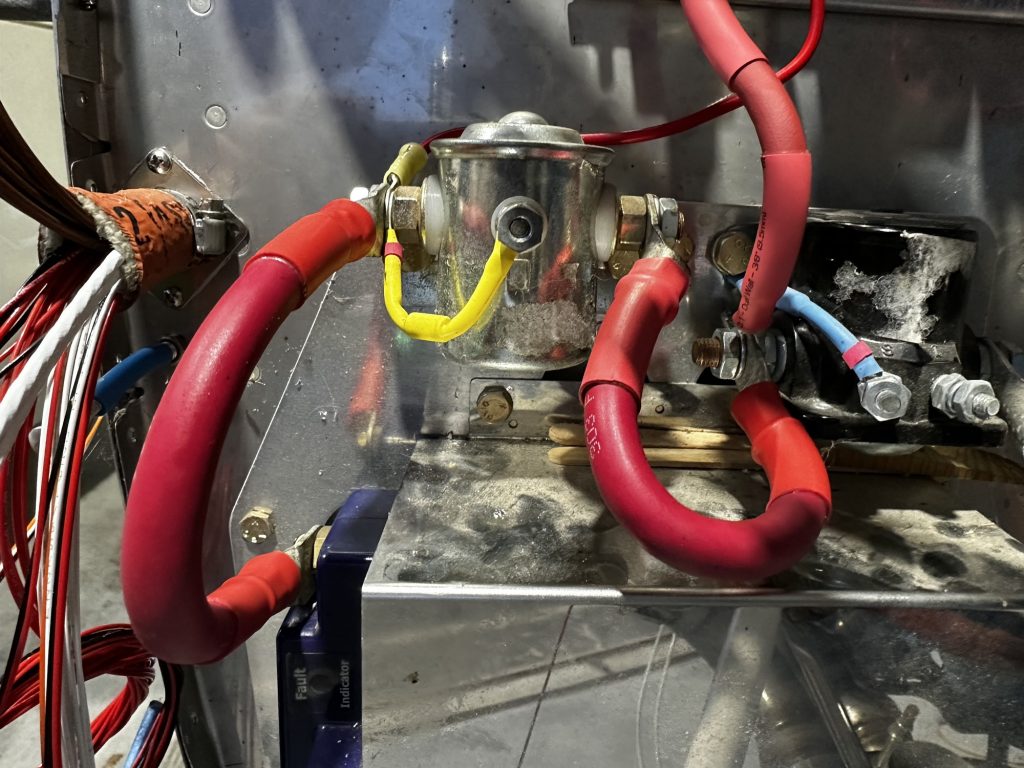
Finally, a closer look at the contactors, where I also fabricate a few of these cable/wire runs today. Visible here is the cable from the battery to the master contactor, a smaller tap from the hot side of the contractor to the battery bus, the big jumper from the master to starter contractor, and the tap from the hot side of the starter contractor up to the power distribution panel:

Of course, as I type this, I realize I made at least one mistake. I have a Hall sensor that I want run the battery bus tap through, so I can see how much current it’s drawing at any time. This will work in concert with a shunt on the main bus feed; the two together will give me a full picture of current flow.
Problem is…those terminals on the battery bus feed are too big go go through the Hall sensor. I needed to feed that cable through the sensor before terminating both ends. So I guess I’ll be prefabricating that cable at some point. Maybe tomorrow, assuming I have enough of the big terminals…